
Nalbinding materials lists are usually quite short compared to other crafts. There are some widely accepted standards such as the fiber content of the yarn, but most of it comes down to personal preference.
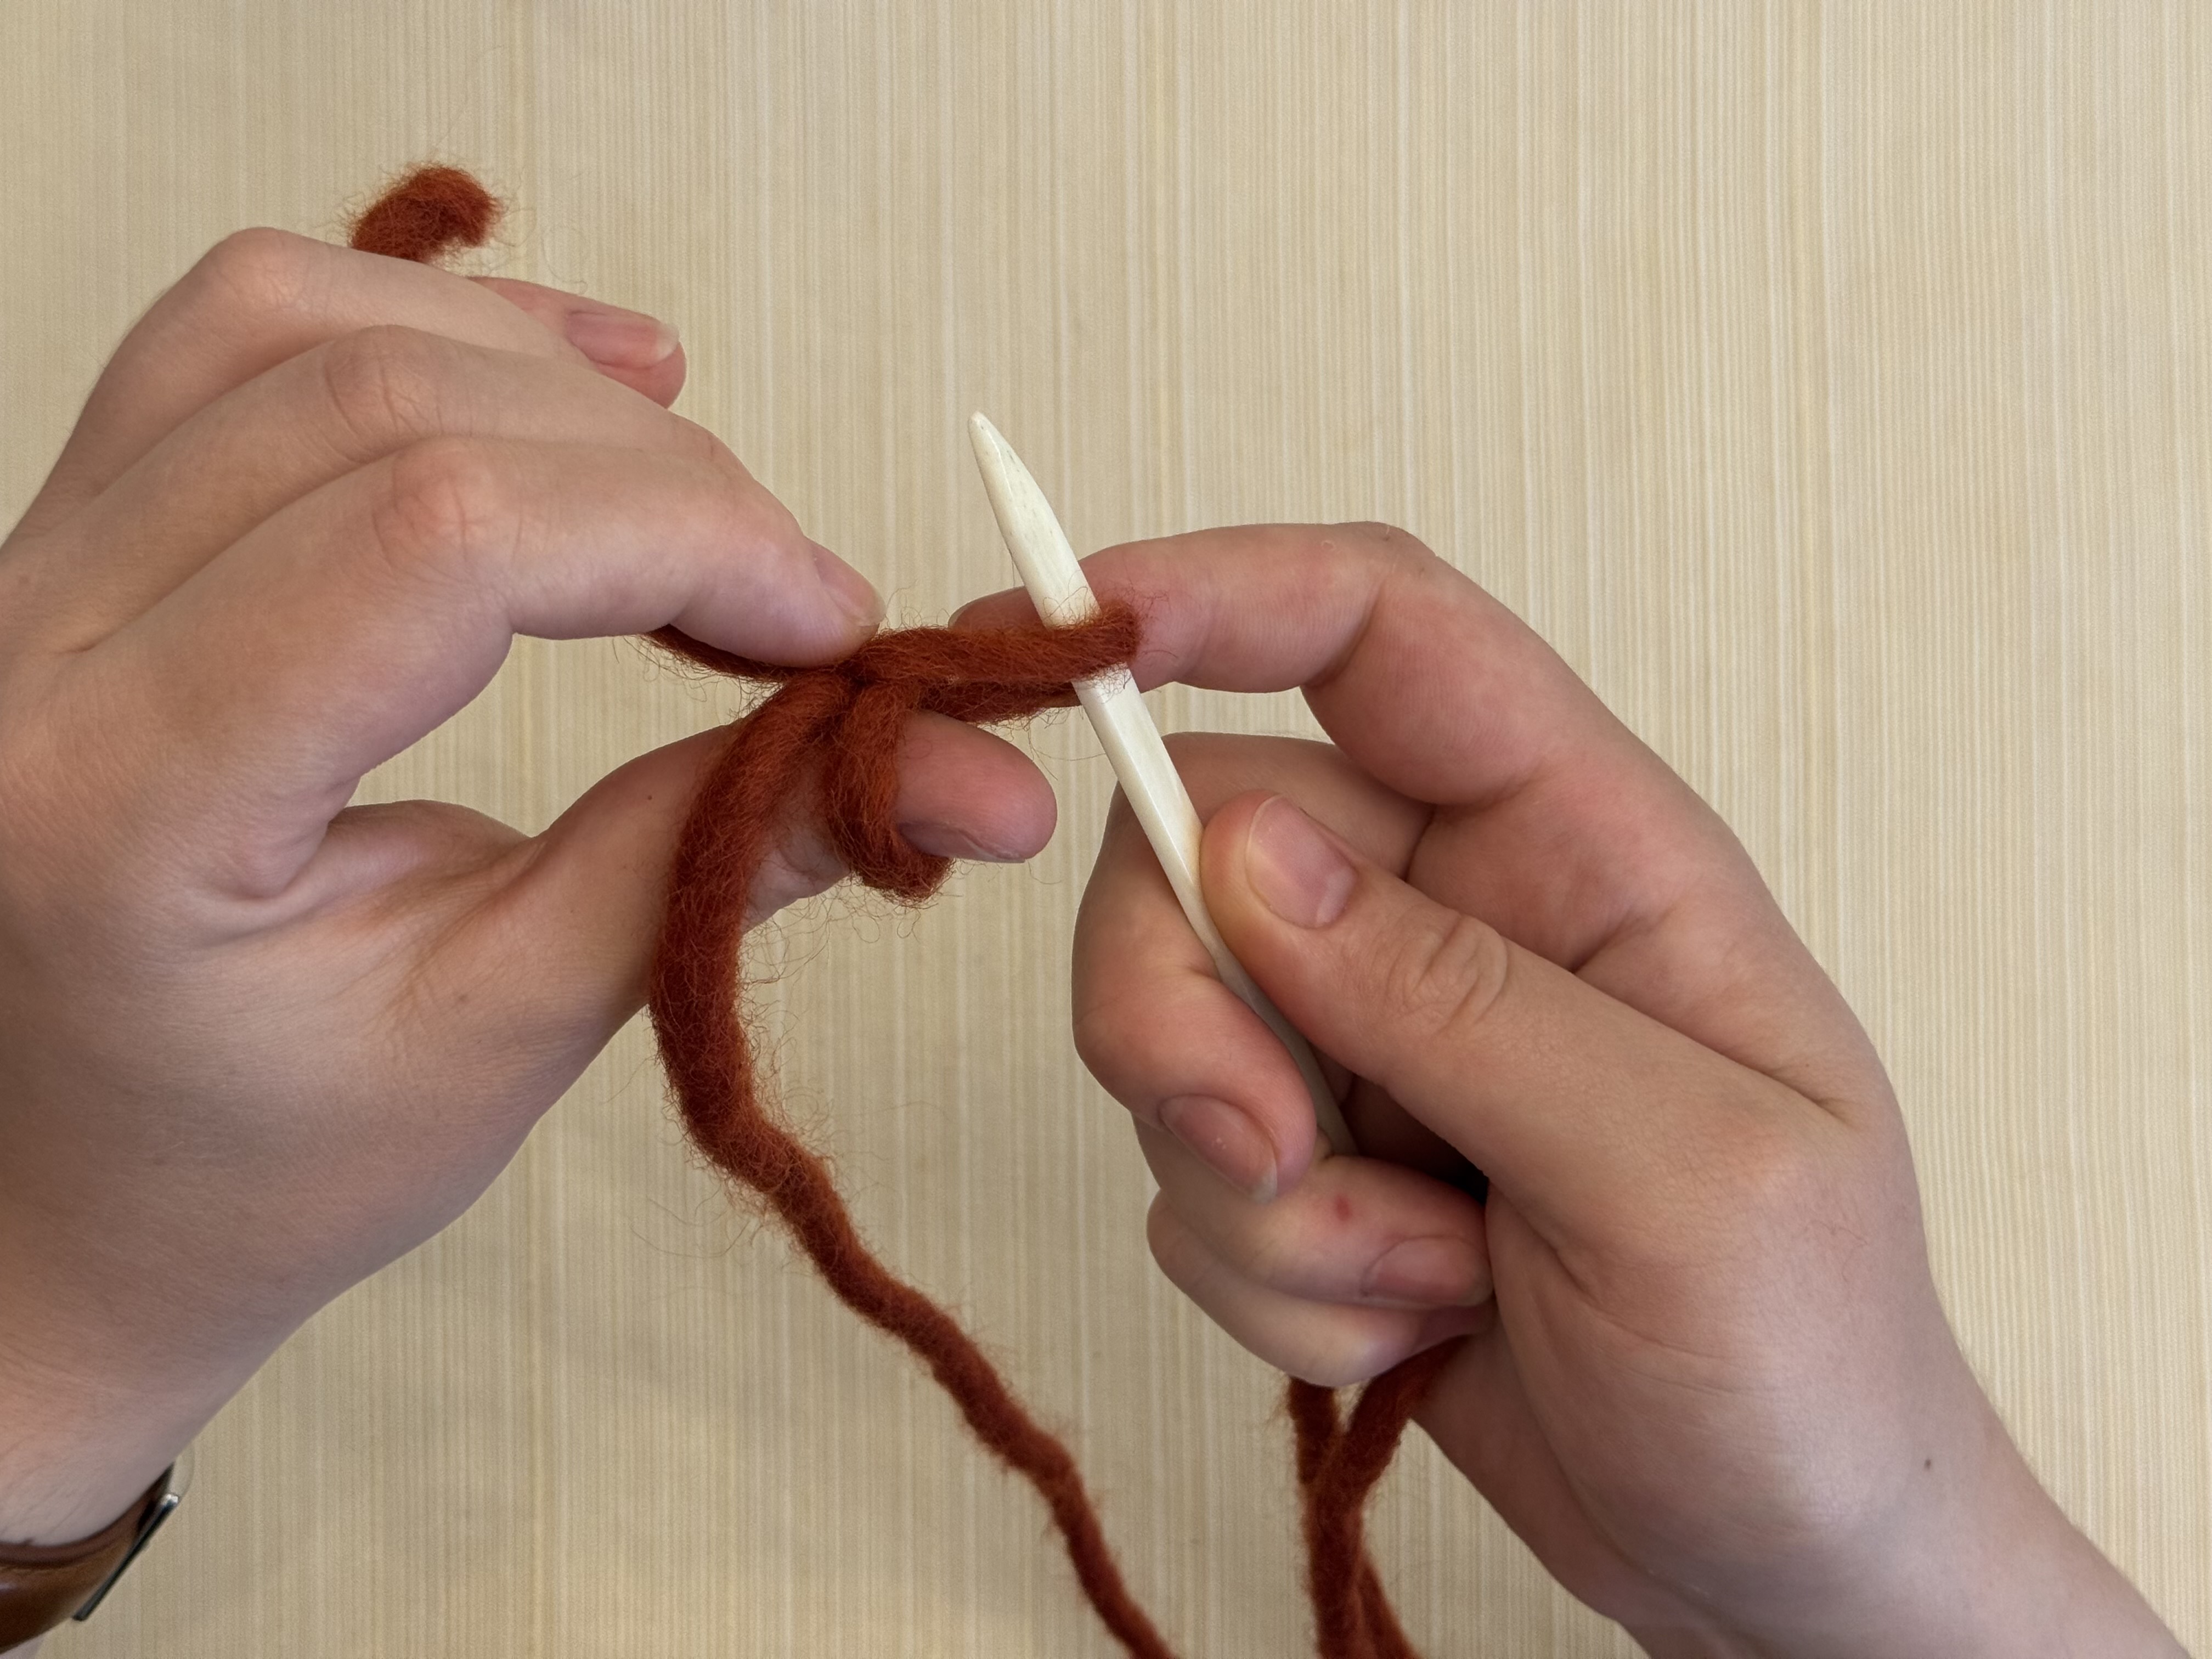
Your thumb
Many nalbinding stitches are worked using the thumb. Your thumb holds the front and back working loops in place, and helps tension new stitches.
Right-handed nalbinders usually use their left thumb, and left-handed nalbinders usually use their right. Try it both ways and see which is more comfortable for you.
Some nalbinders prefer to work off the thumb entirely, and some stitches are only possible this way. As you learn more and become more comfortable with nalbinding, you’ll discover which methods work best for you.
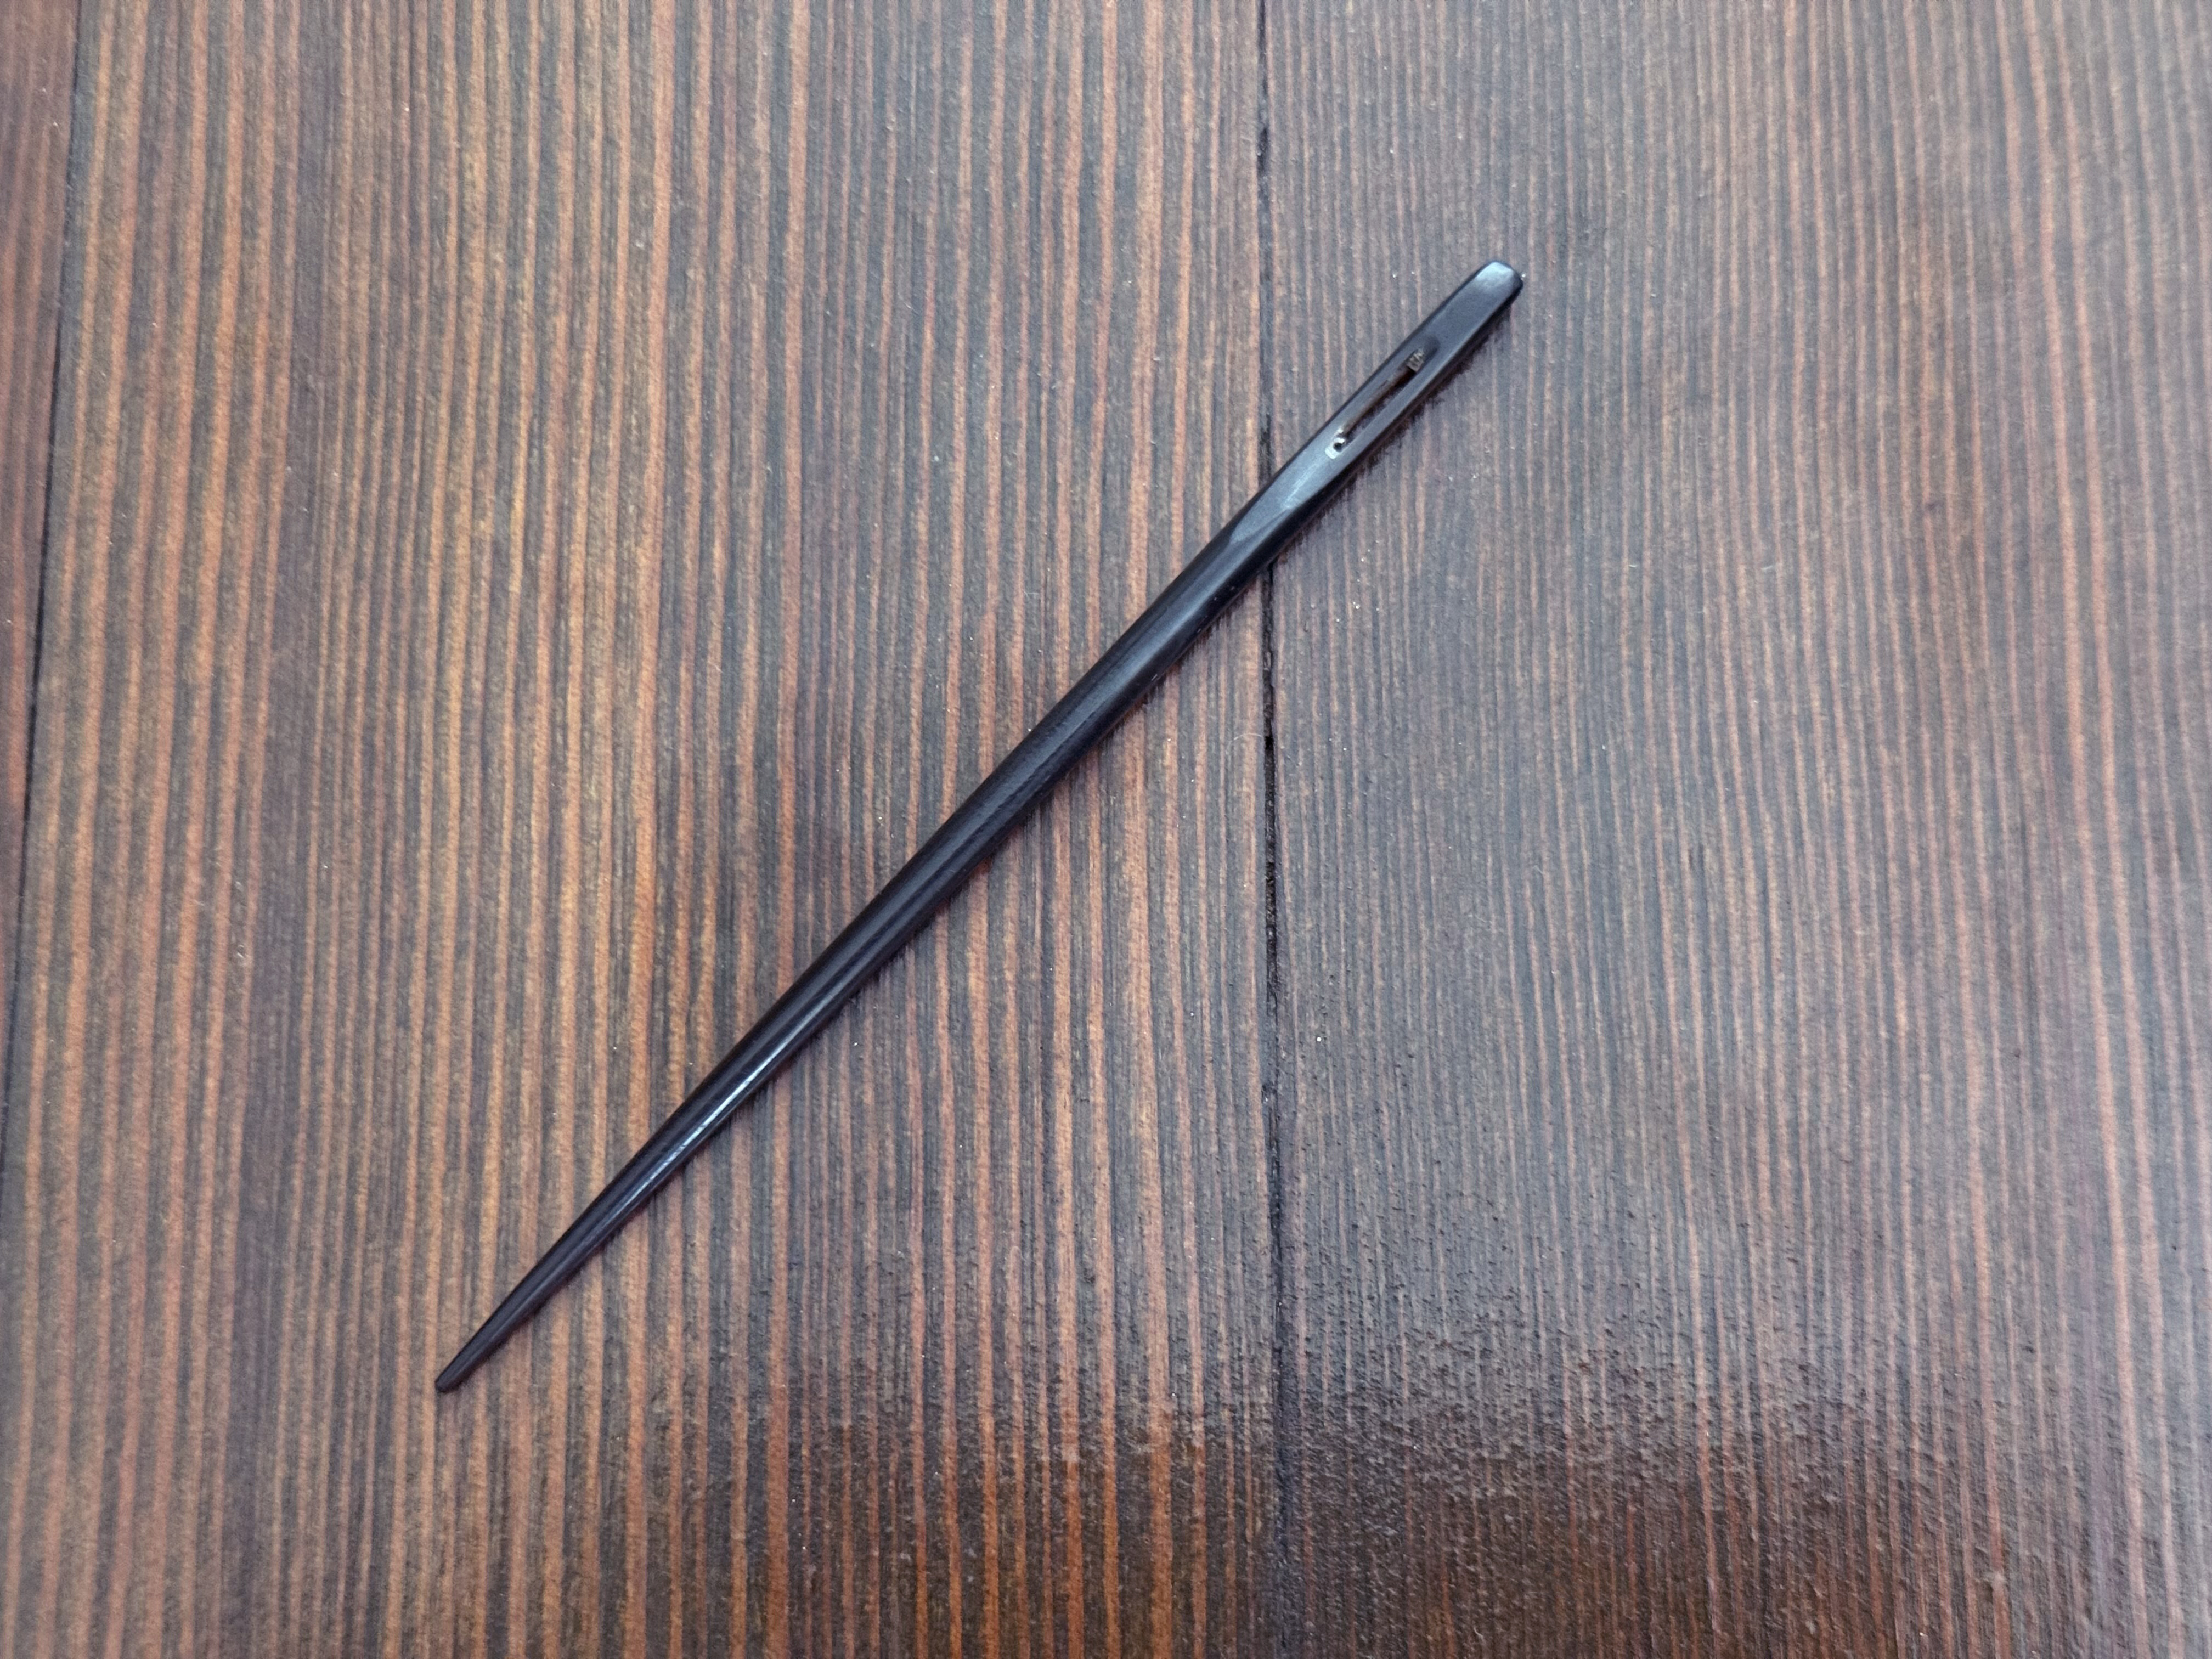
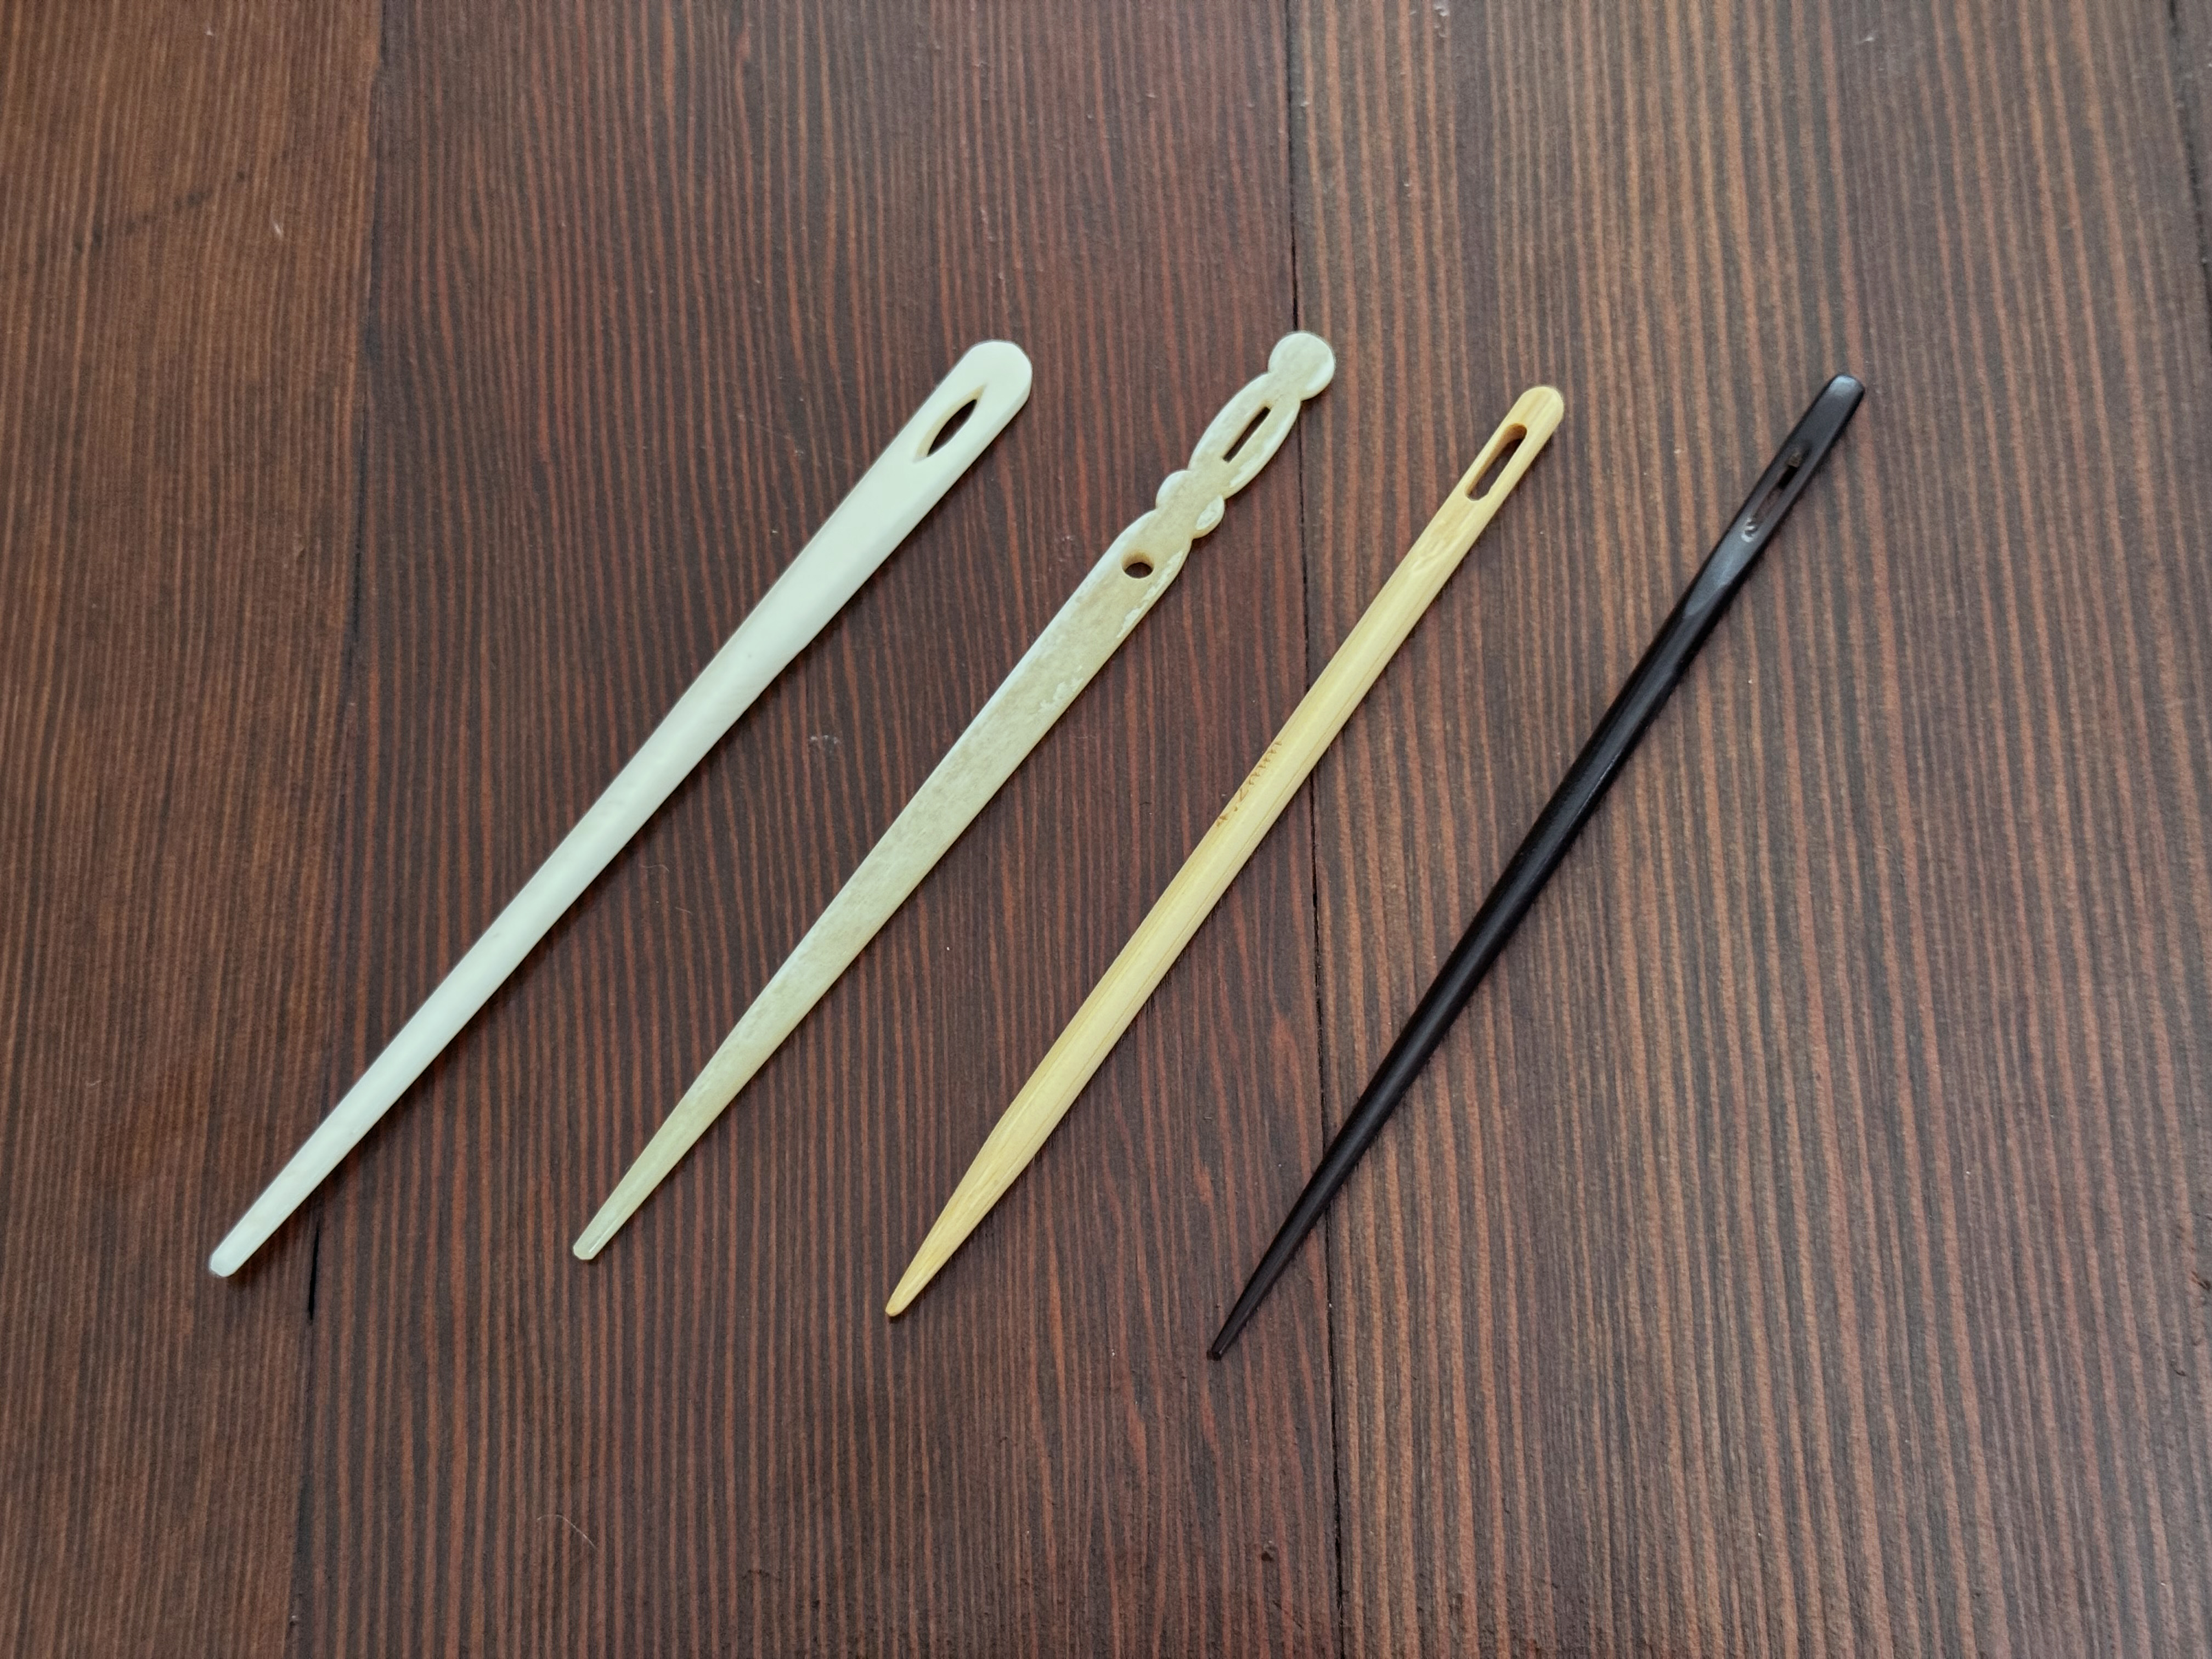
A needle
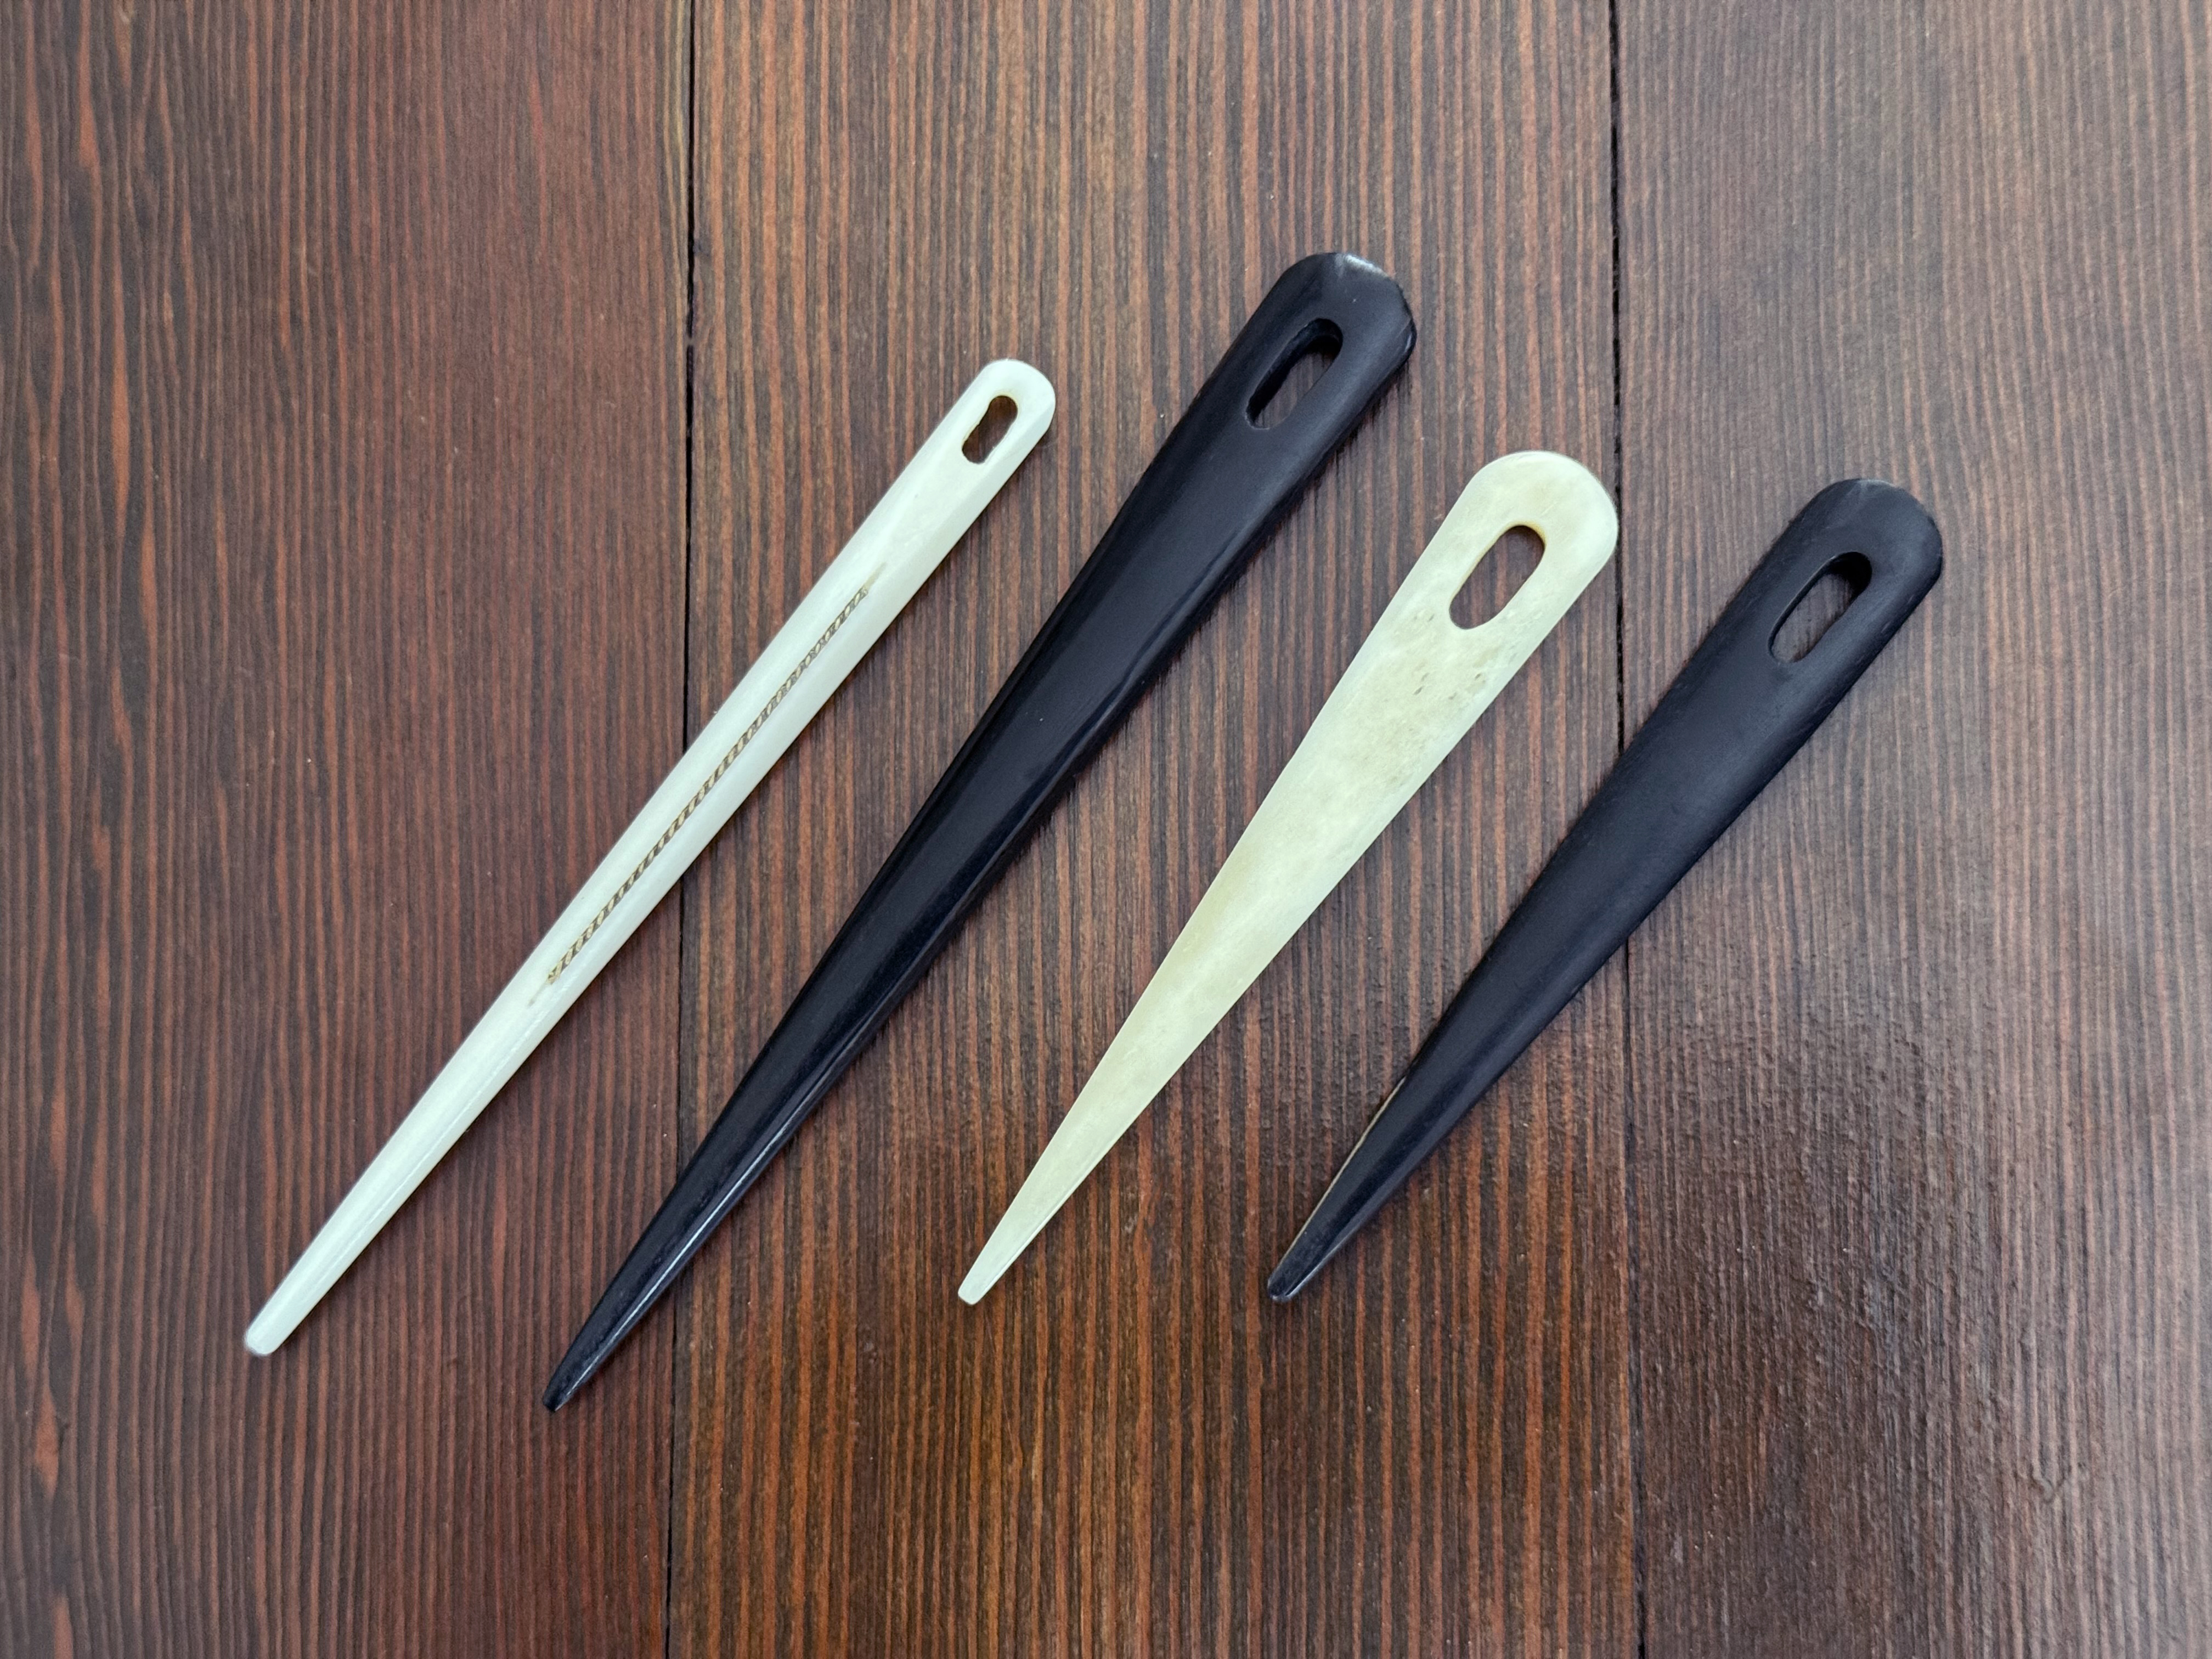
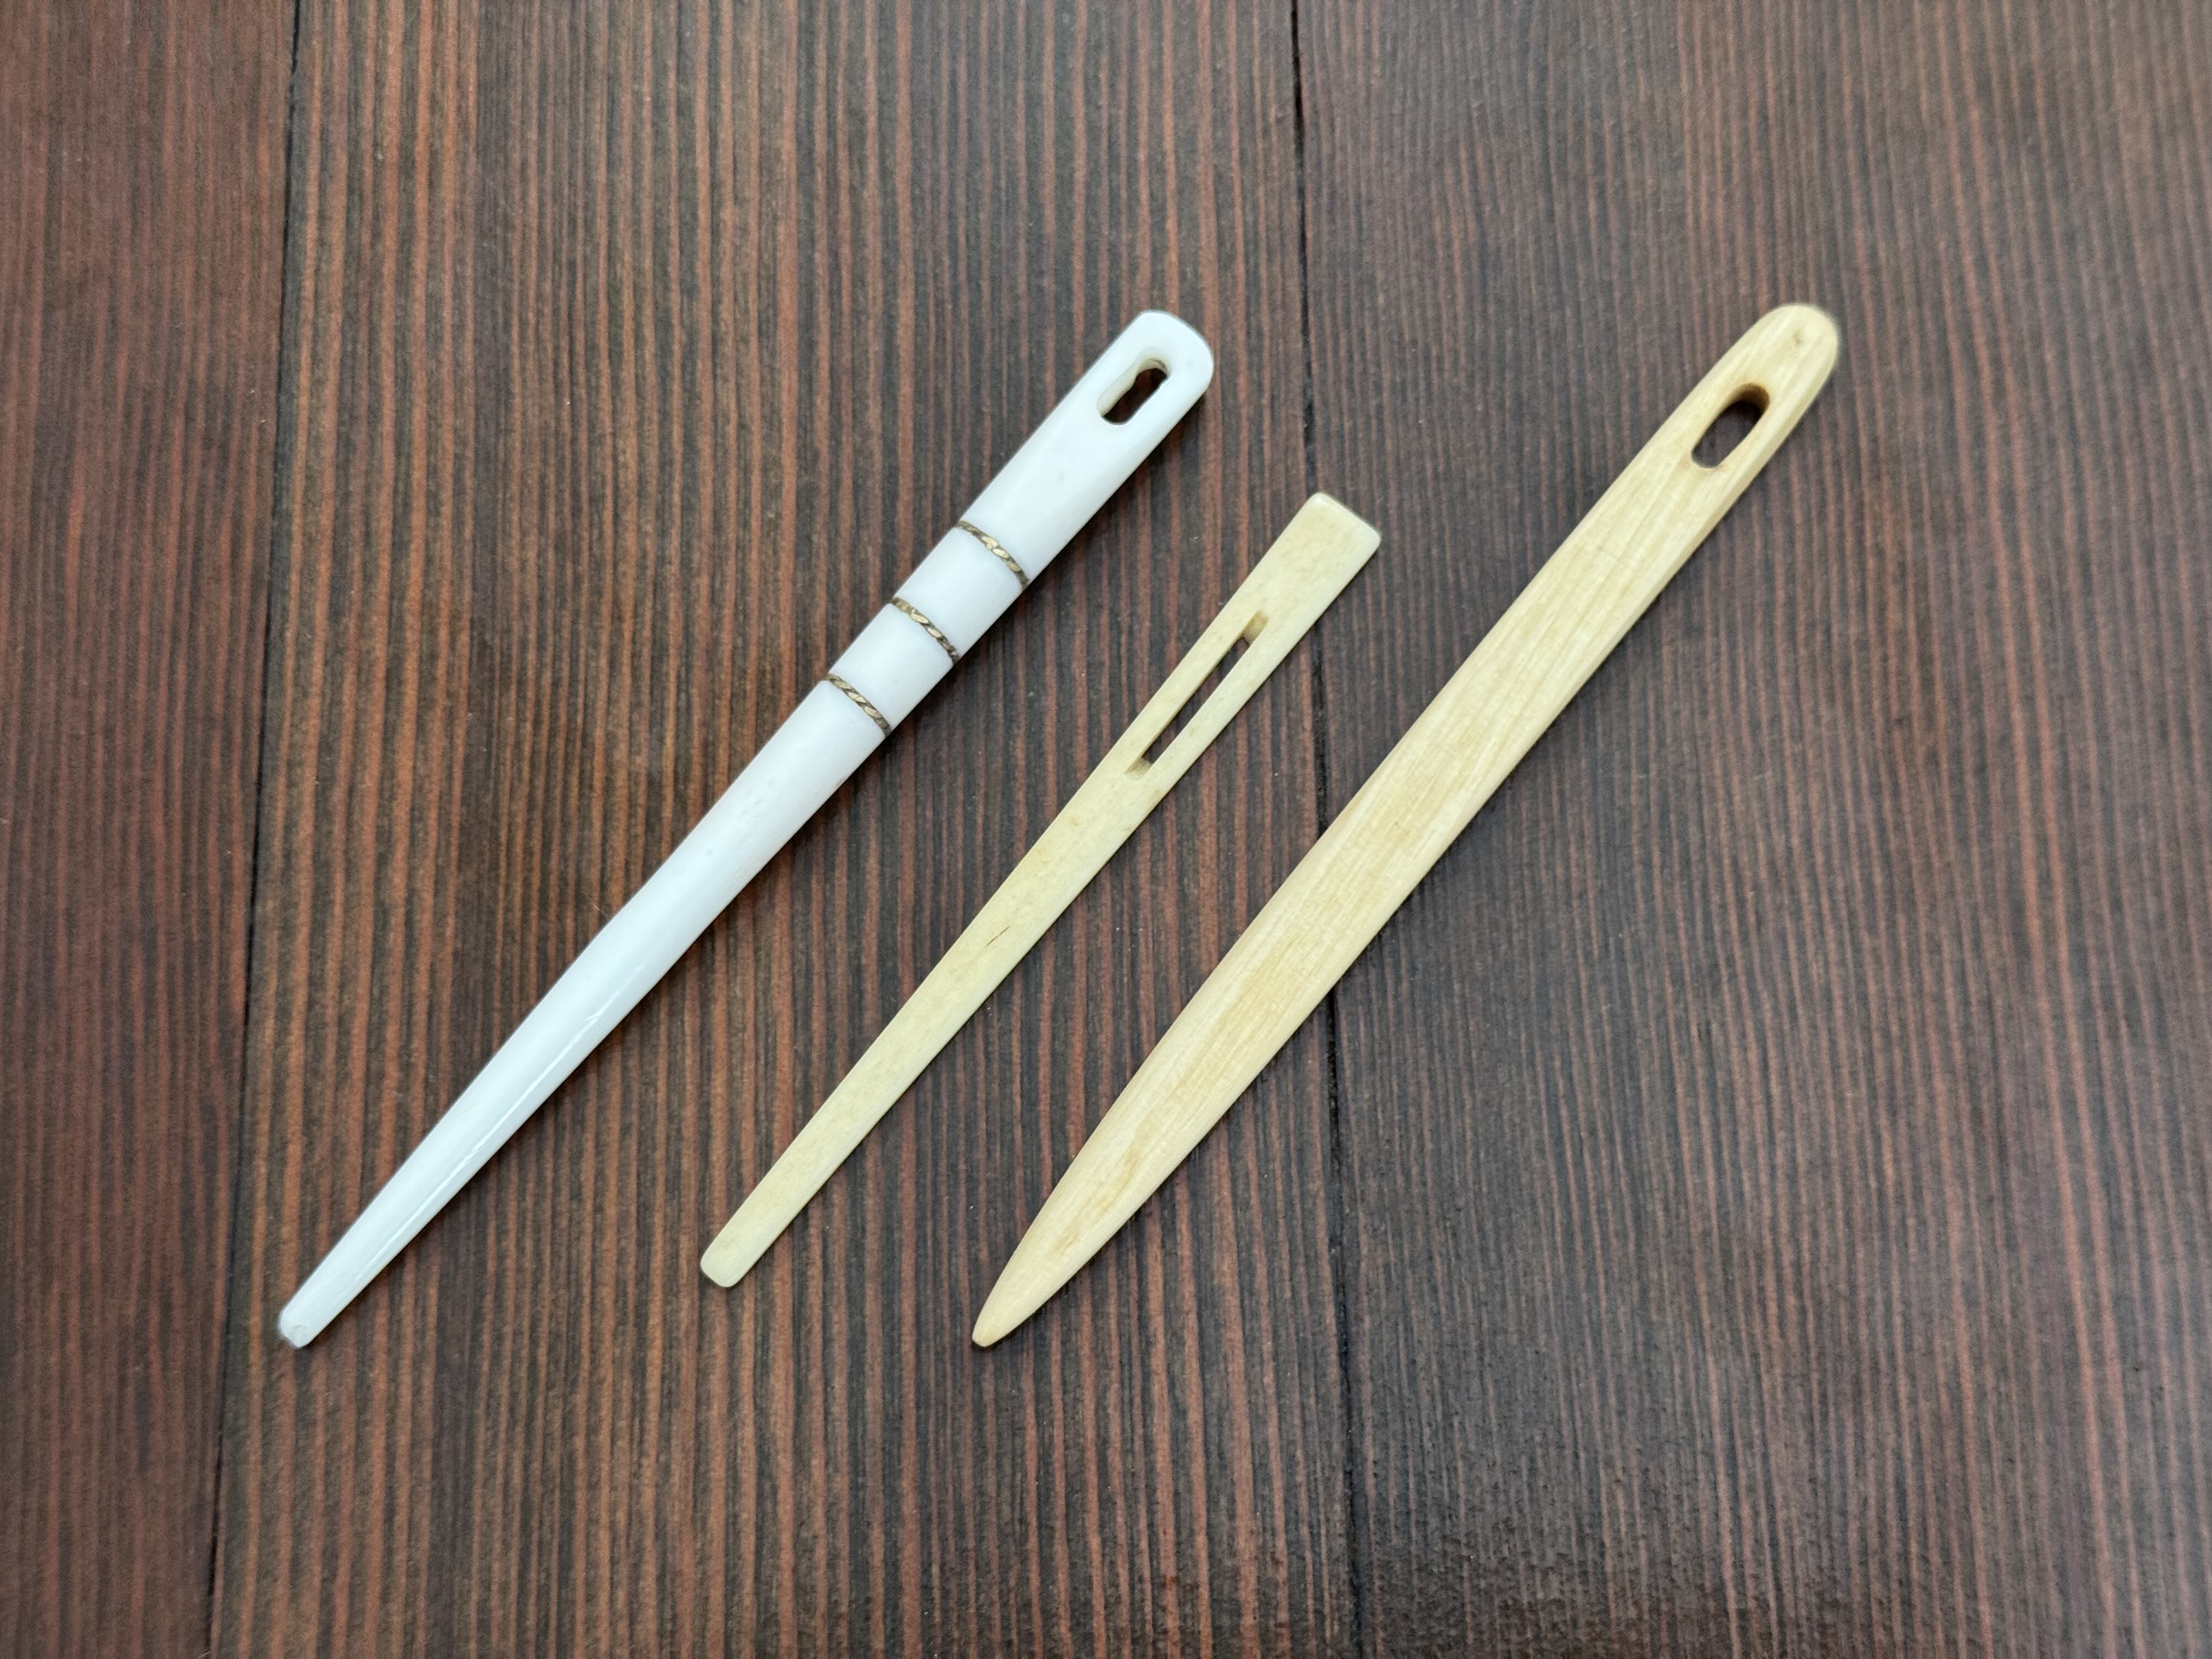
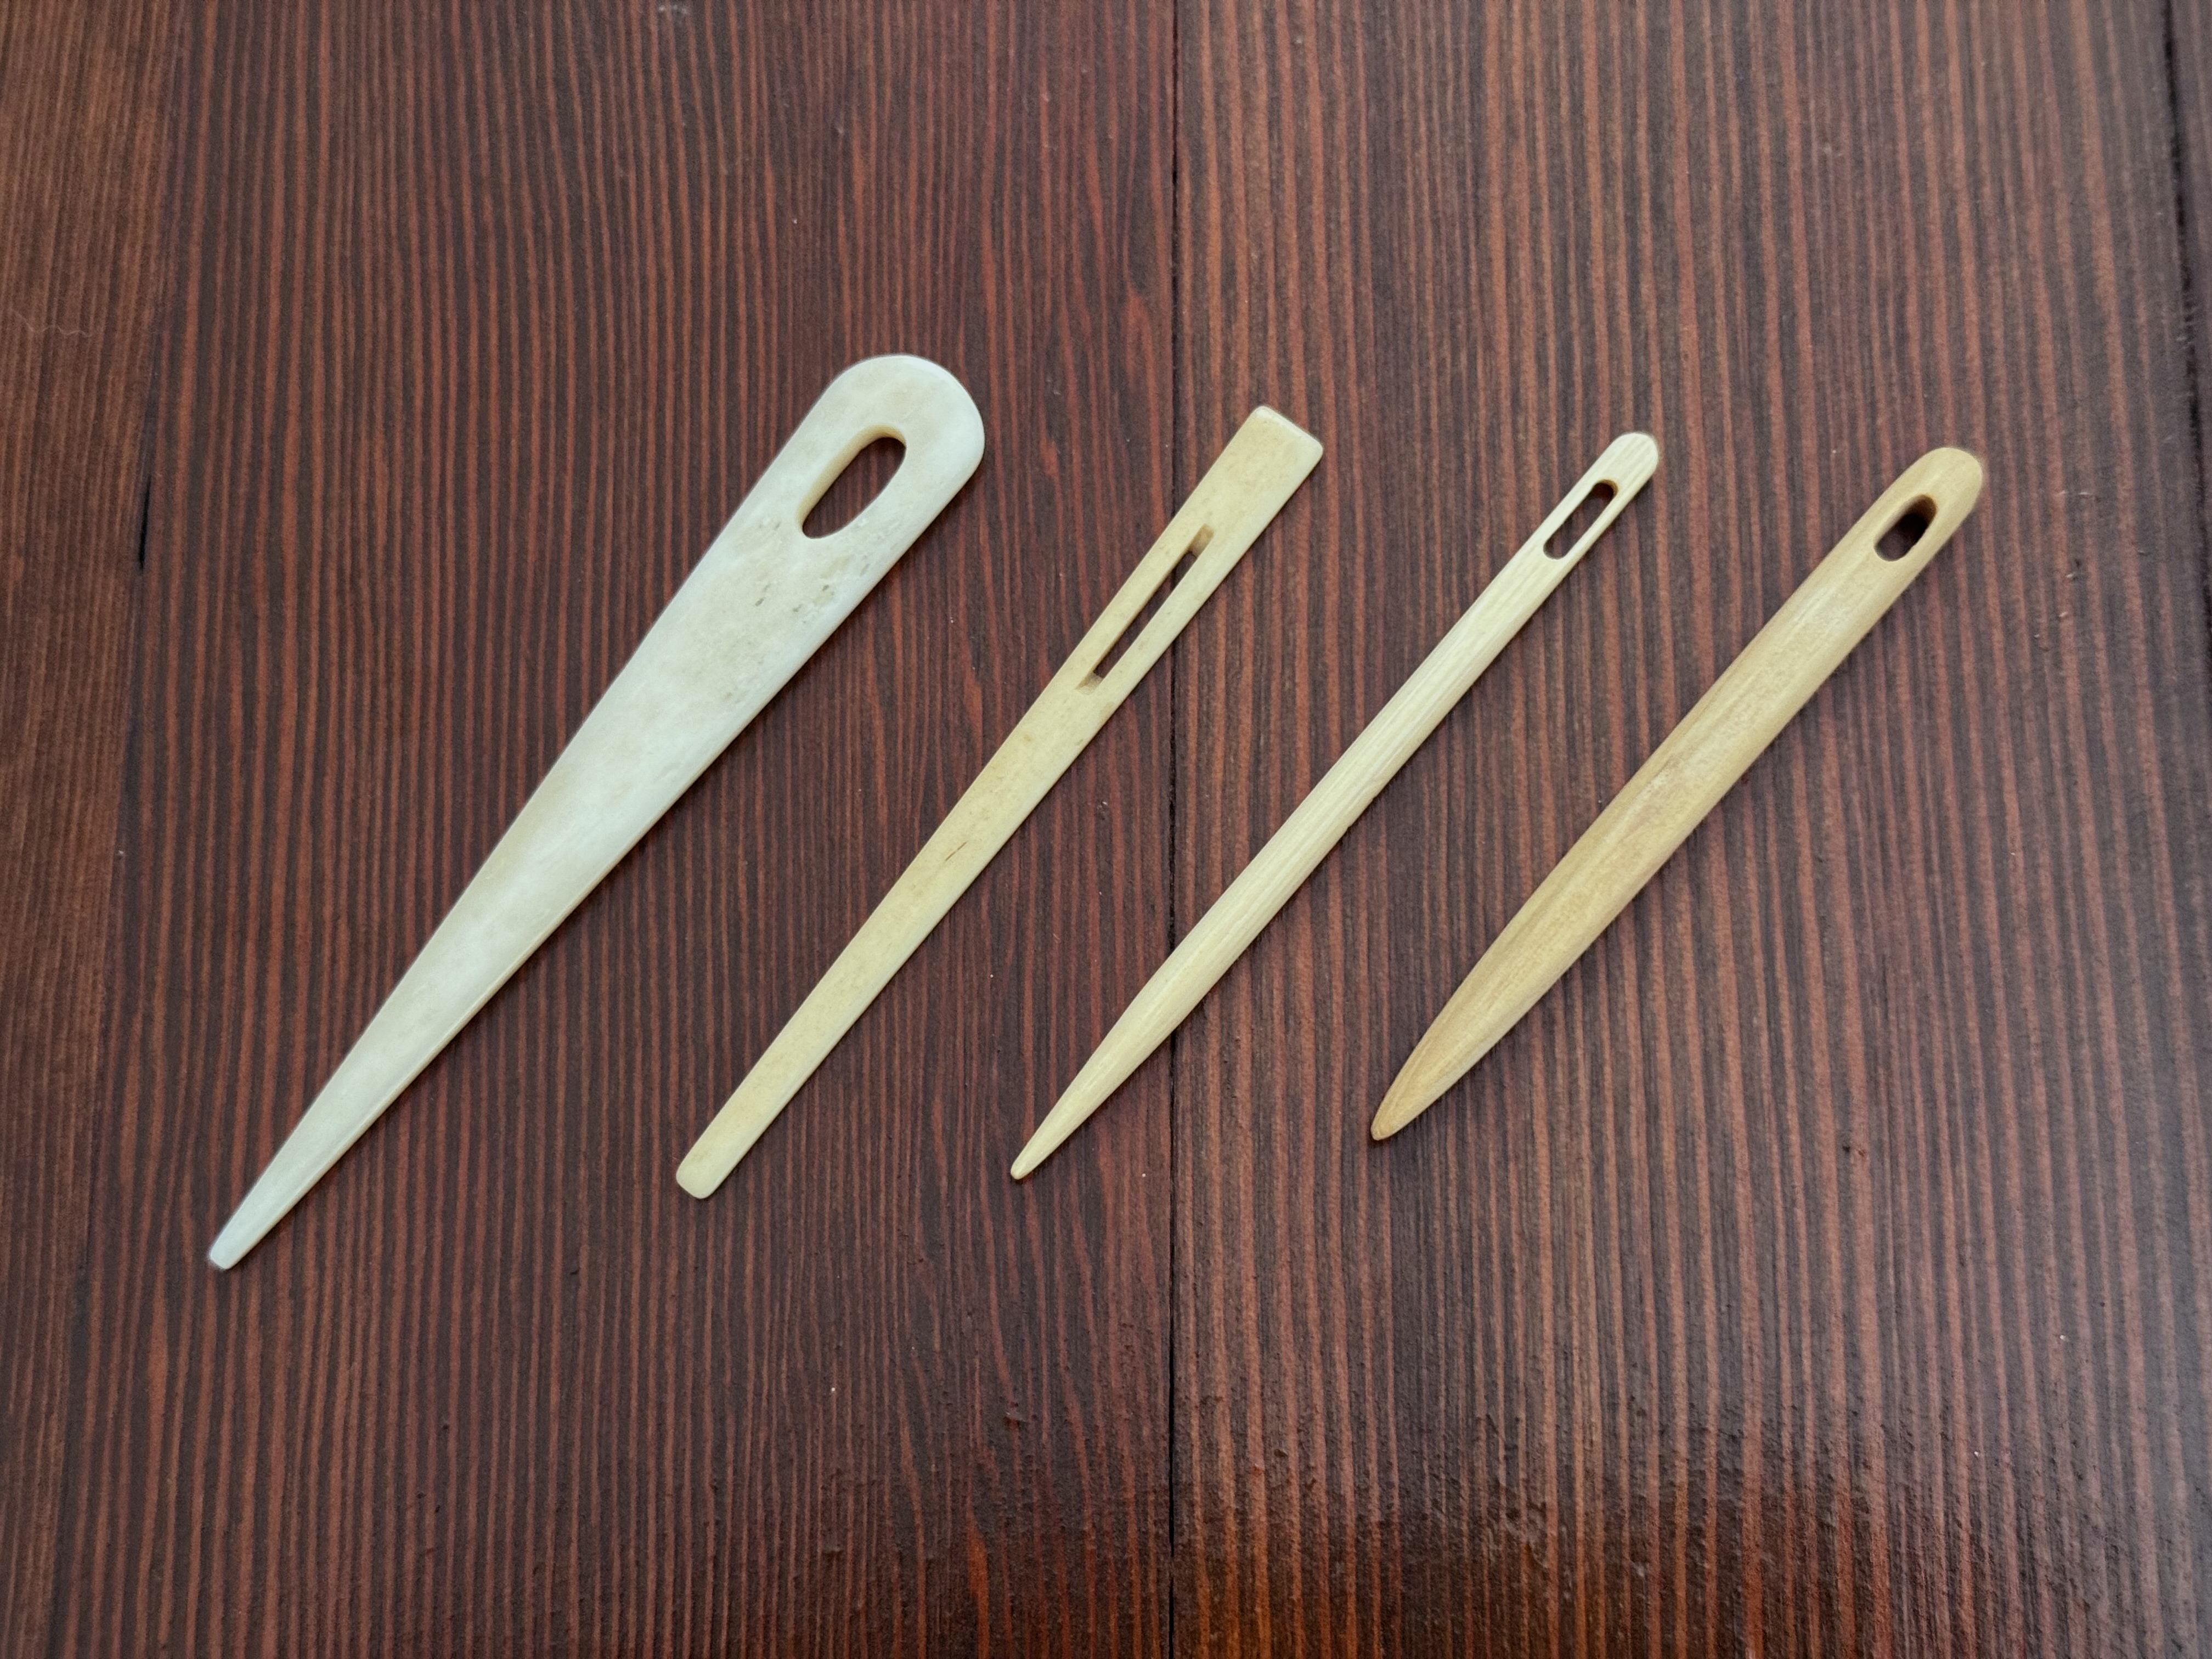
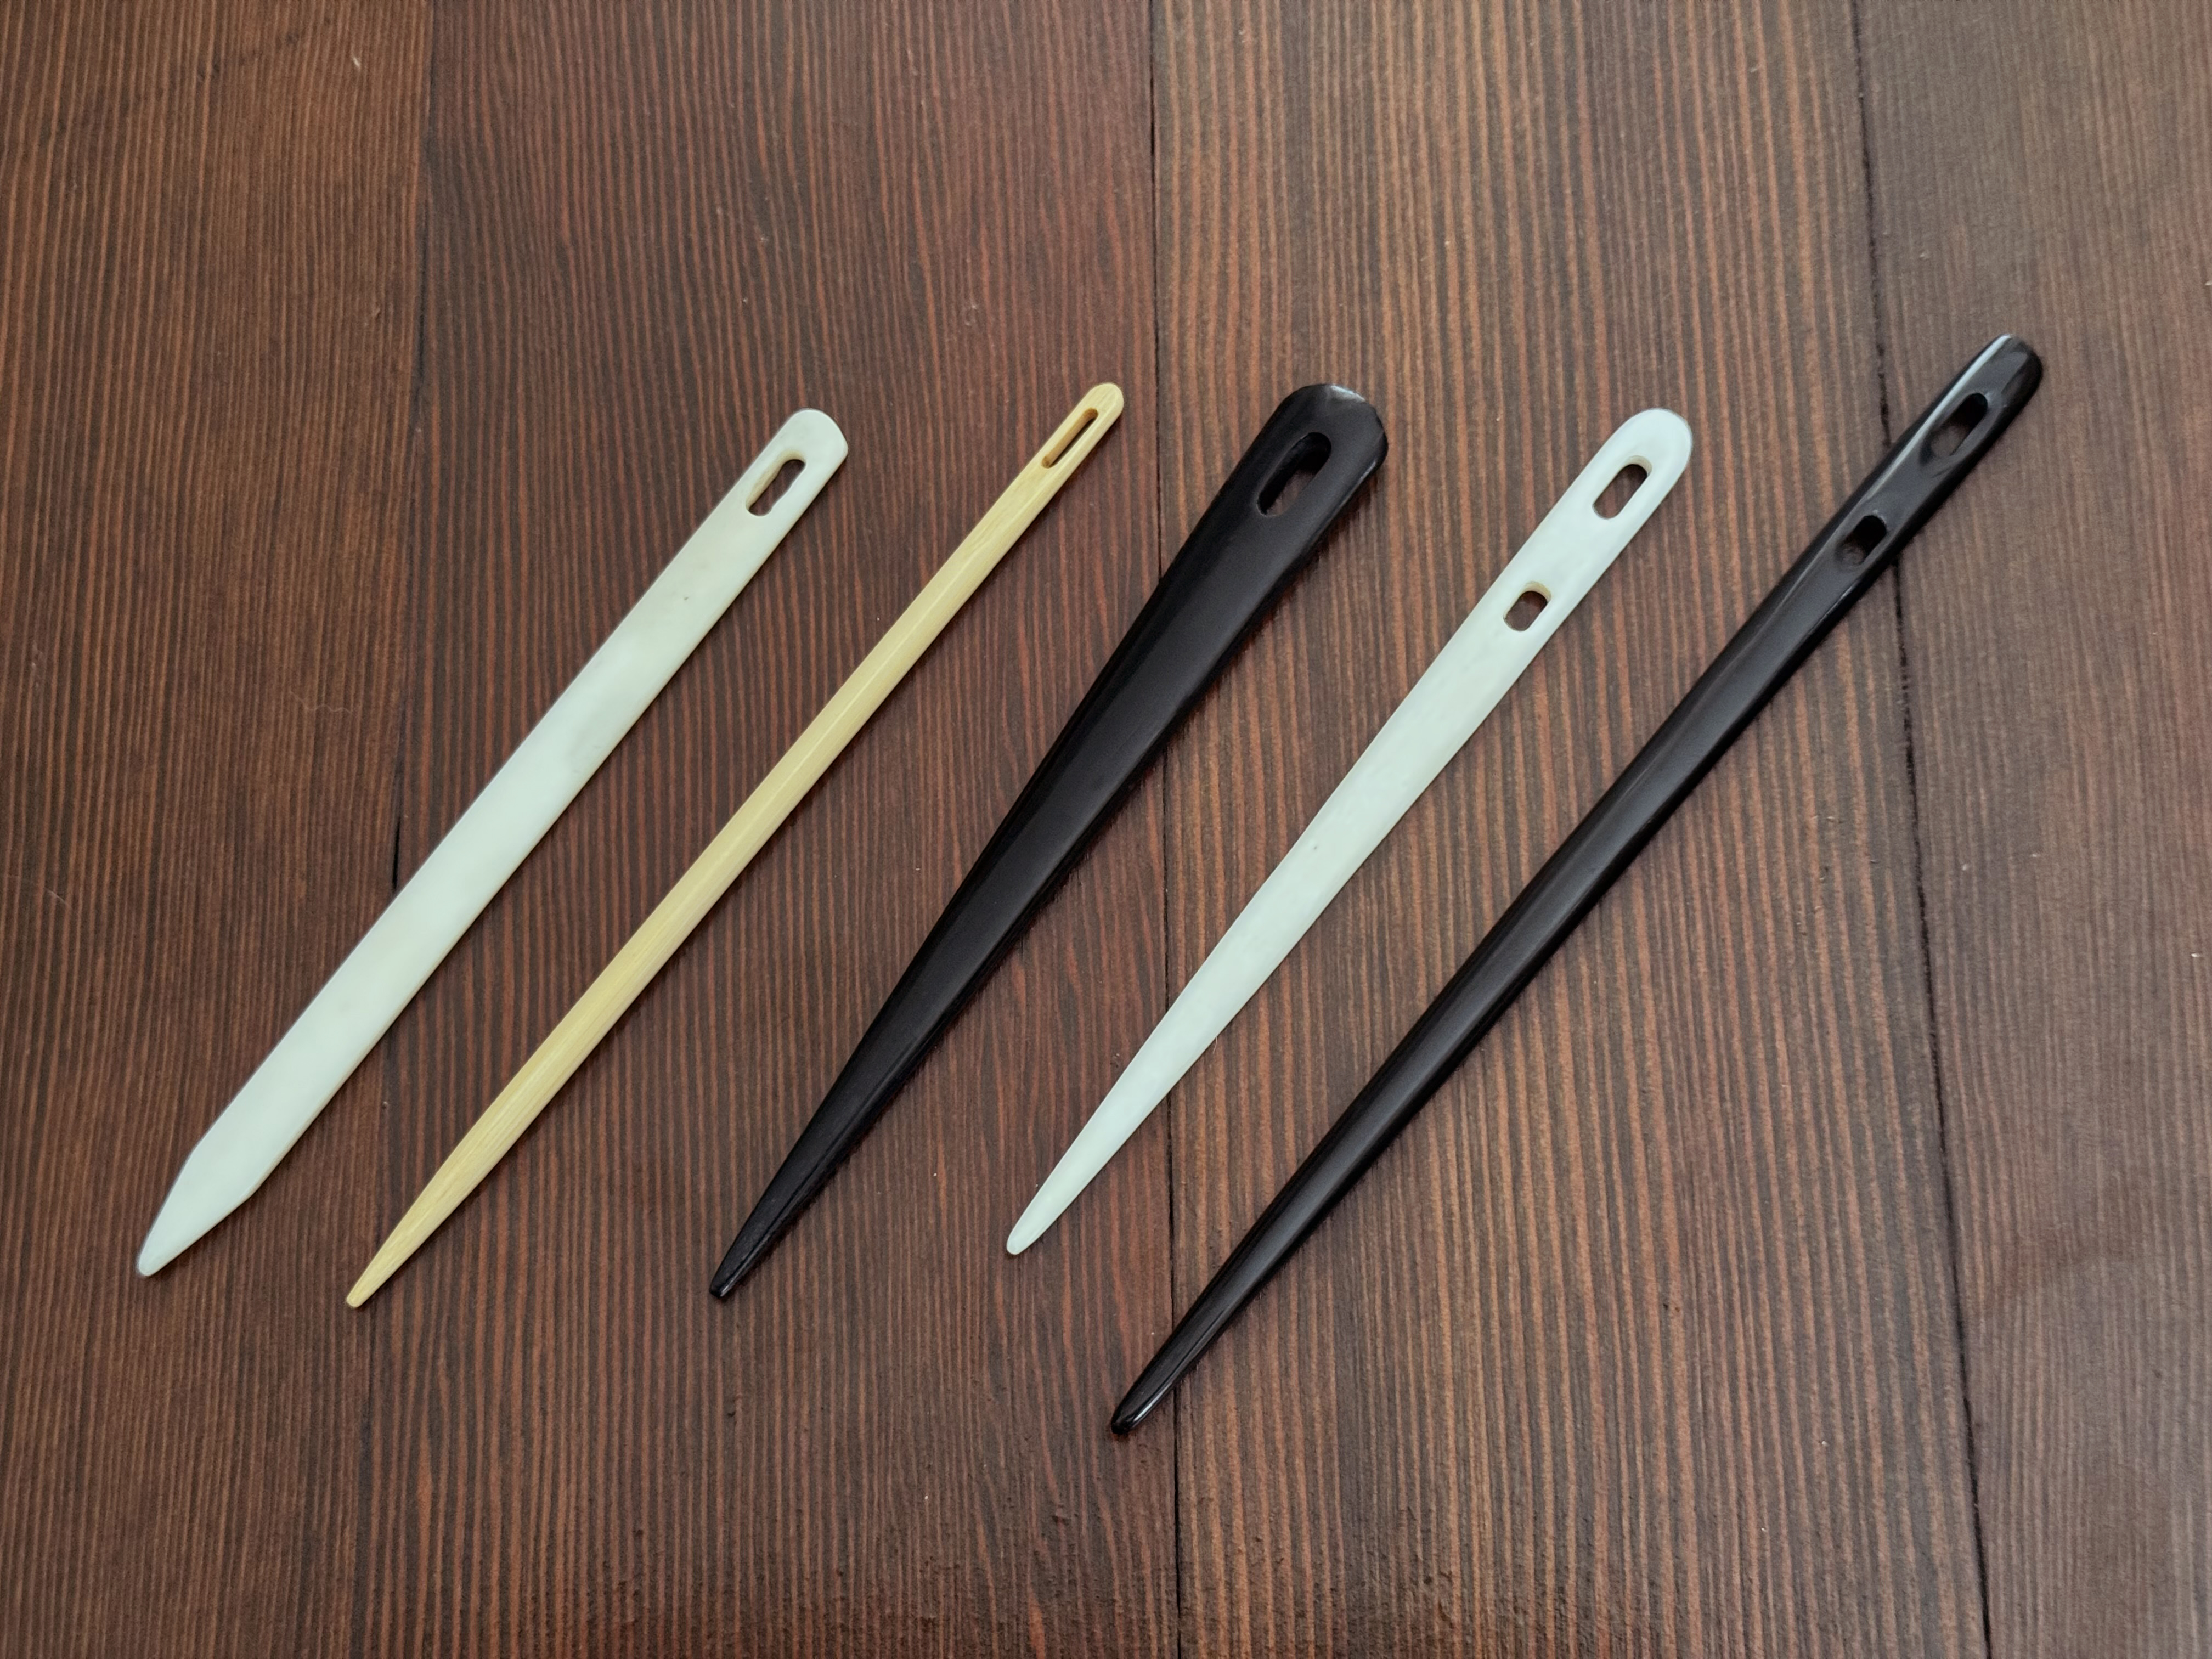
Historically, needles have been made from natural materials that could be easily found. More recently, other materials are now readily available, and nalbinders have a wide selection to choose from.
If you’re looking for the most authentic material to use in reenactment, just pick a material that was available in that time period. Otherwise, try a few different options for material, shape, size, and so on. You’ll find what works best for you and the type of projects you prefer.
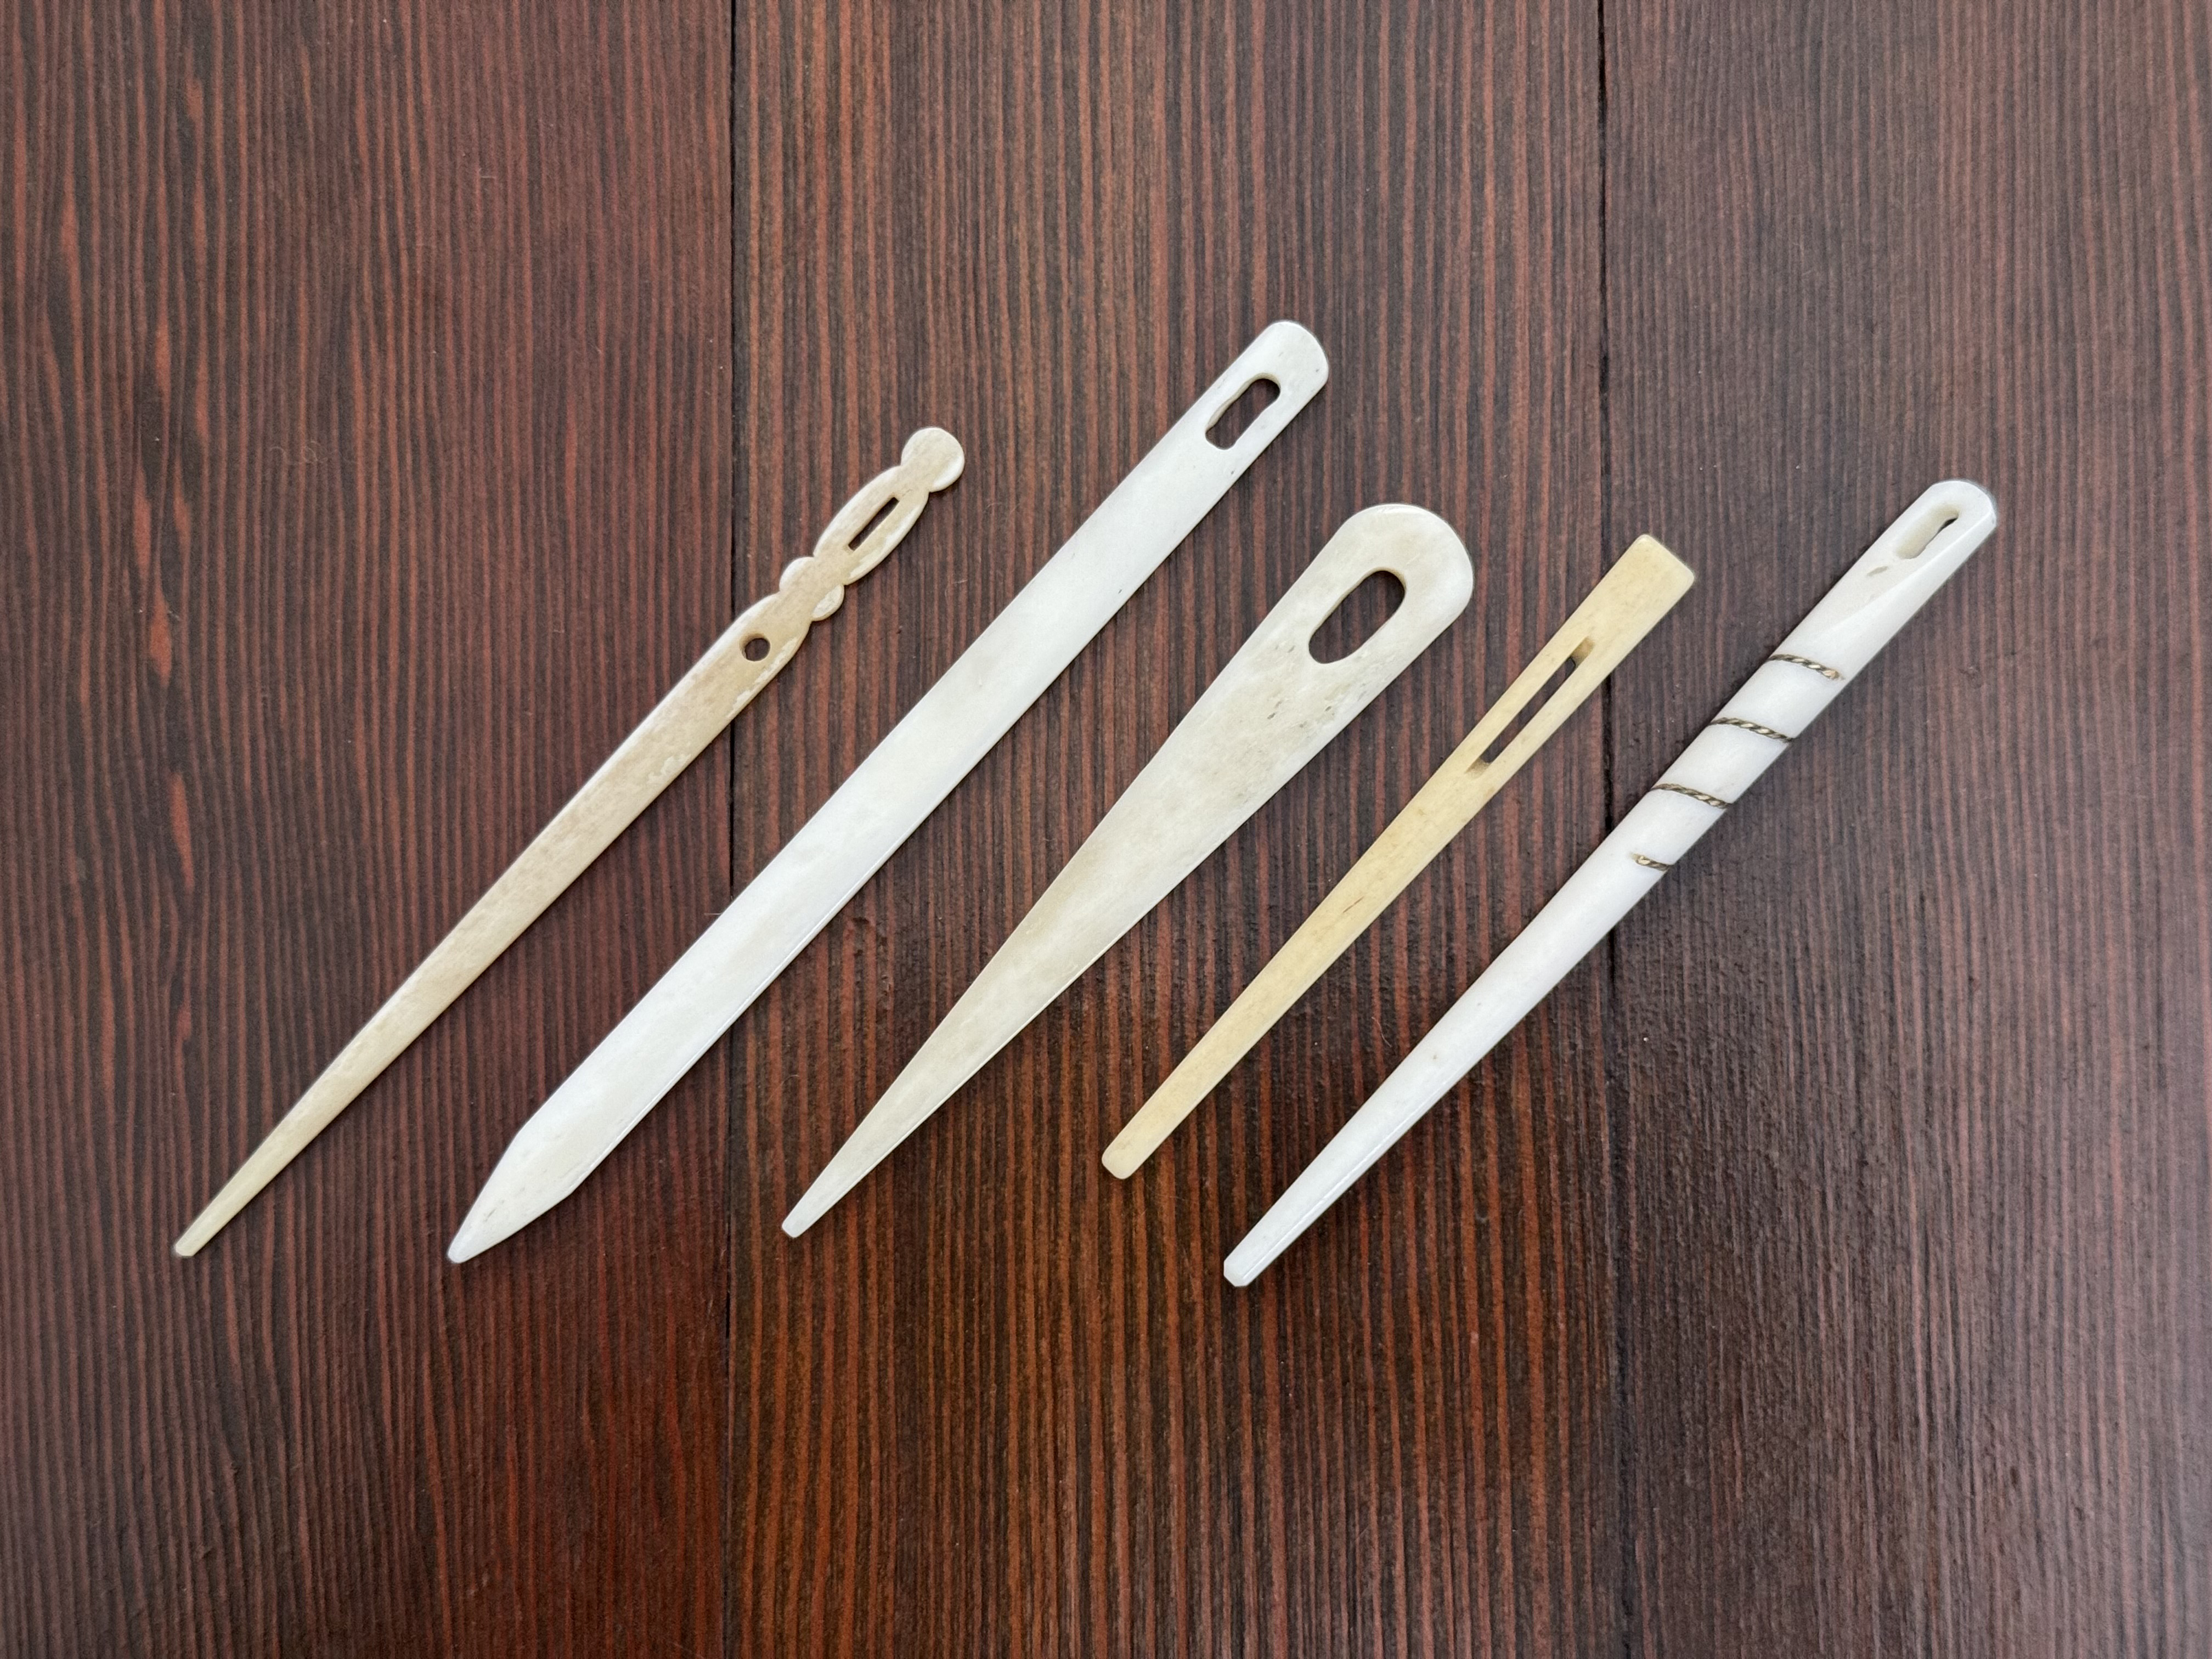
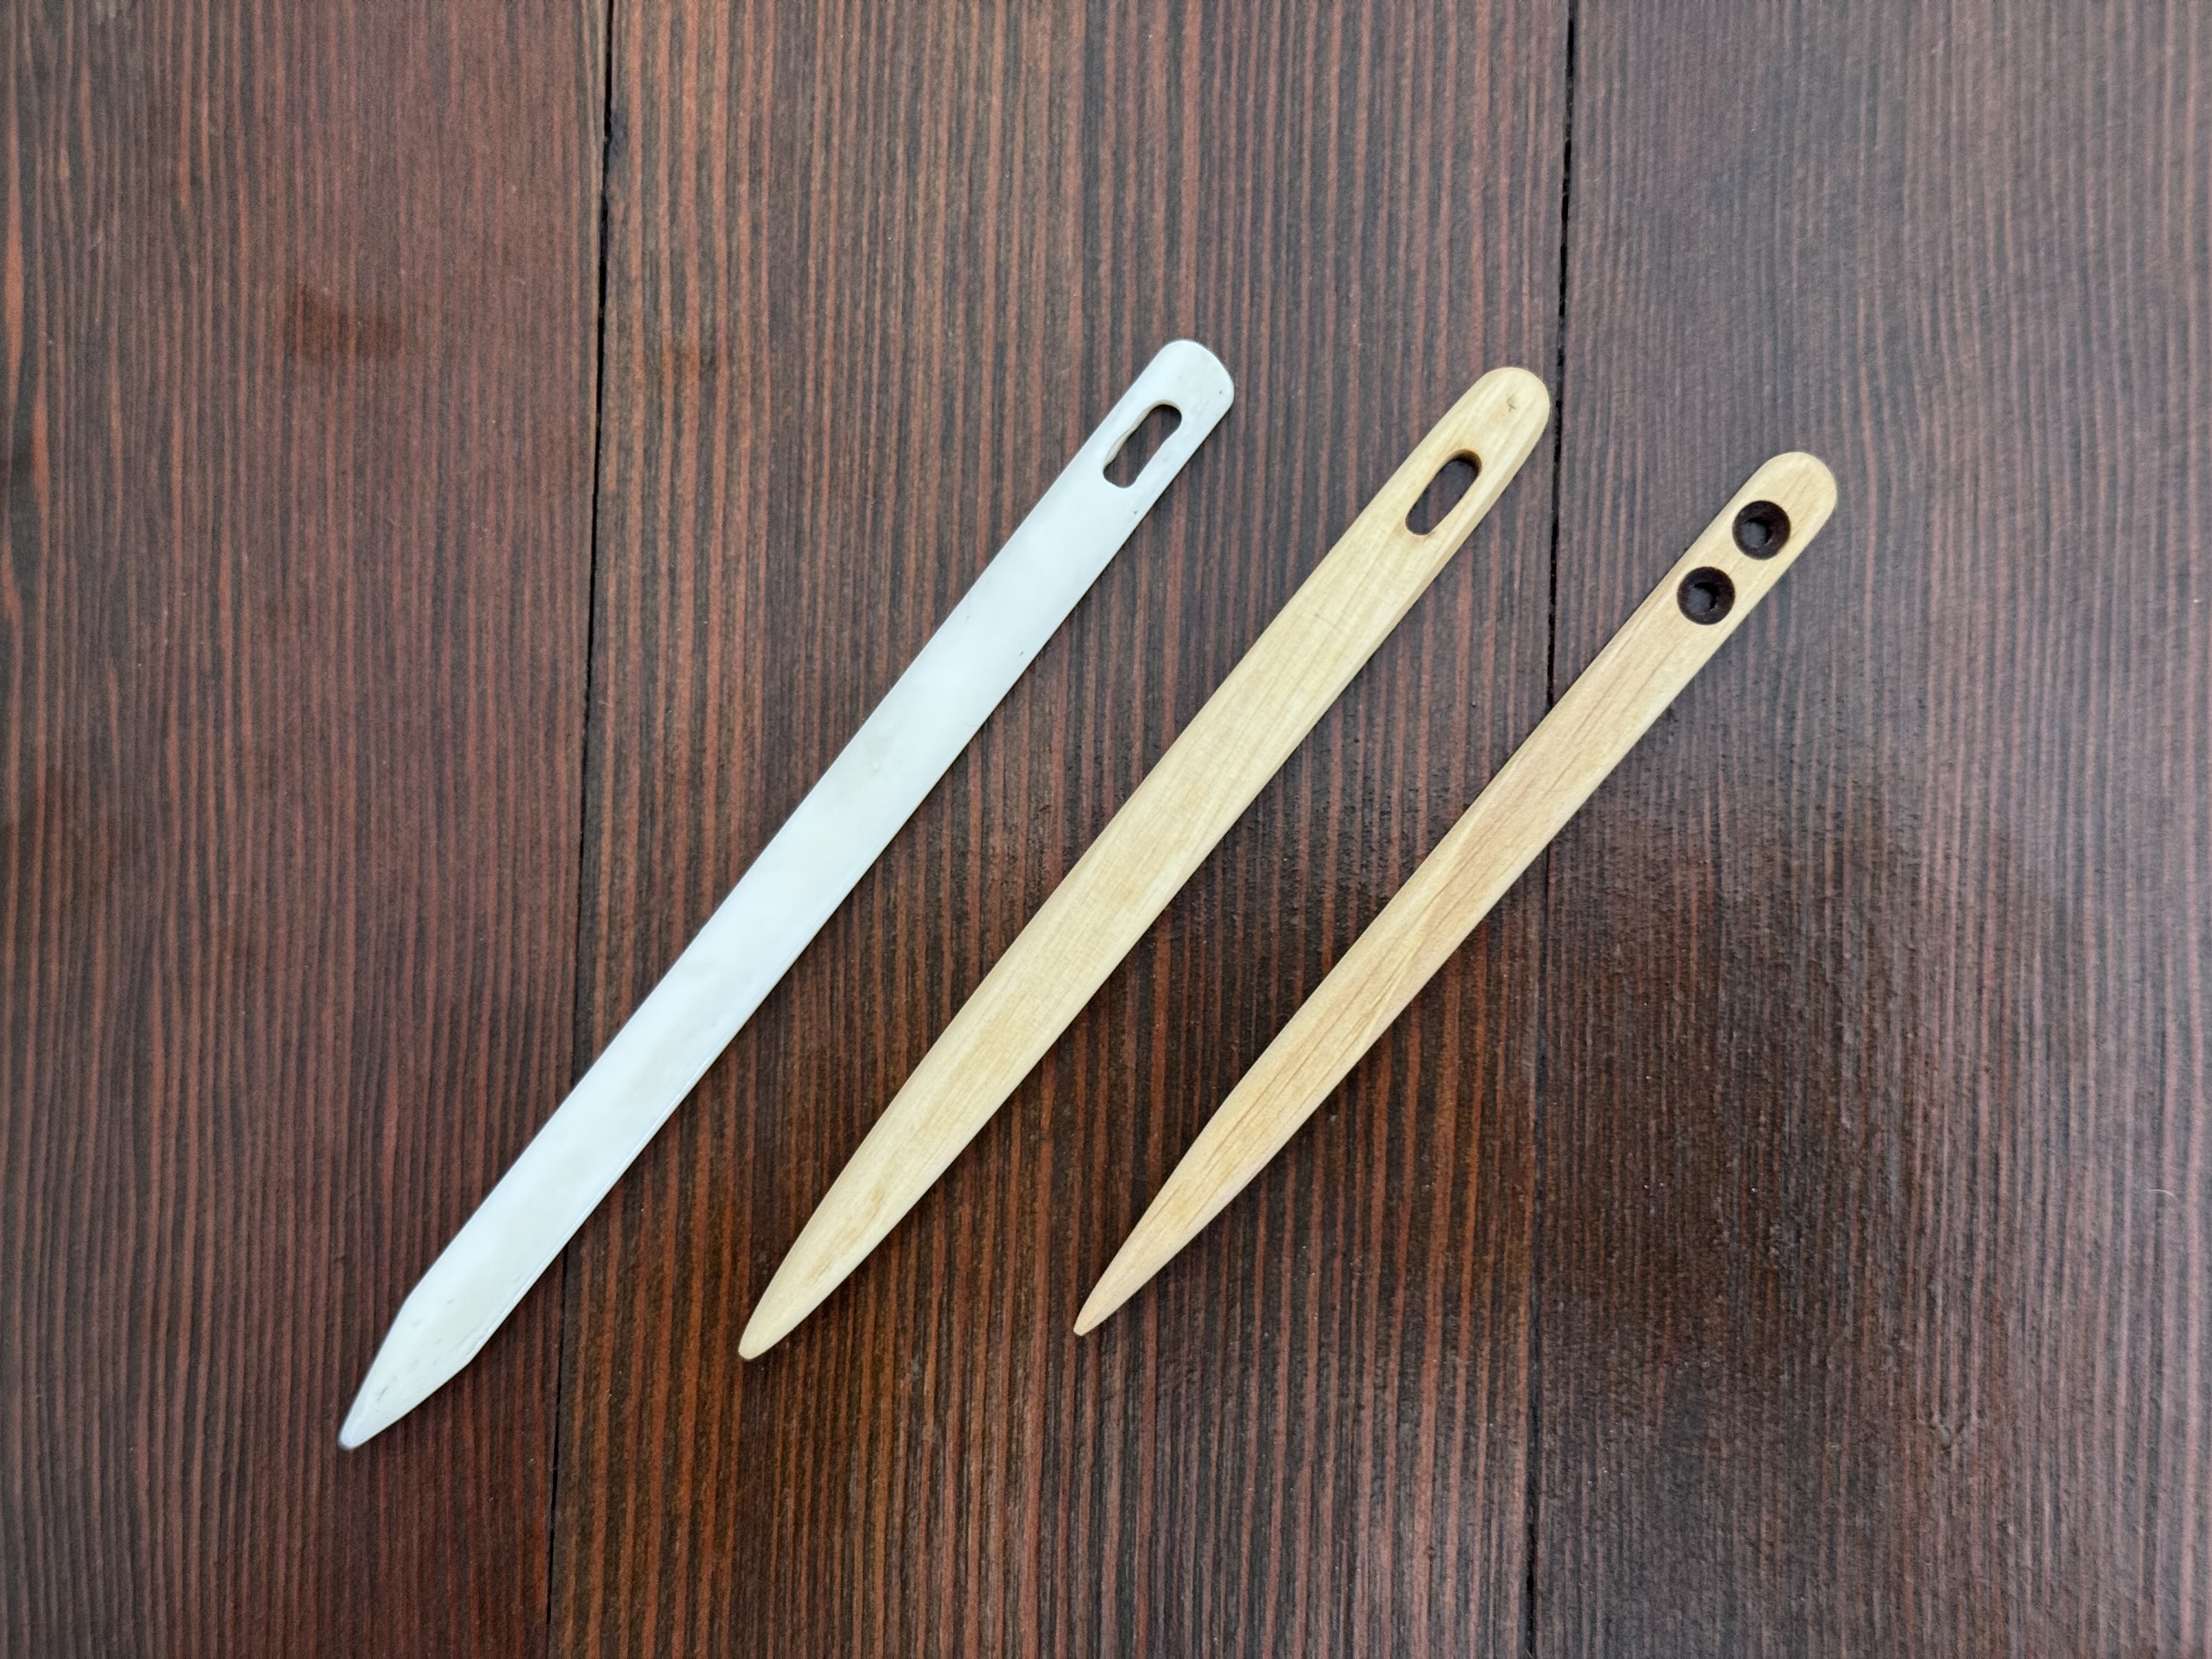
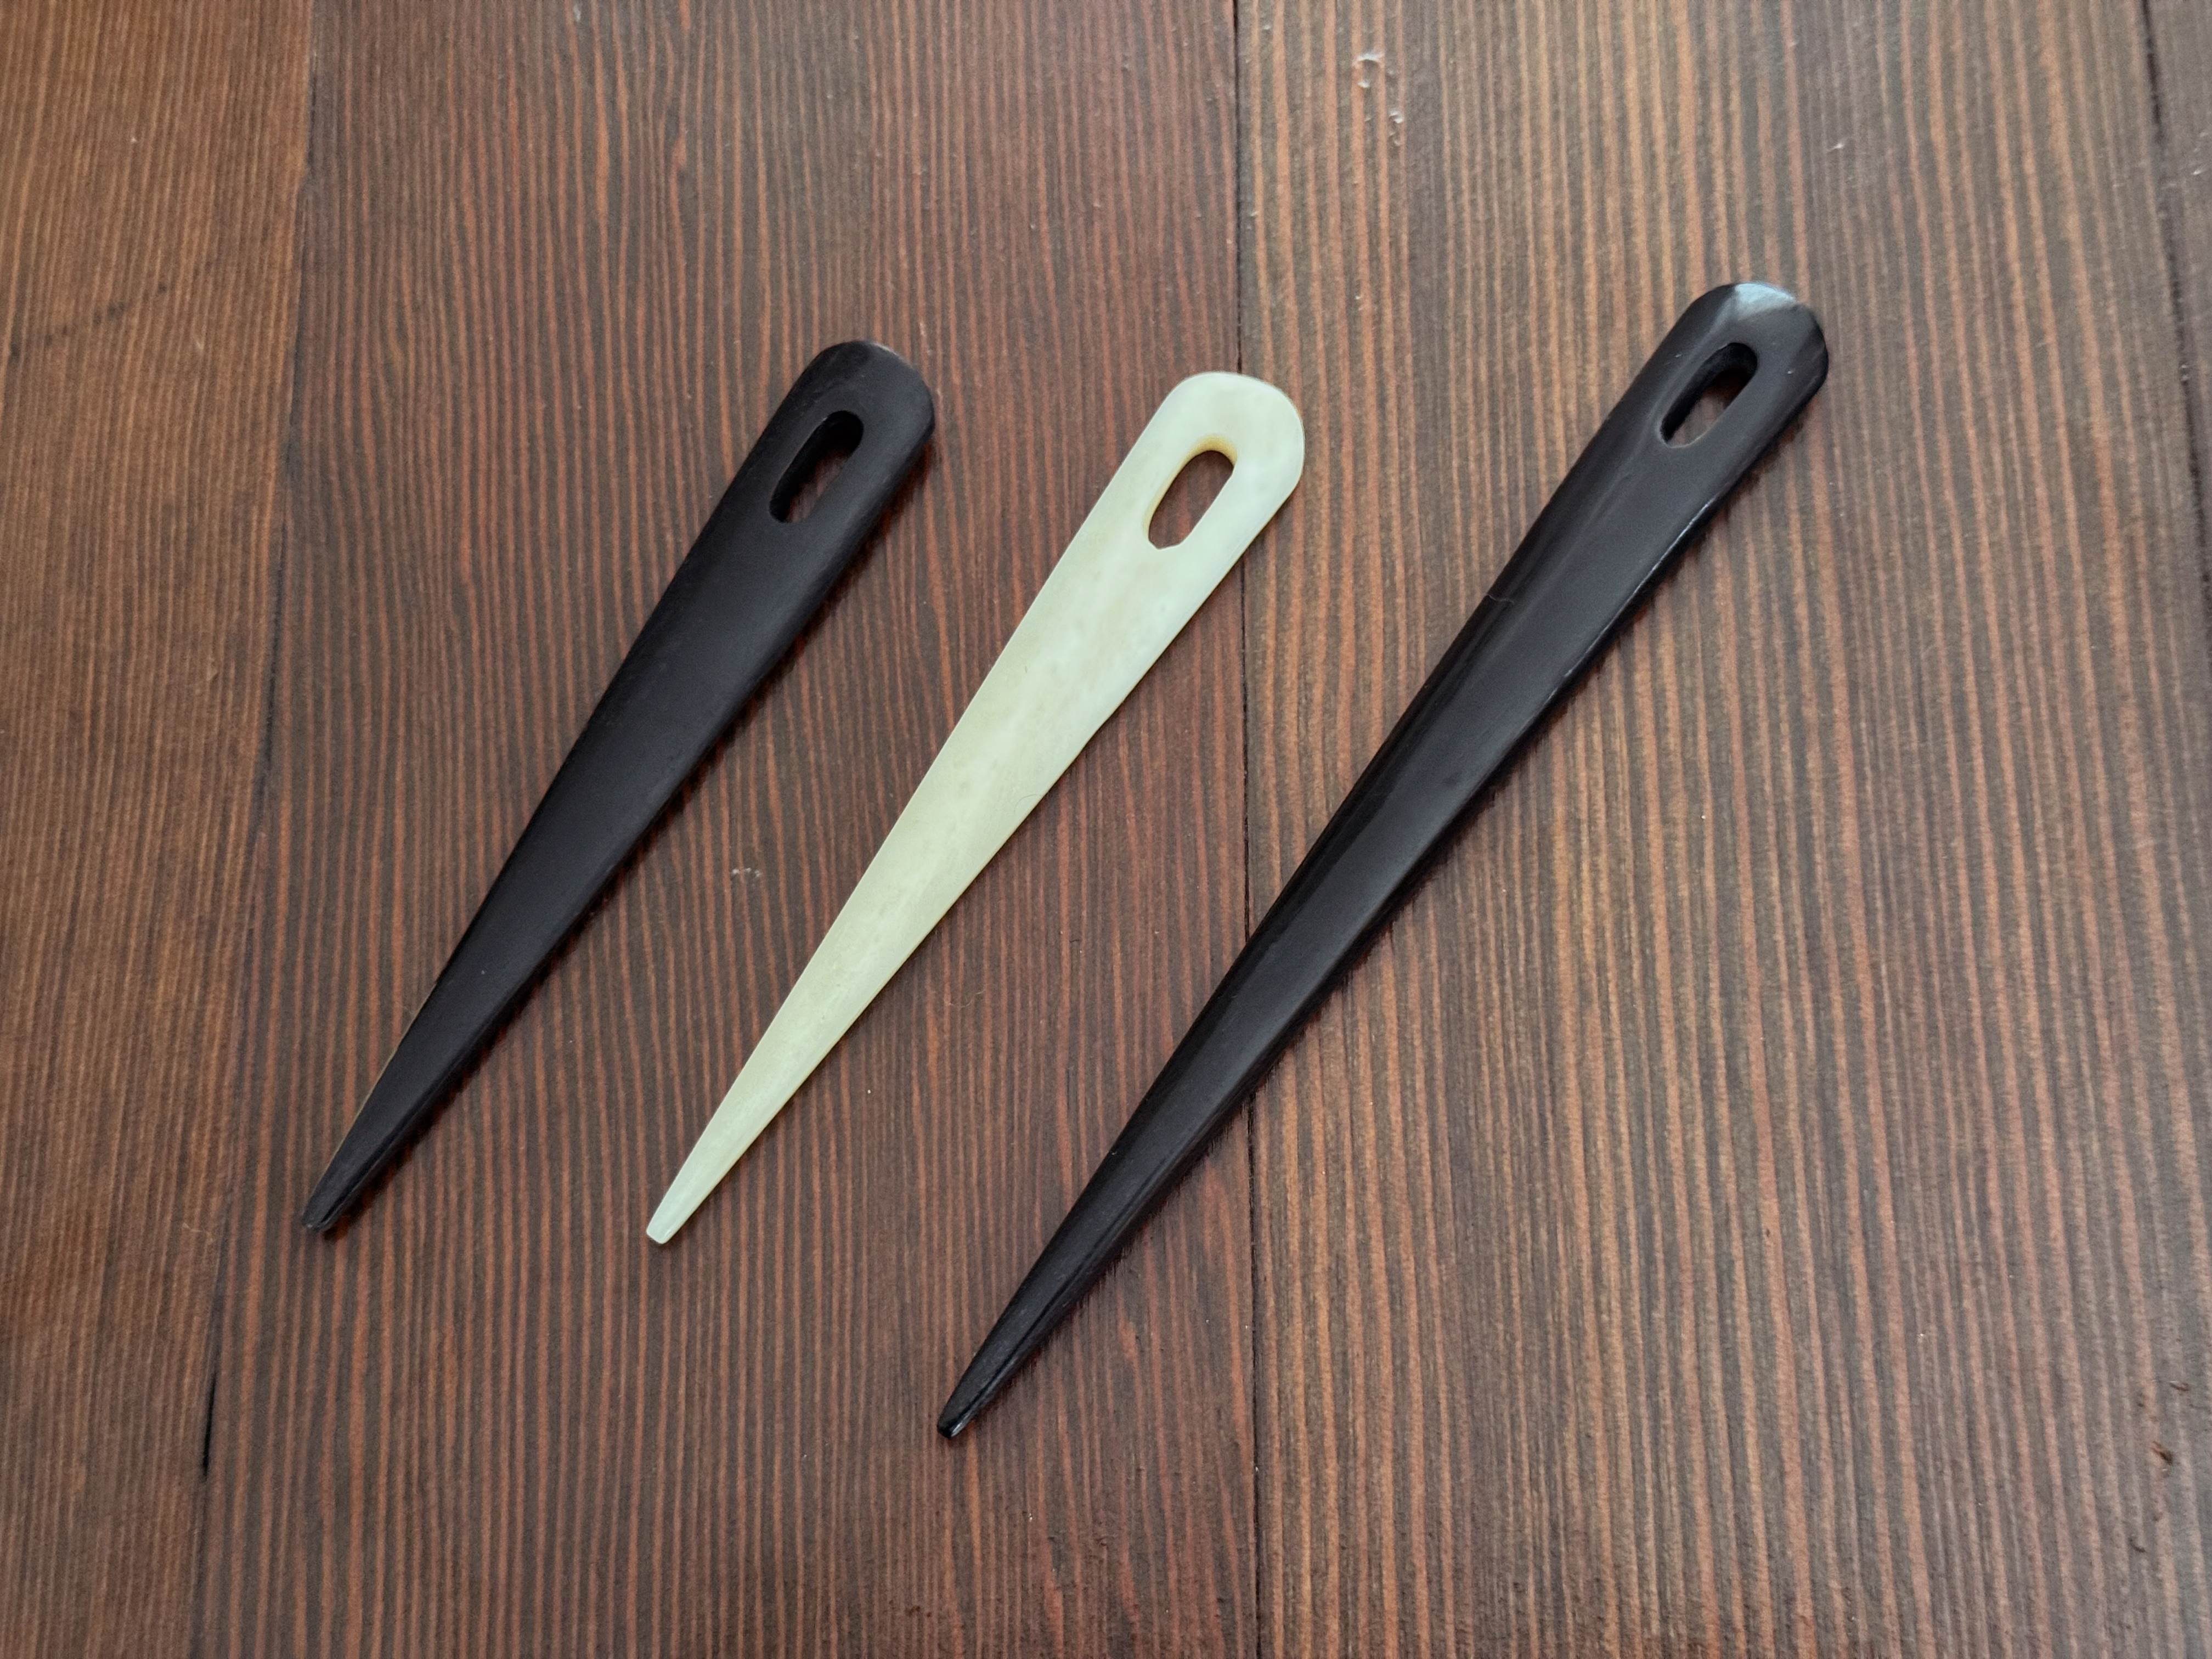
Bone
Bone is durable, smooth, silky to the touch, and warms up to skin temperature easily. Some bone needles have elaborate hand-carved decorative designs.
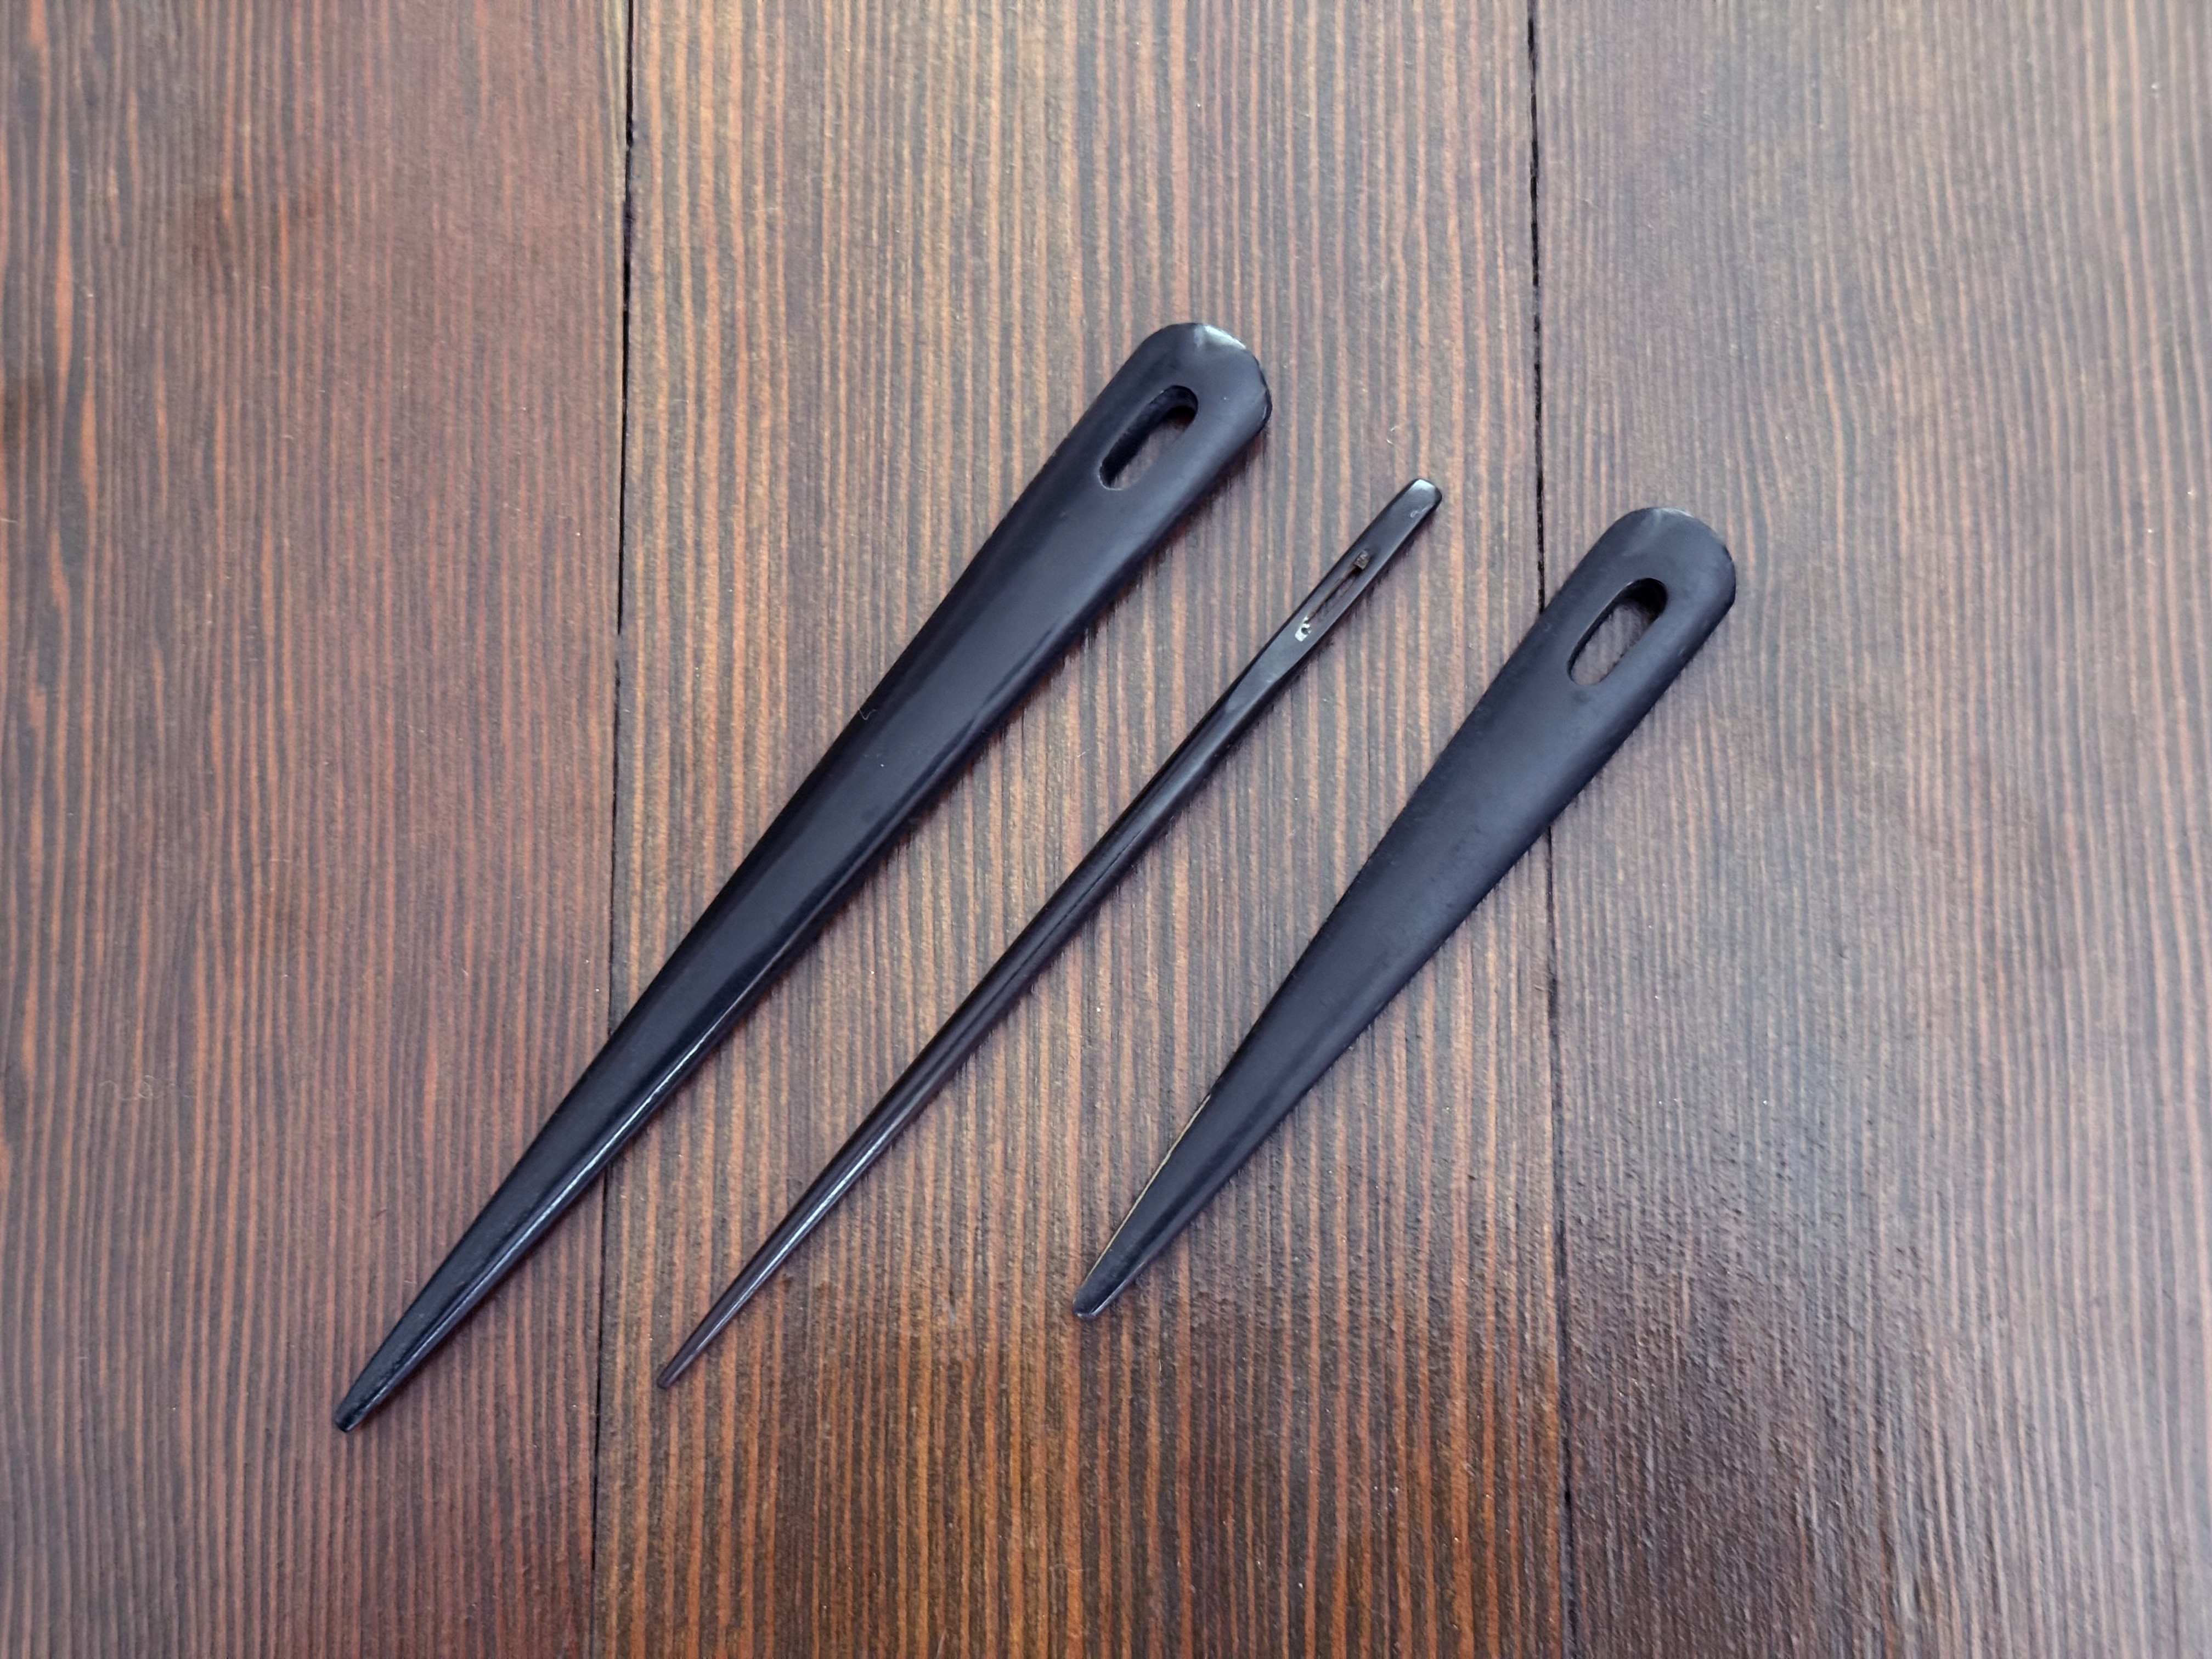
Horn
Horn is slightly more flexible than bone (and can get even more flexible under high temperatures). It has a similar polished-smooth surface to bone, and is usually black.

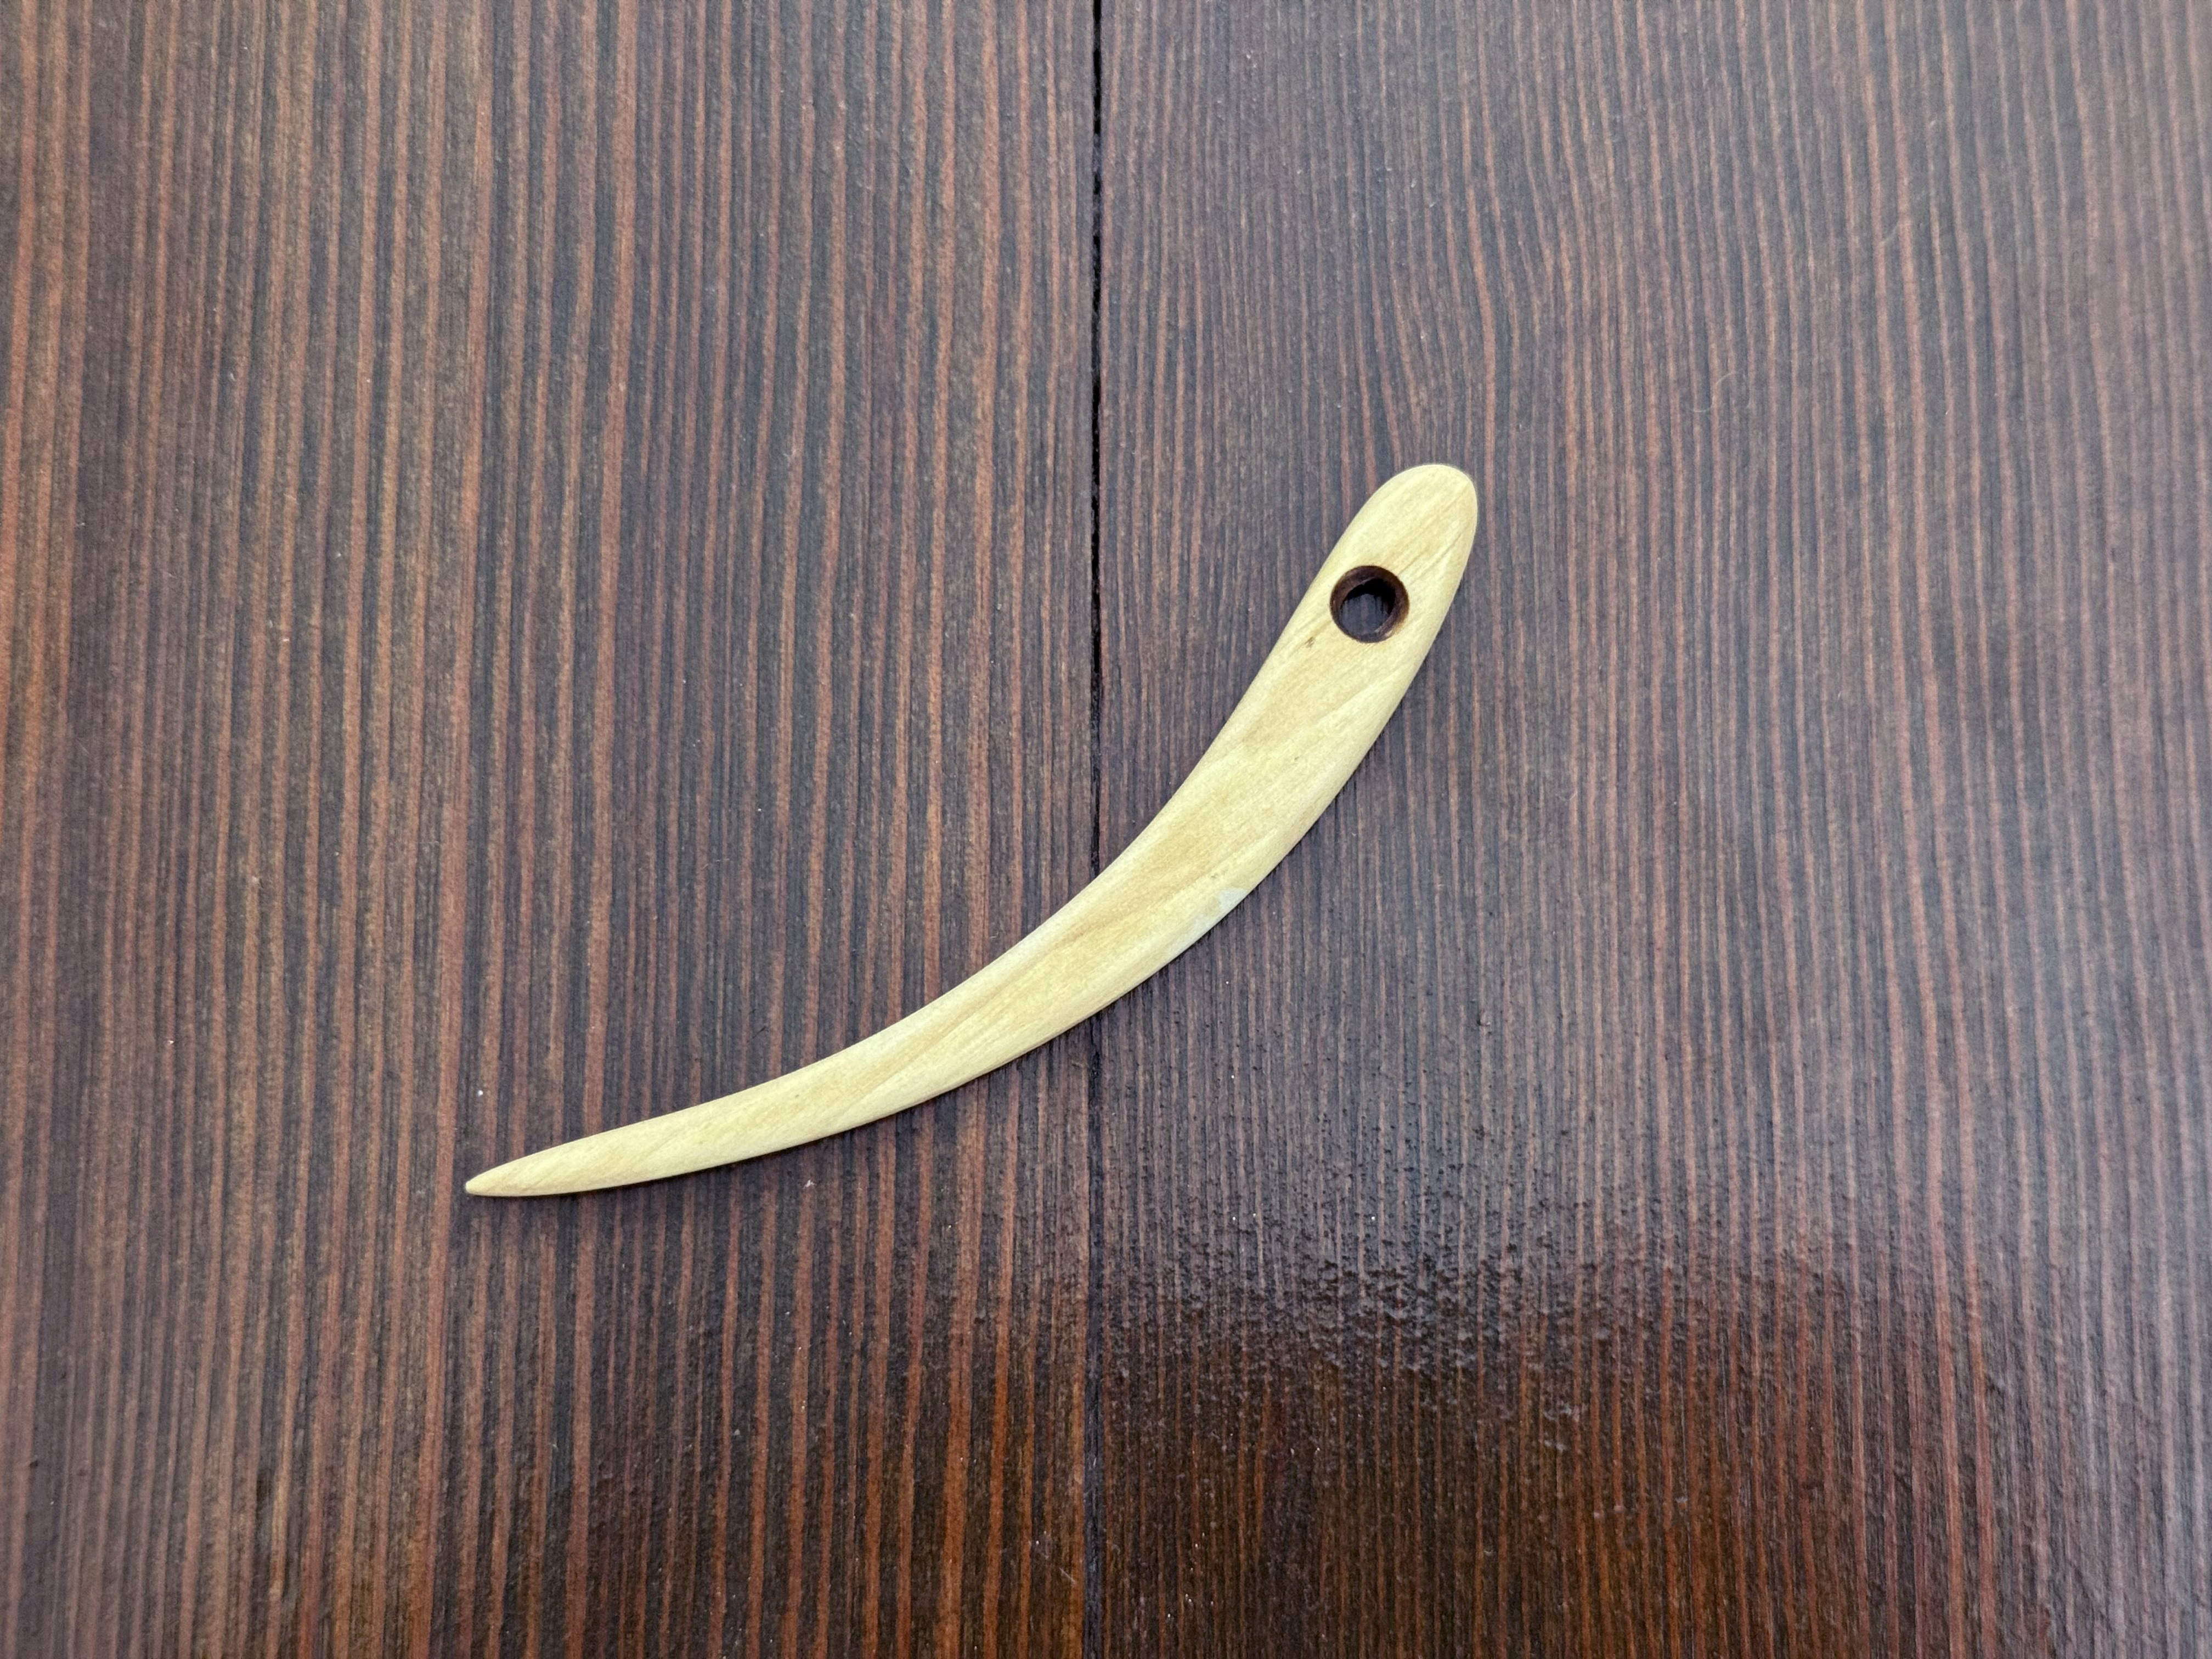
Antler
Antler is rigid with a velvety smooth texture, and can be carved to very sharp points. It’s ideal if you prefer a material that’s naturally shed by the animal, and can be found while foraging.
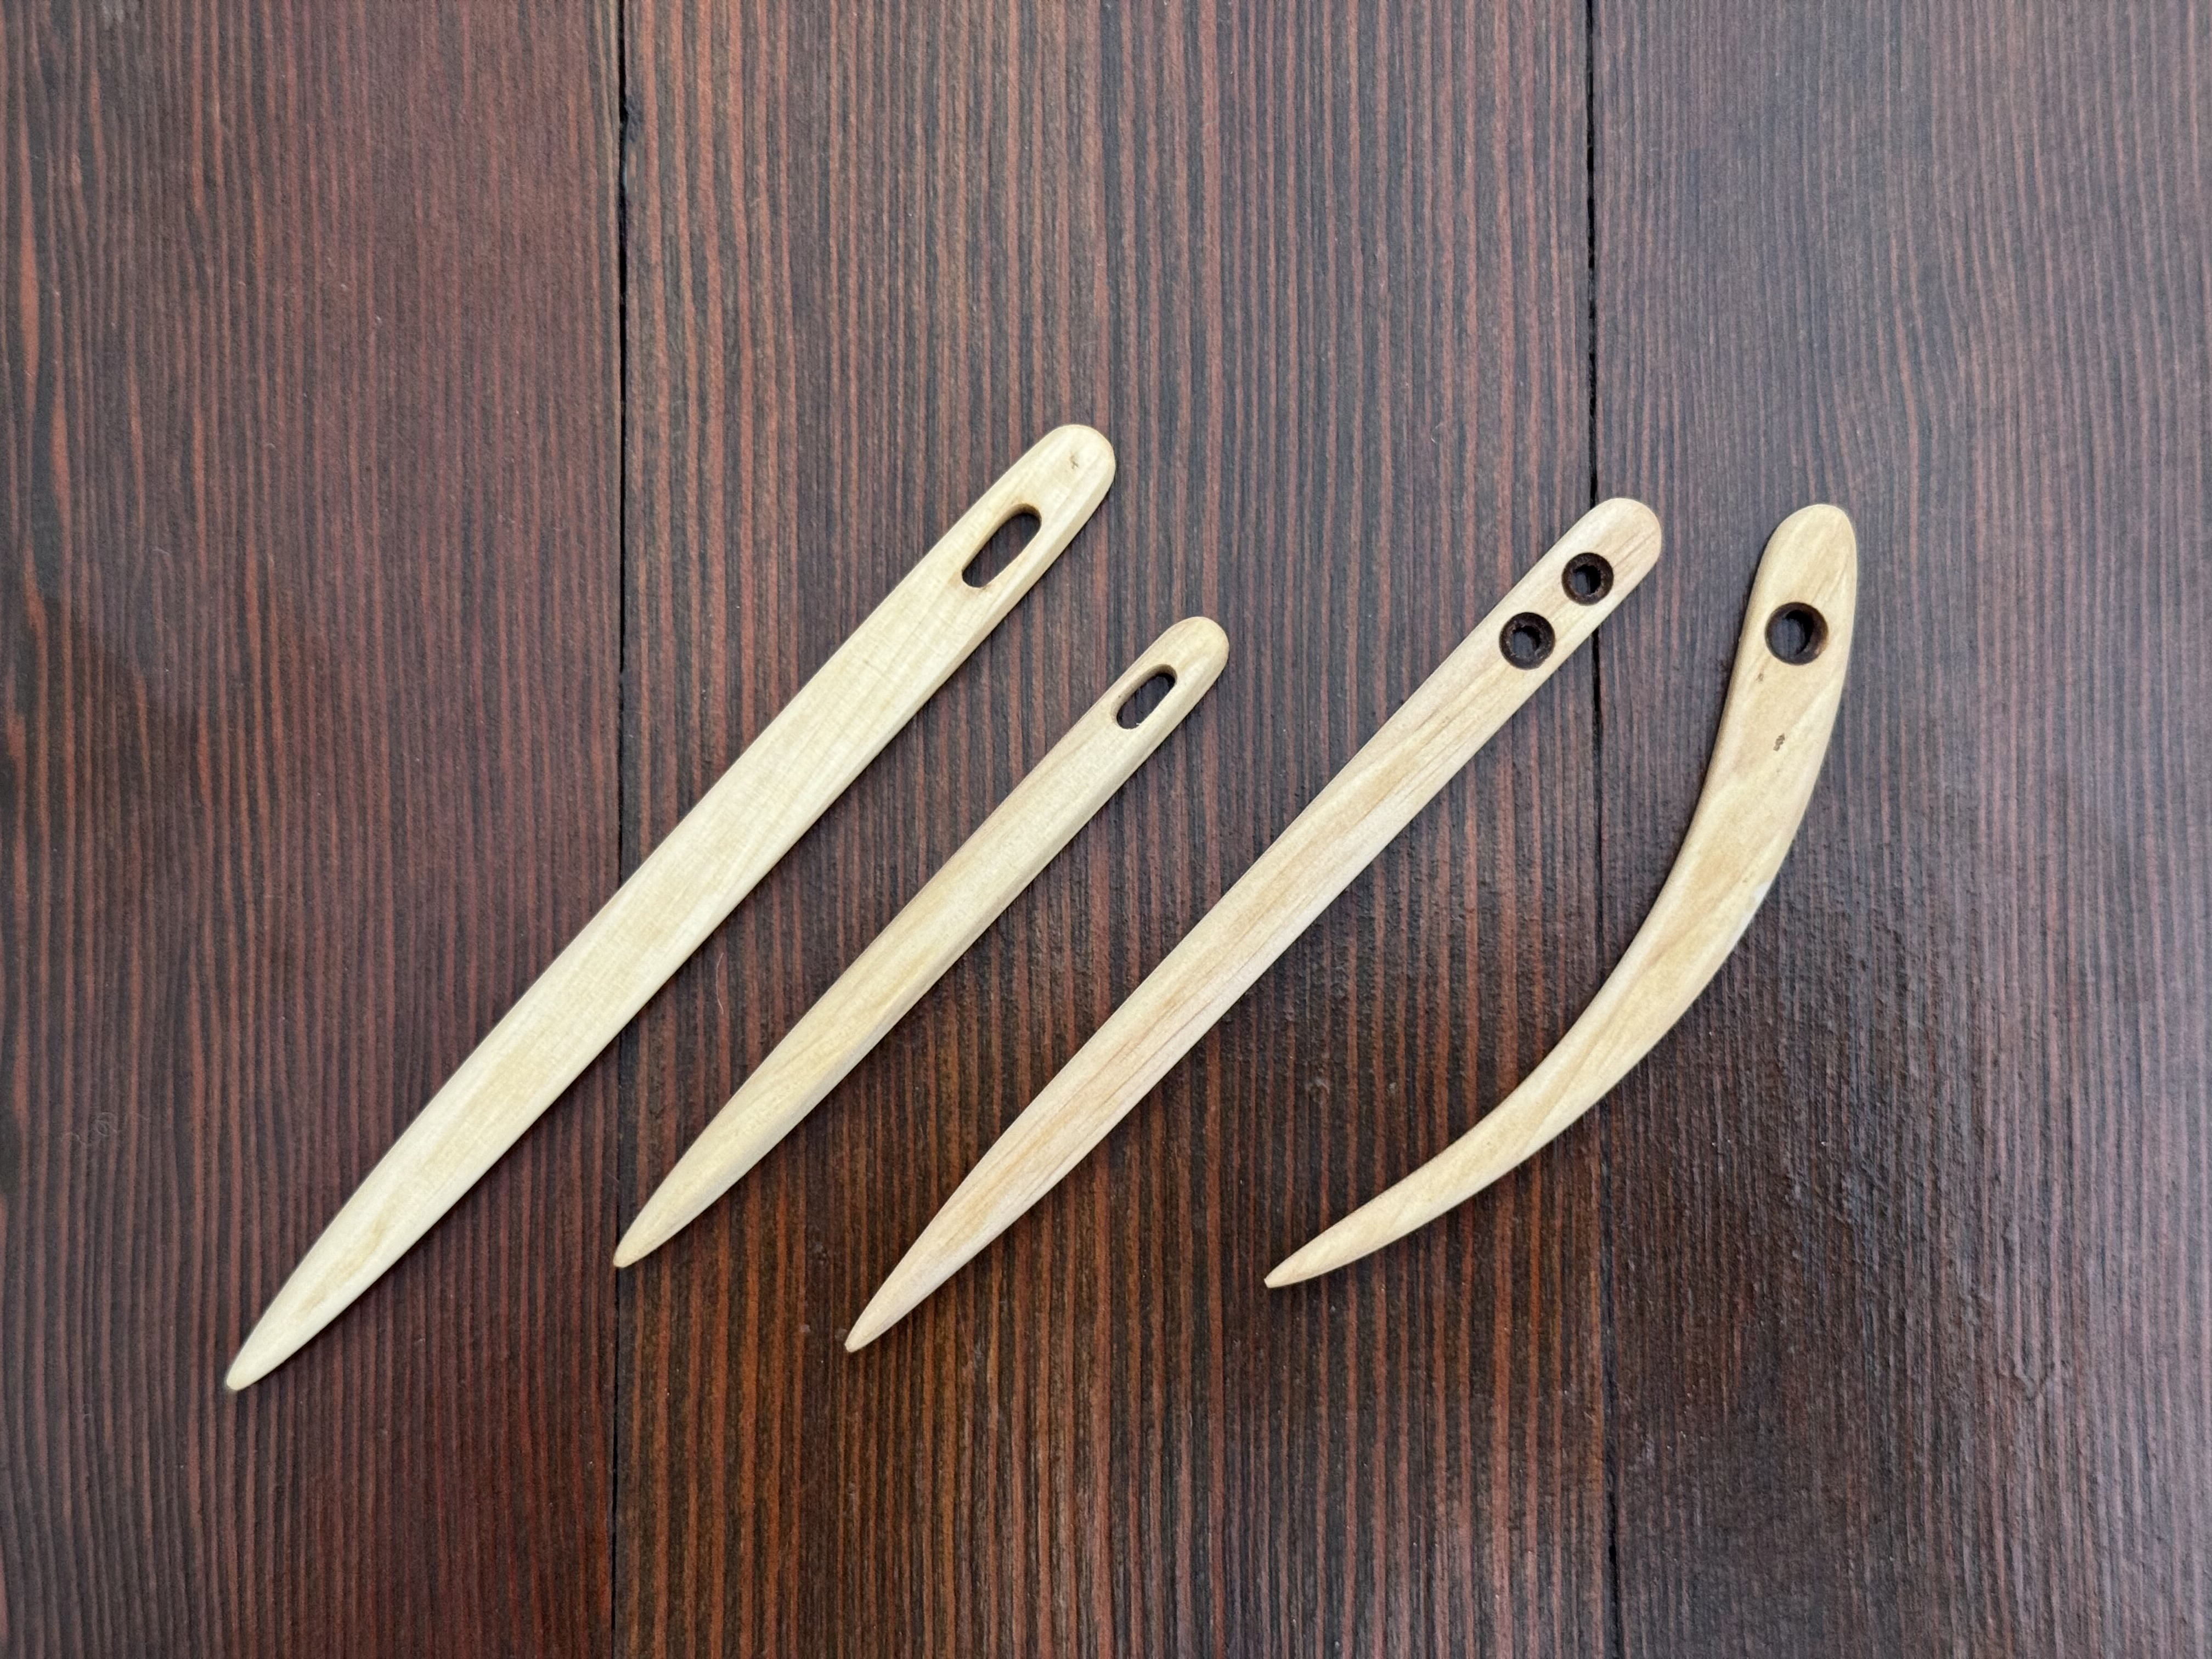
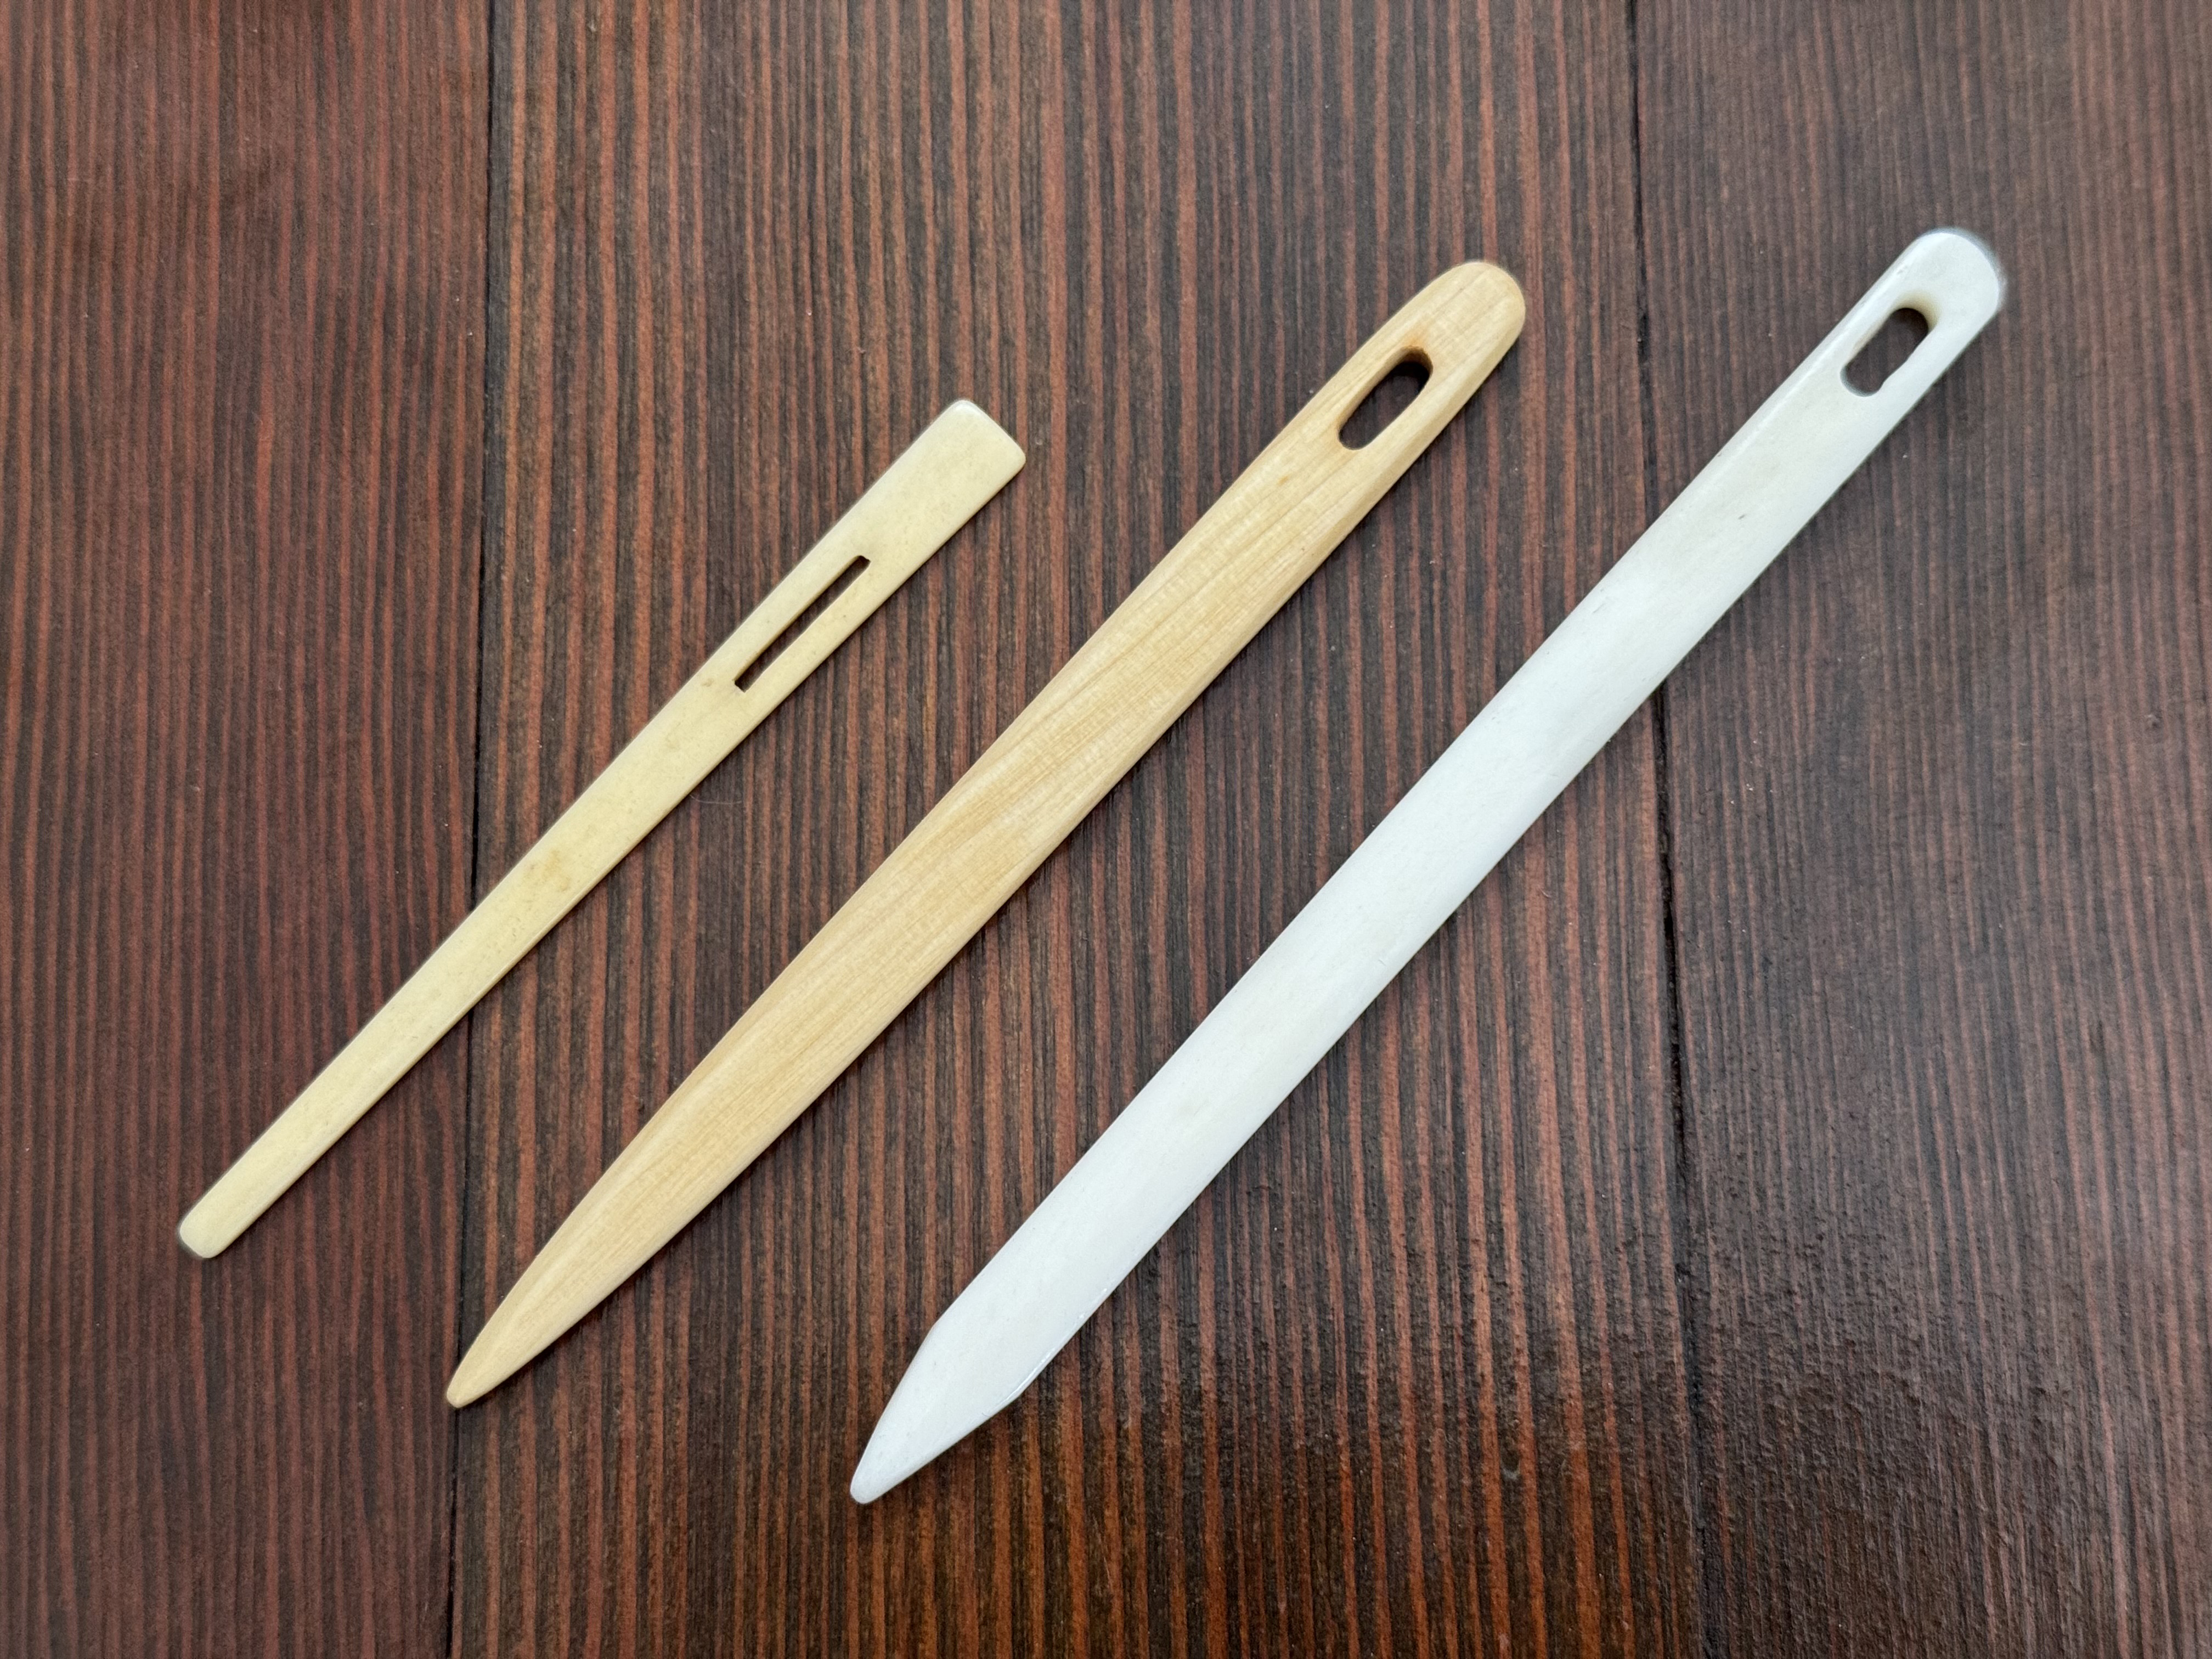
Wood
Wood needles are among the easiest to make, and are typically warmer to the touch than other materials. They can be softer and more susceptible to wear, though.
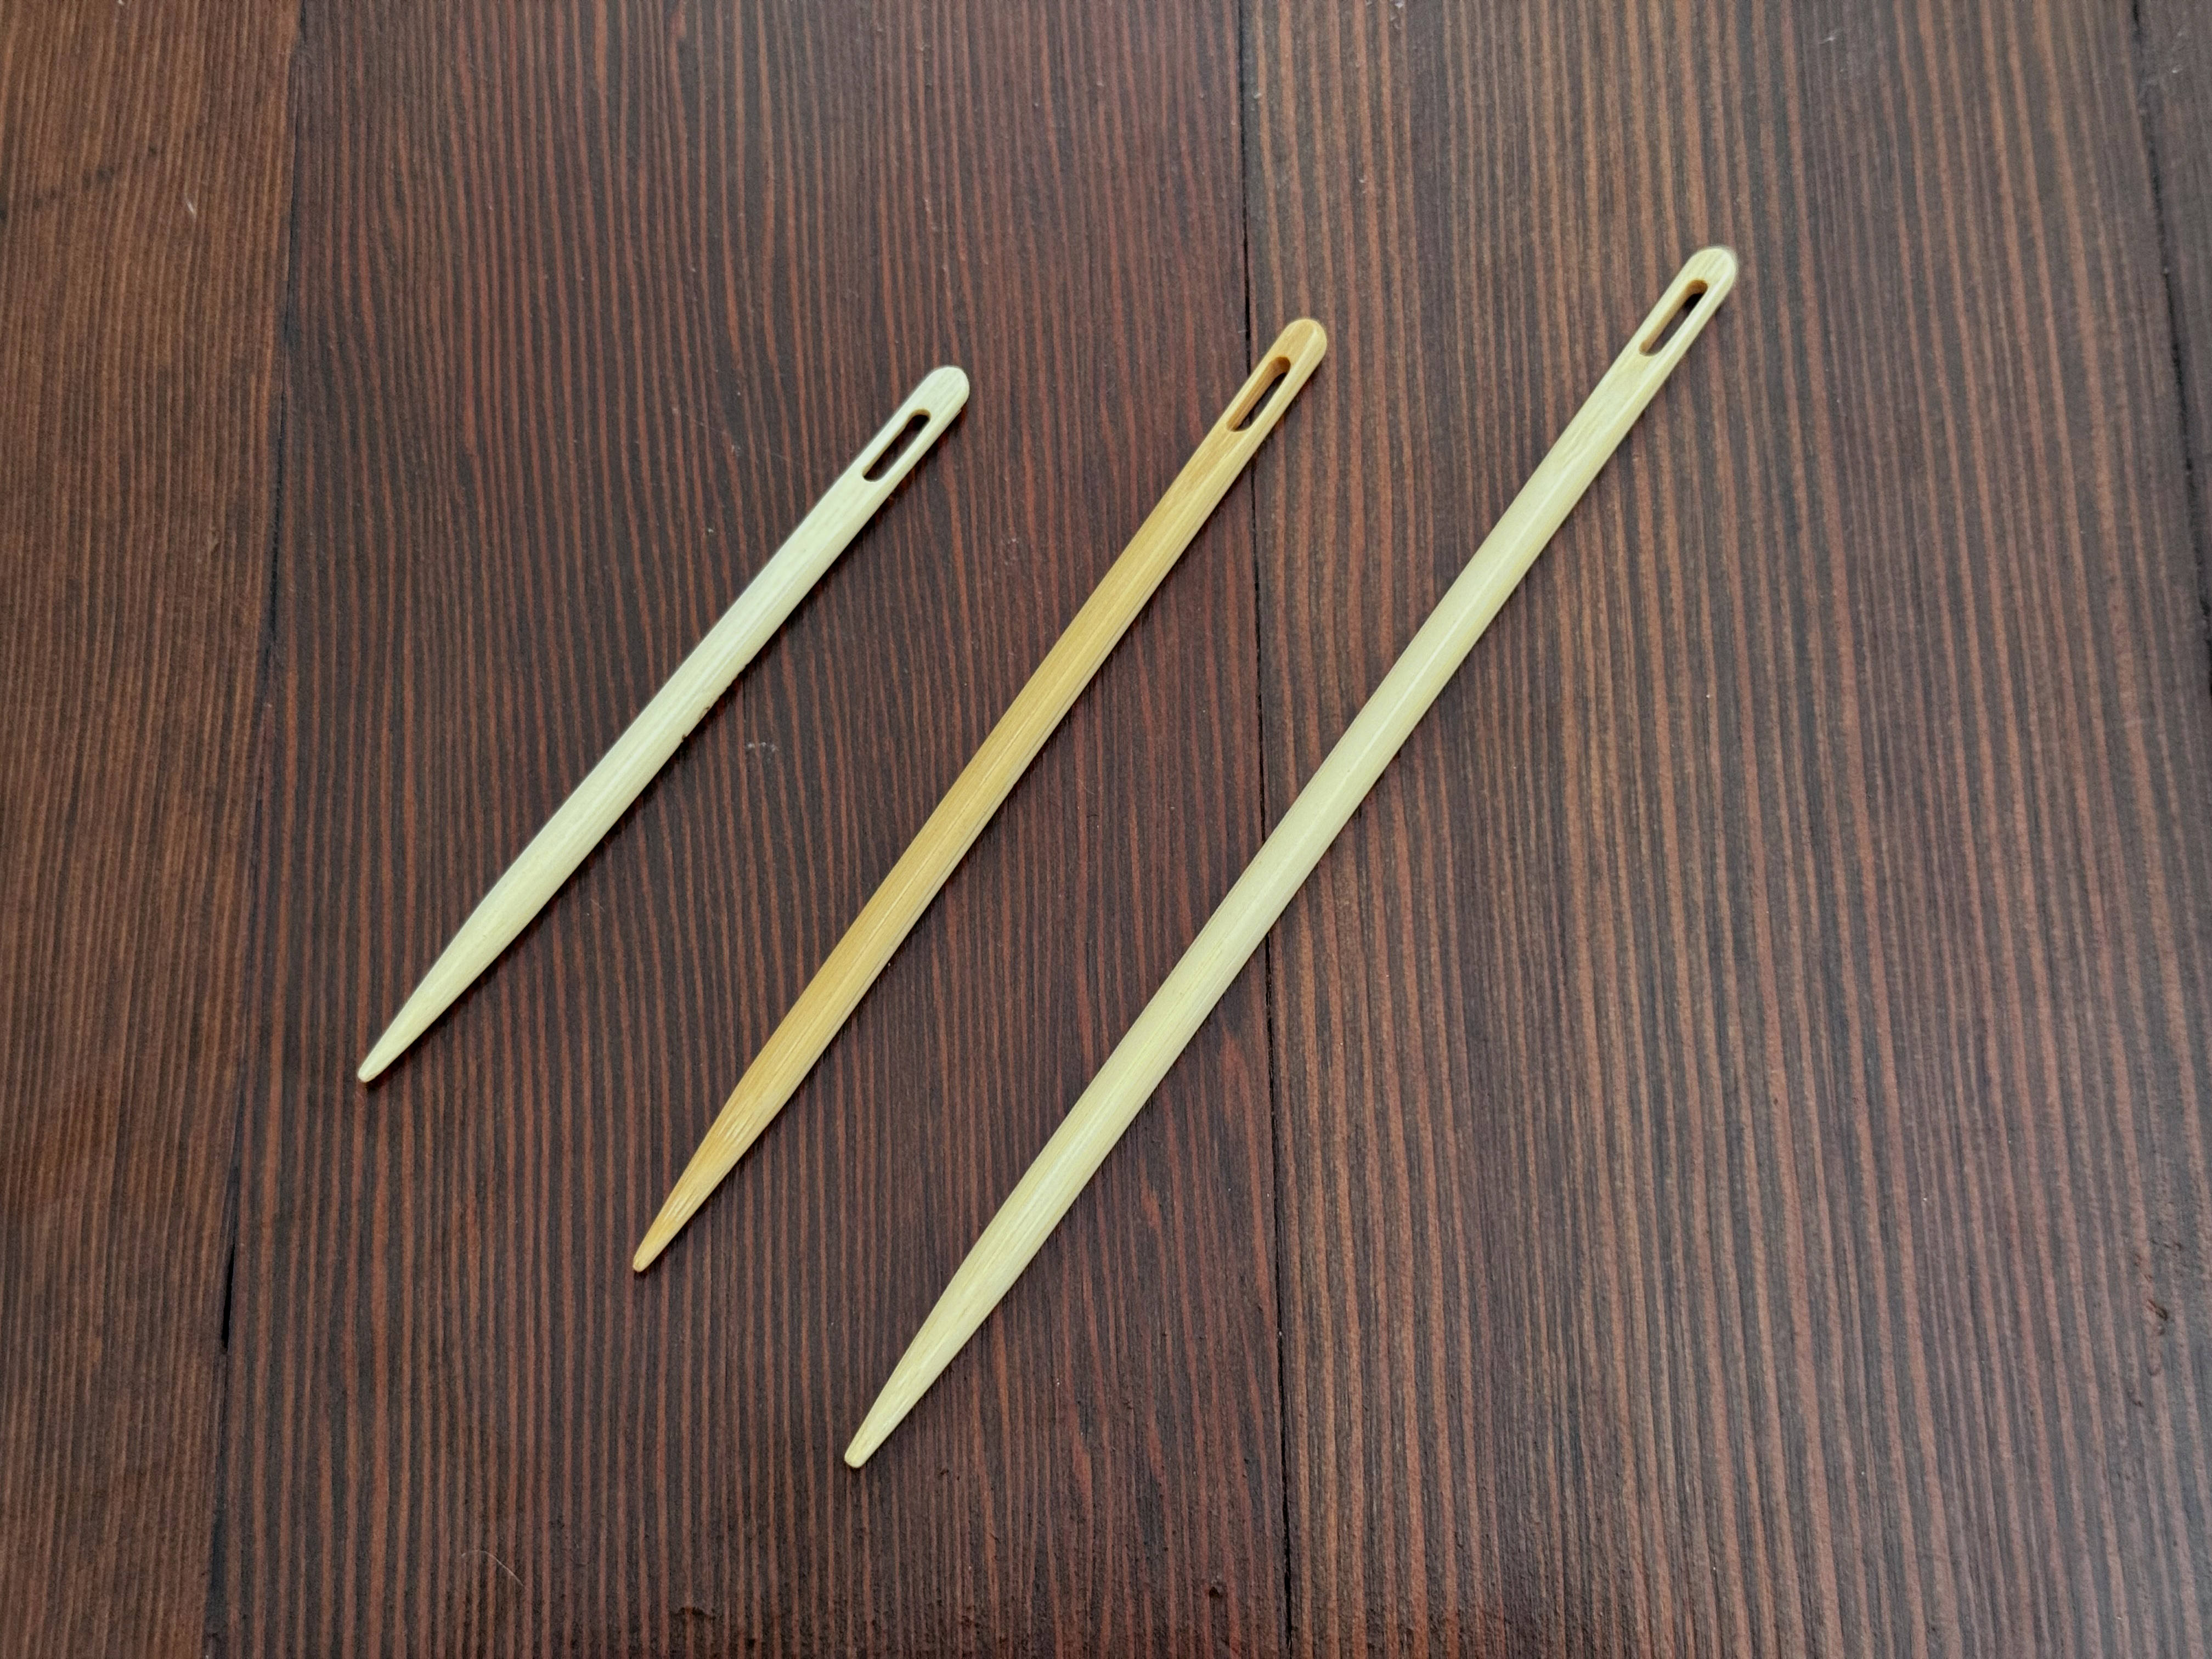
Bamboo
Bamboo needles are typically round and on the thinner side, with a satin-smooth surface. Like wood, it’s a softer material so it may wear down over time, and the eyes can be fragile.
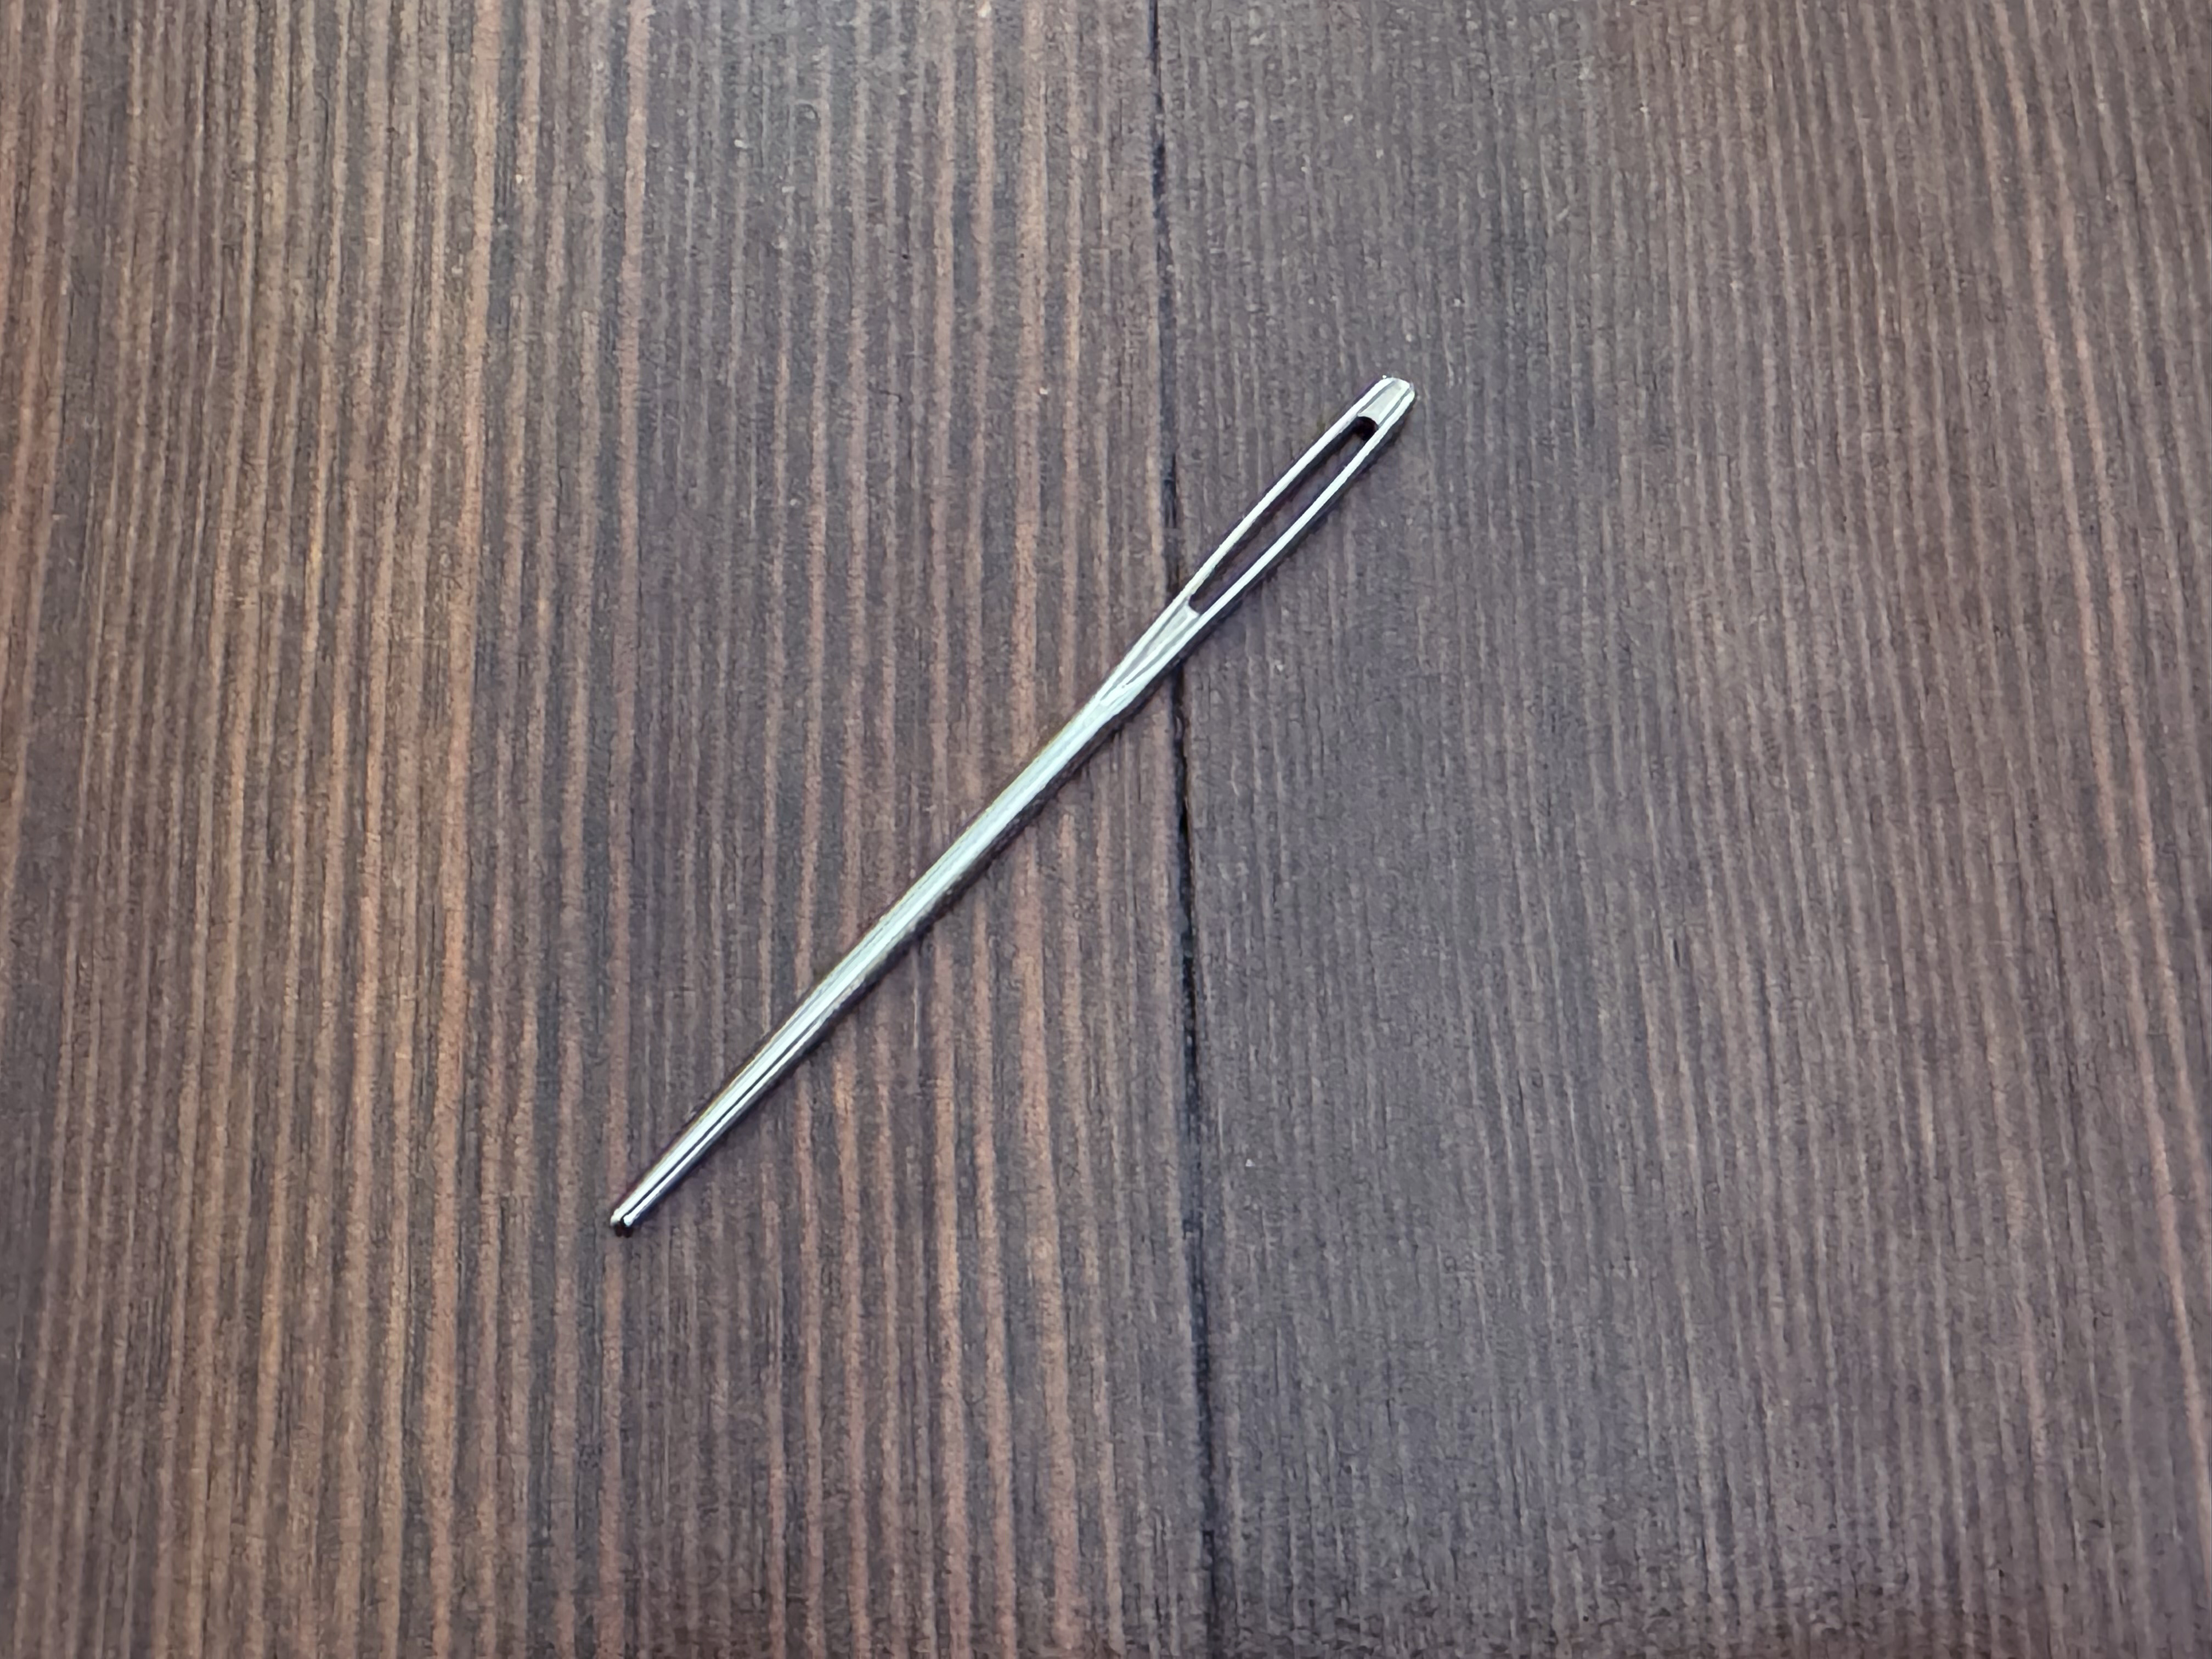
Metal
Metal allows needles to be both slimmer and sharper, so these work well when doing tight or small stitches. They’re often cold in the hand, though, and don’t flex easily as they pass through the loops.
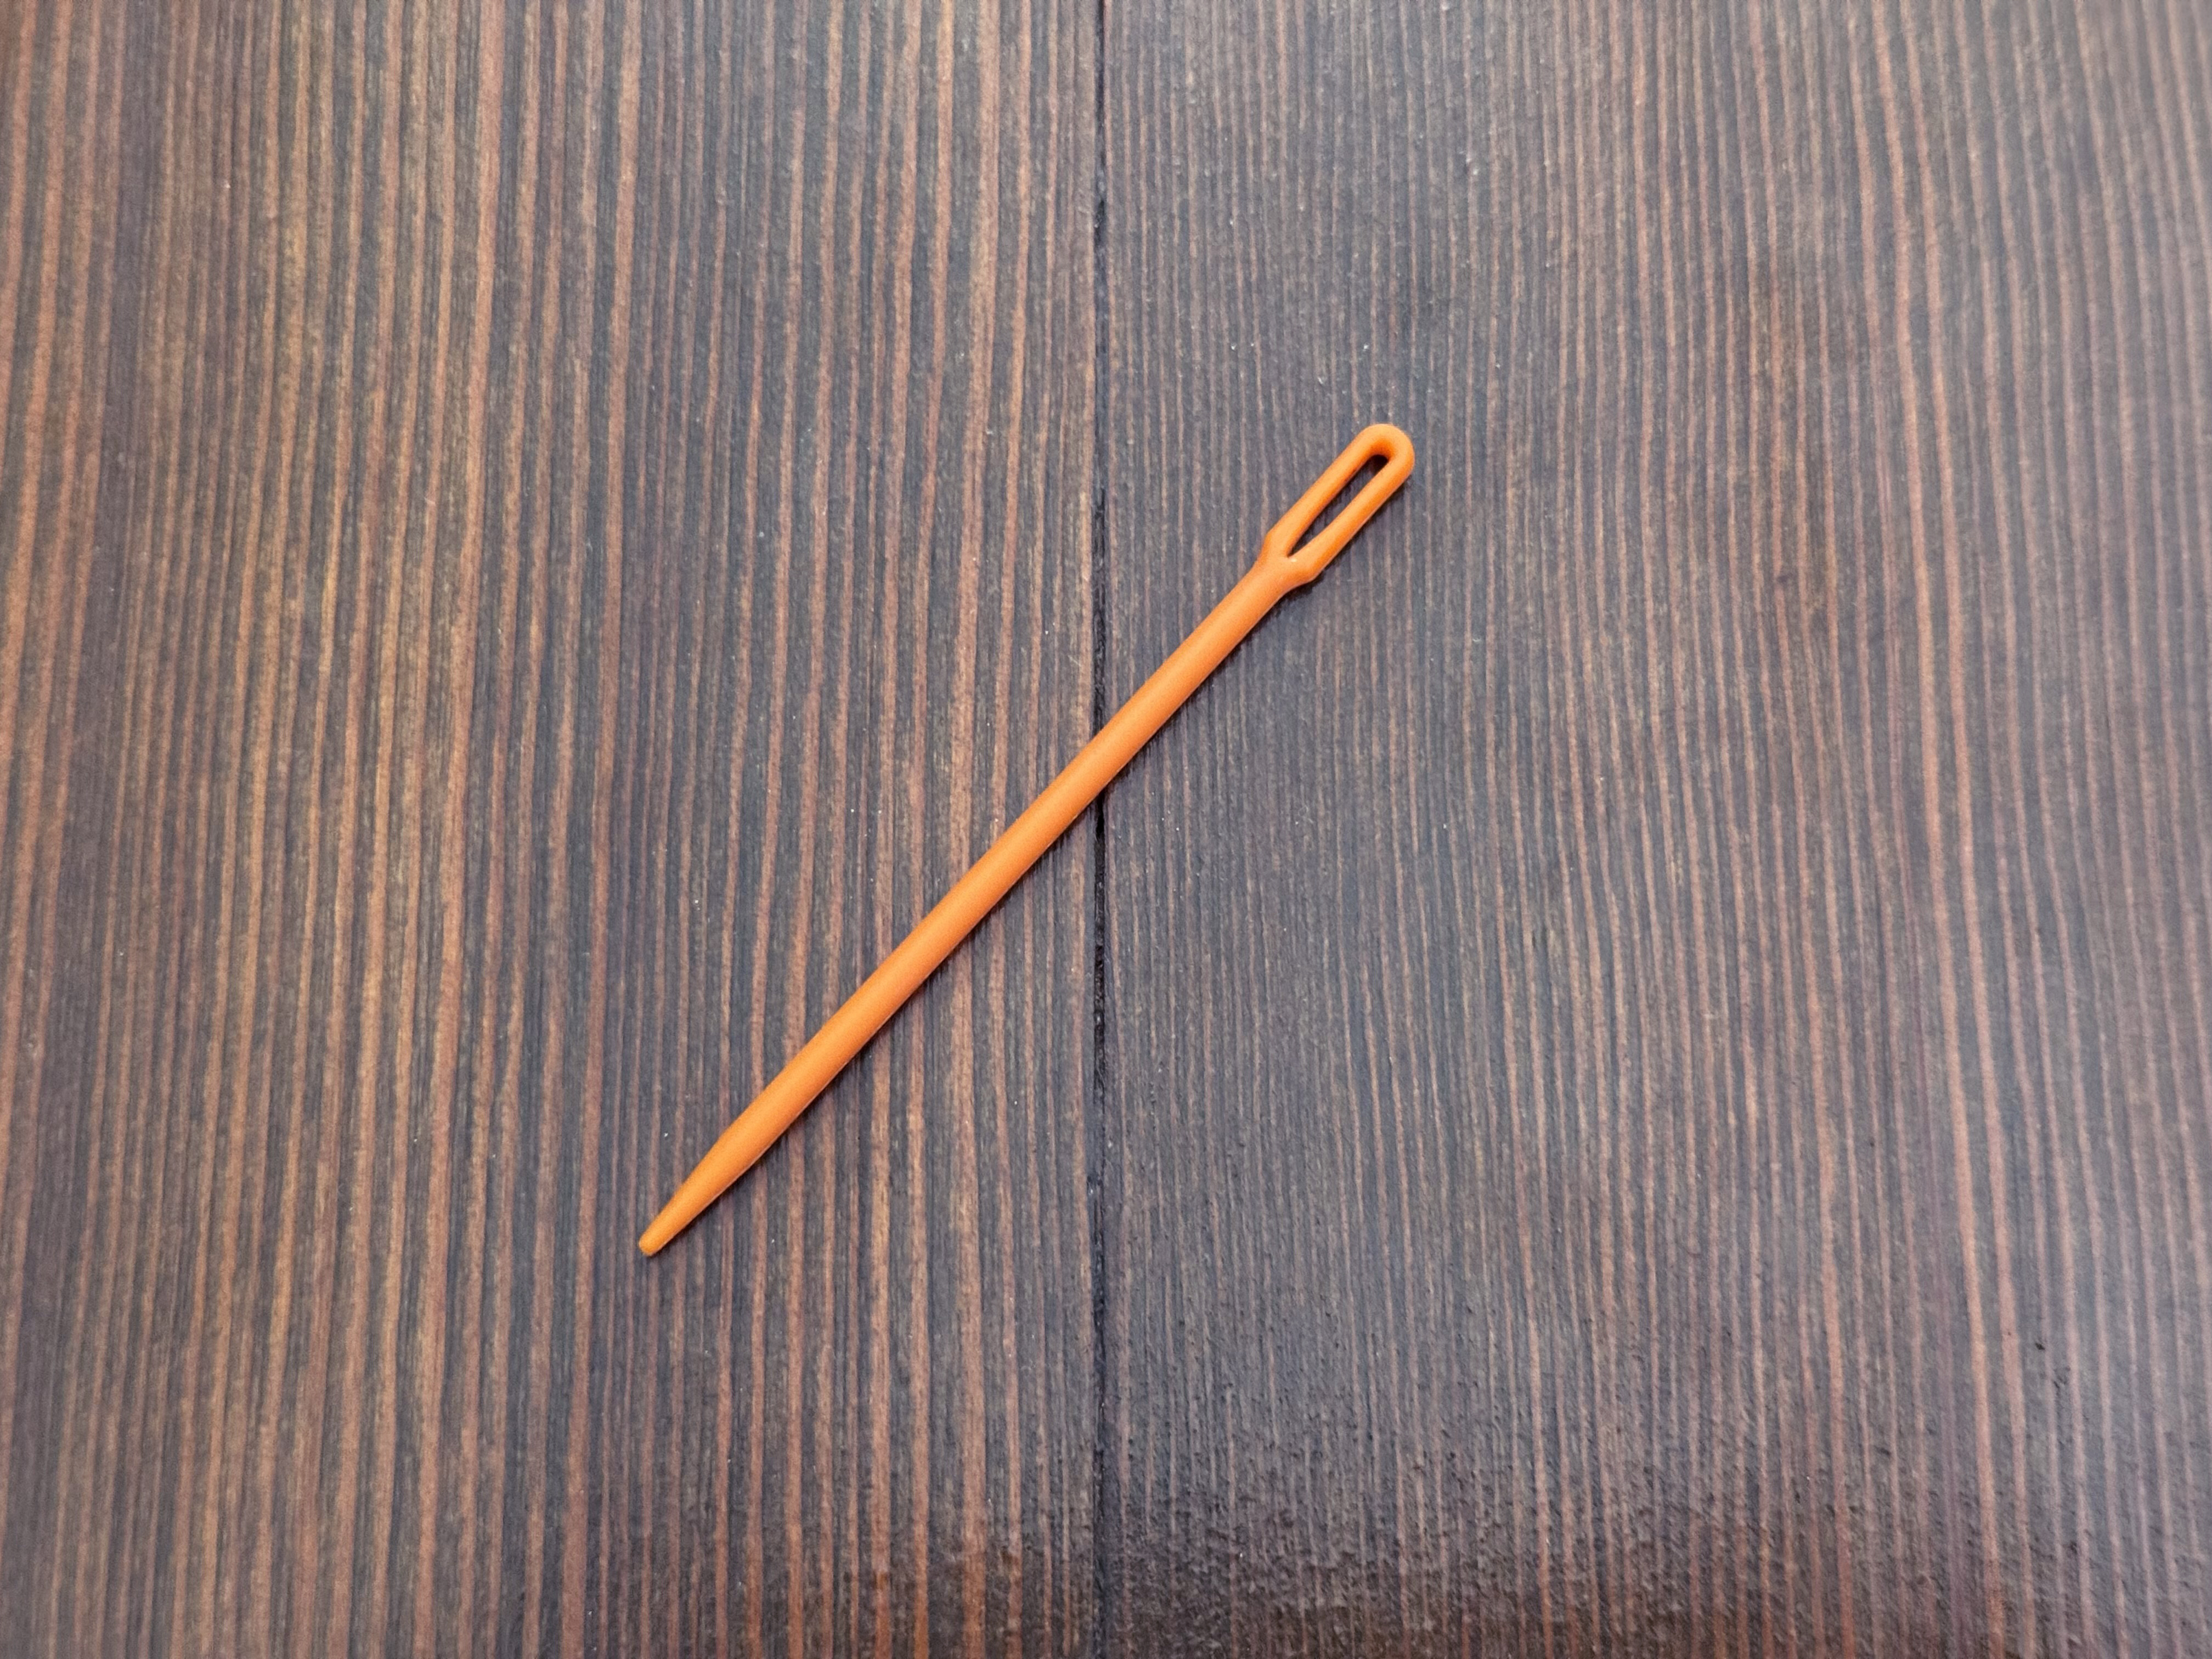
Plastic
Plastic yarn needles are widely available at most craft stores, and are an excellent choice for getting started. You can also make your own plastic needles from old credit cards or toothbrush handles.
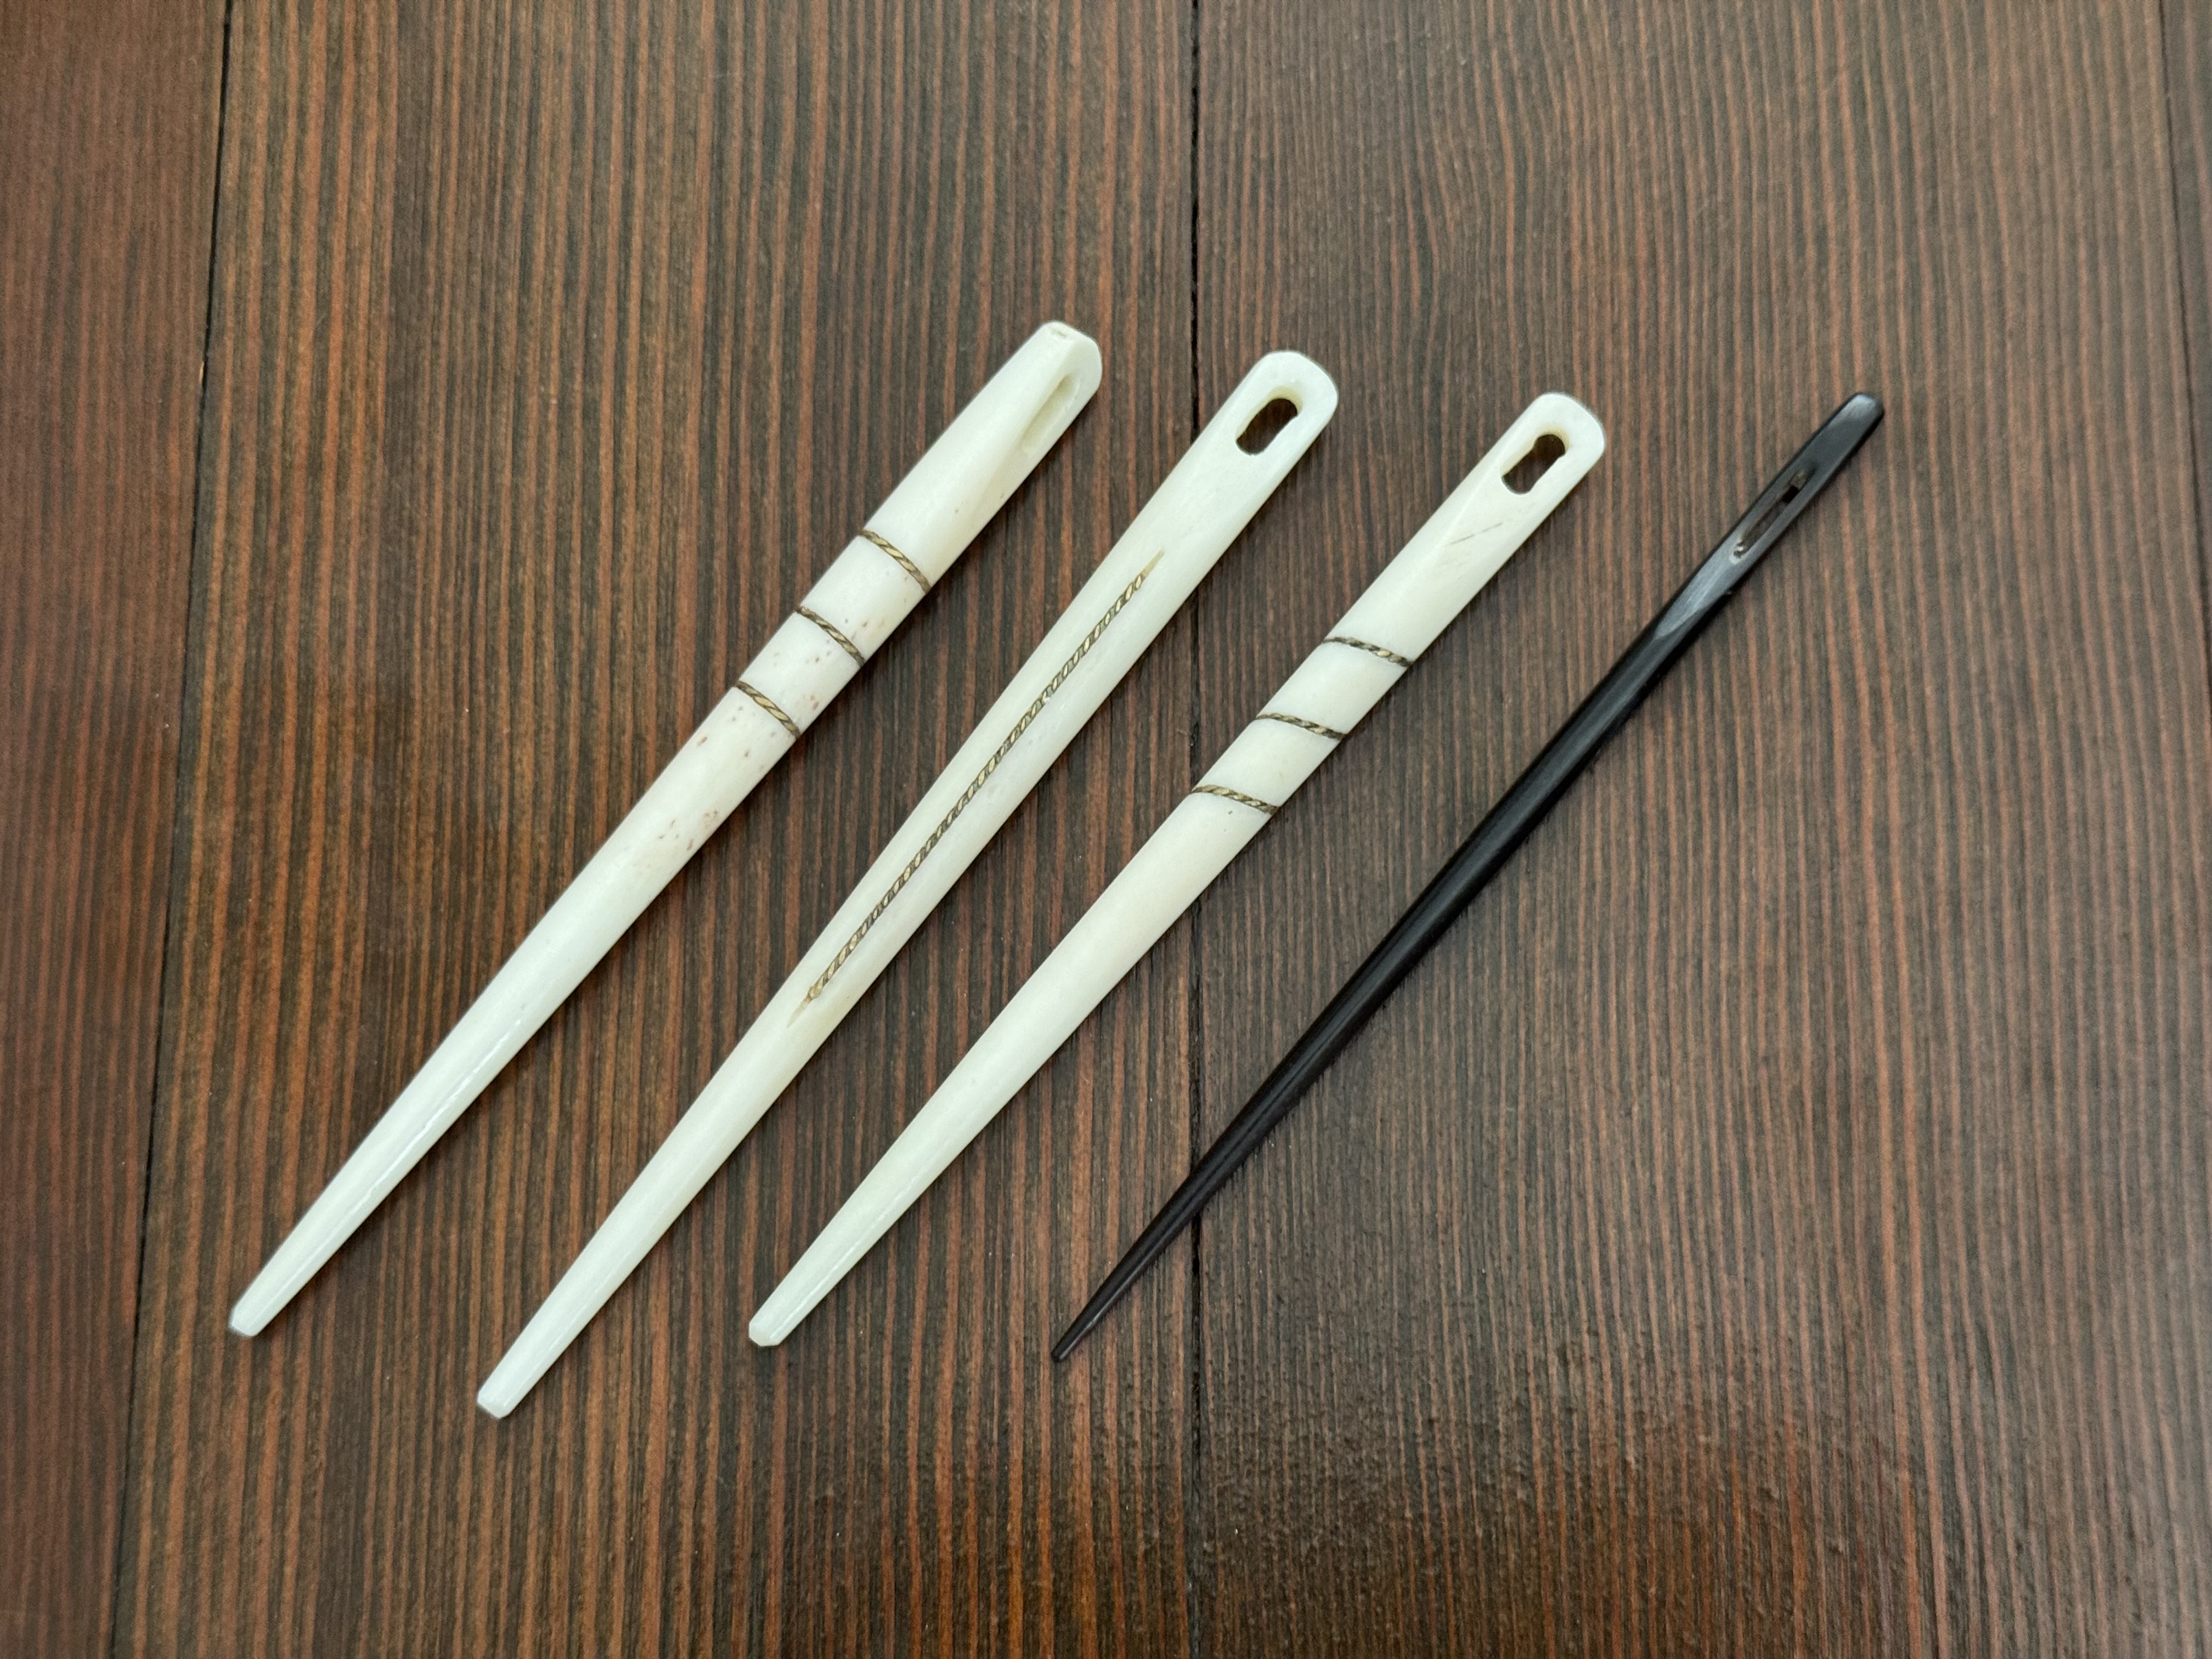
One eye, or two?


Most nalbinding needles have only one eye to pass the yarn through. Some have two, and in rare instances you may find a needle with three eyes. If you’re working with multiple strands of yarn at the same time, having multiple eyes can help.
A two-eye needle can also make it easier to loop the yarn back through the needle again. This allows you to use much longer lengths of yarn at a time, reducing how many joins you need to do.
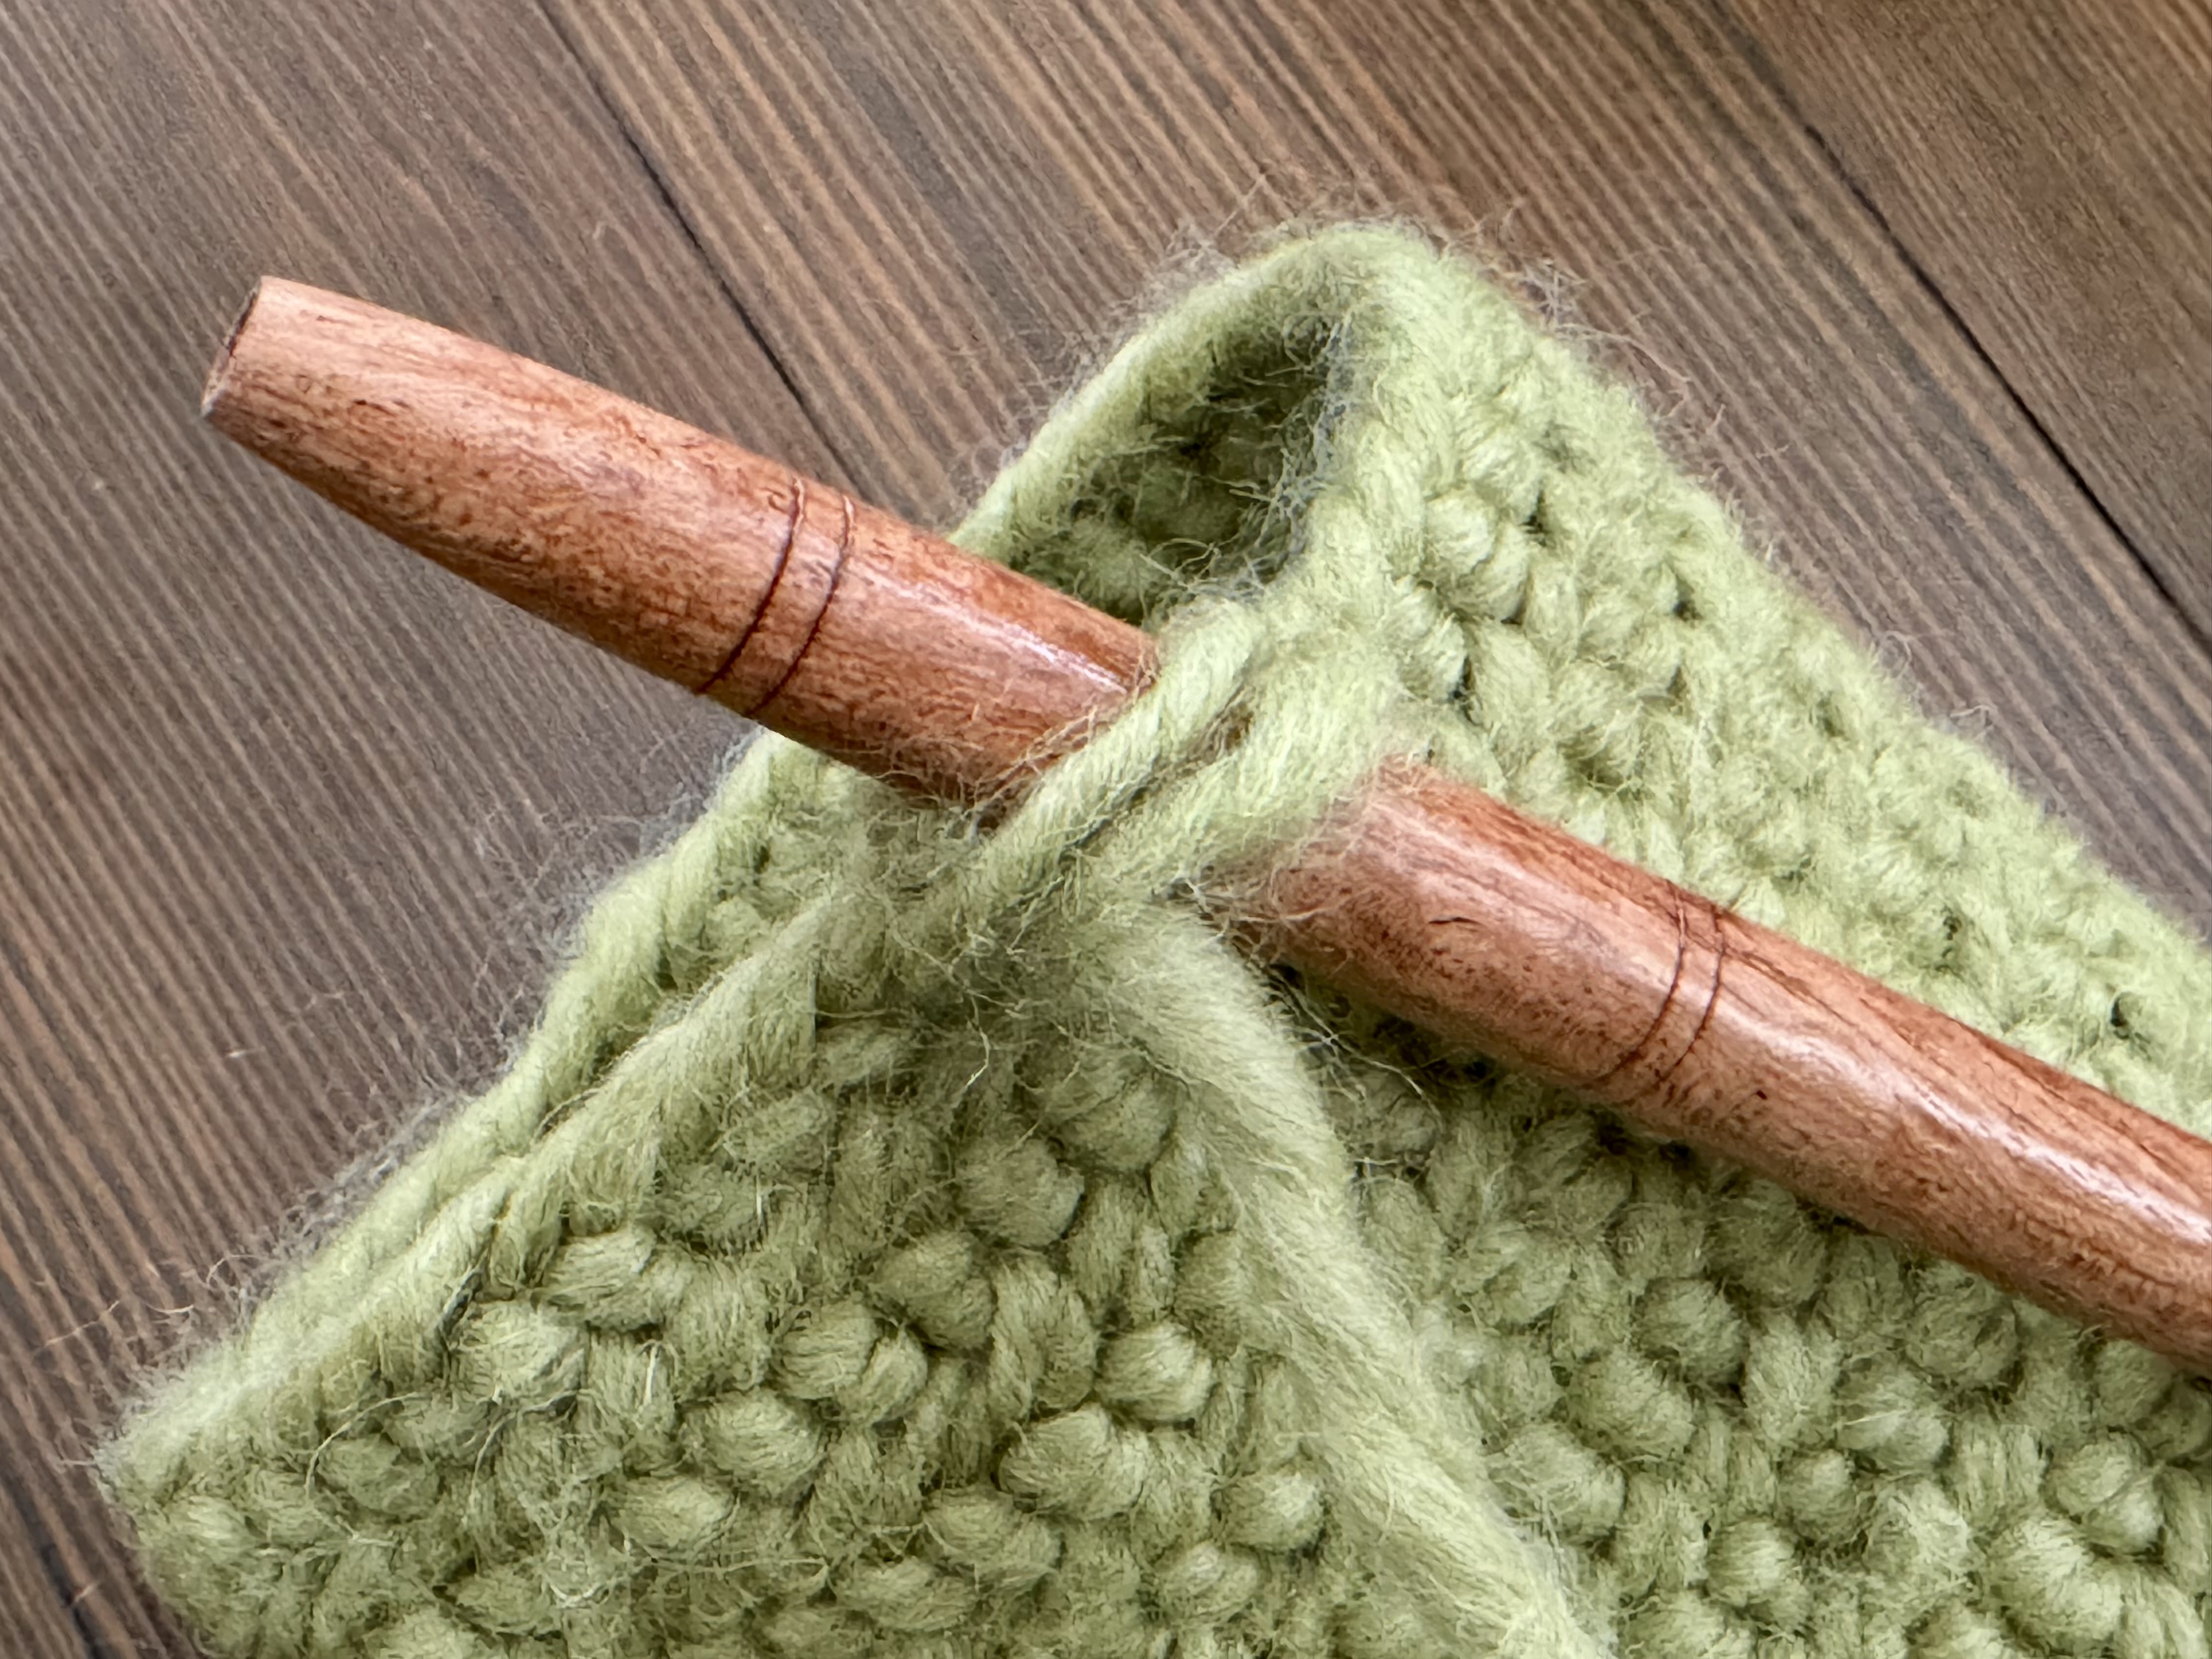
What shape?
Just like us, nalbinding needles come in a very wide variety of shapes and sizes. There is no one “right” or “ideal” shape; it all comes down to preference, and what works best for the stitch and yarn you’re using.
Straight
Straight needles can be easier to pass through stitches, especially with smaller or tighter stitches. It helps to still have a small taper at the tip to create a point.
Tapered
This is the most common style of needle. The bigger the needle at the widest part, the bigger your stitches will need to be for the needle to comfortably pass through them.
Curved
Some nalbinders prefer the ergonomics of curved or crescent needles, since it’s easier to do twisting movements. Crescent needles with the eye in the center can be used in both directions for specialized techniques.
Round
Round needles have a circular cross-section rather than rectangular or oval. They tend to be less prone to flexing, and work best with small or tight stitches.
Flat
Flat needles glide easily through loops, and are stronger than round needles of the same thickness.
Sharp
Smaller stitches will need needles with slimmer tips, though if they’re too sharp they risk splitting the yarn instead of sliding through the loops.
Blunt
Blunt needles have far less risk of splitting the yarn or catching stray fibers, though they may be harder to use for smaller stitches.
Short
Short needles are more portable and work well for simpler stitches like Oslo stitch. They also tend to be more comfortable for people with smaller hands.
Long
If you have a lot of loops to pick up or have to turn the needle a lot, a longer needle may be easier to work with. They’re also well-suited to a more relaxed tension and thicker yarns.
Thin
Thin or narrow needles are best for small stitches with thin yarn, or other precision work. Tapestry needles can be used in a pinch.
Wide
Wide needles are often easiest to start with, but if they’re too wide they can be hard to pass through the loops.
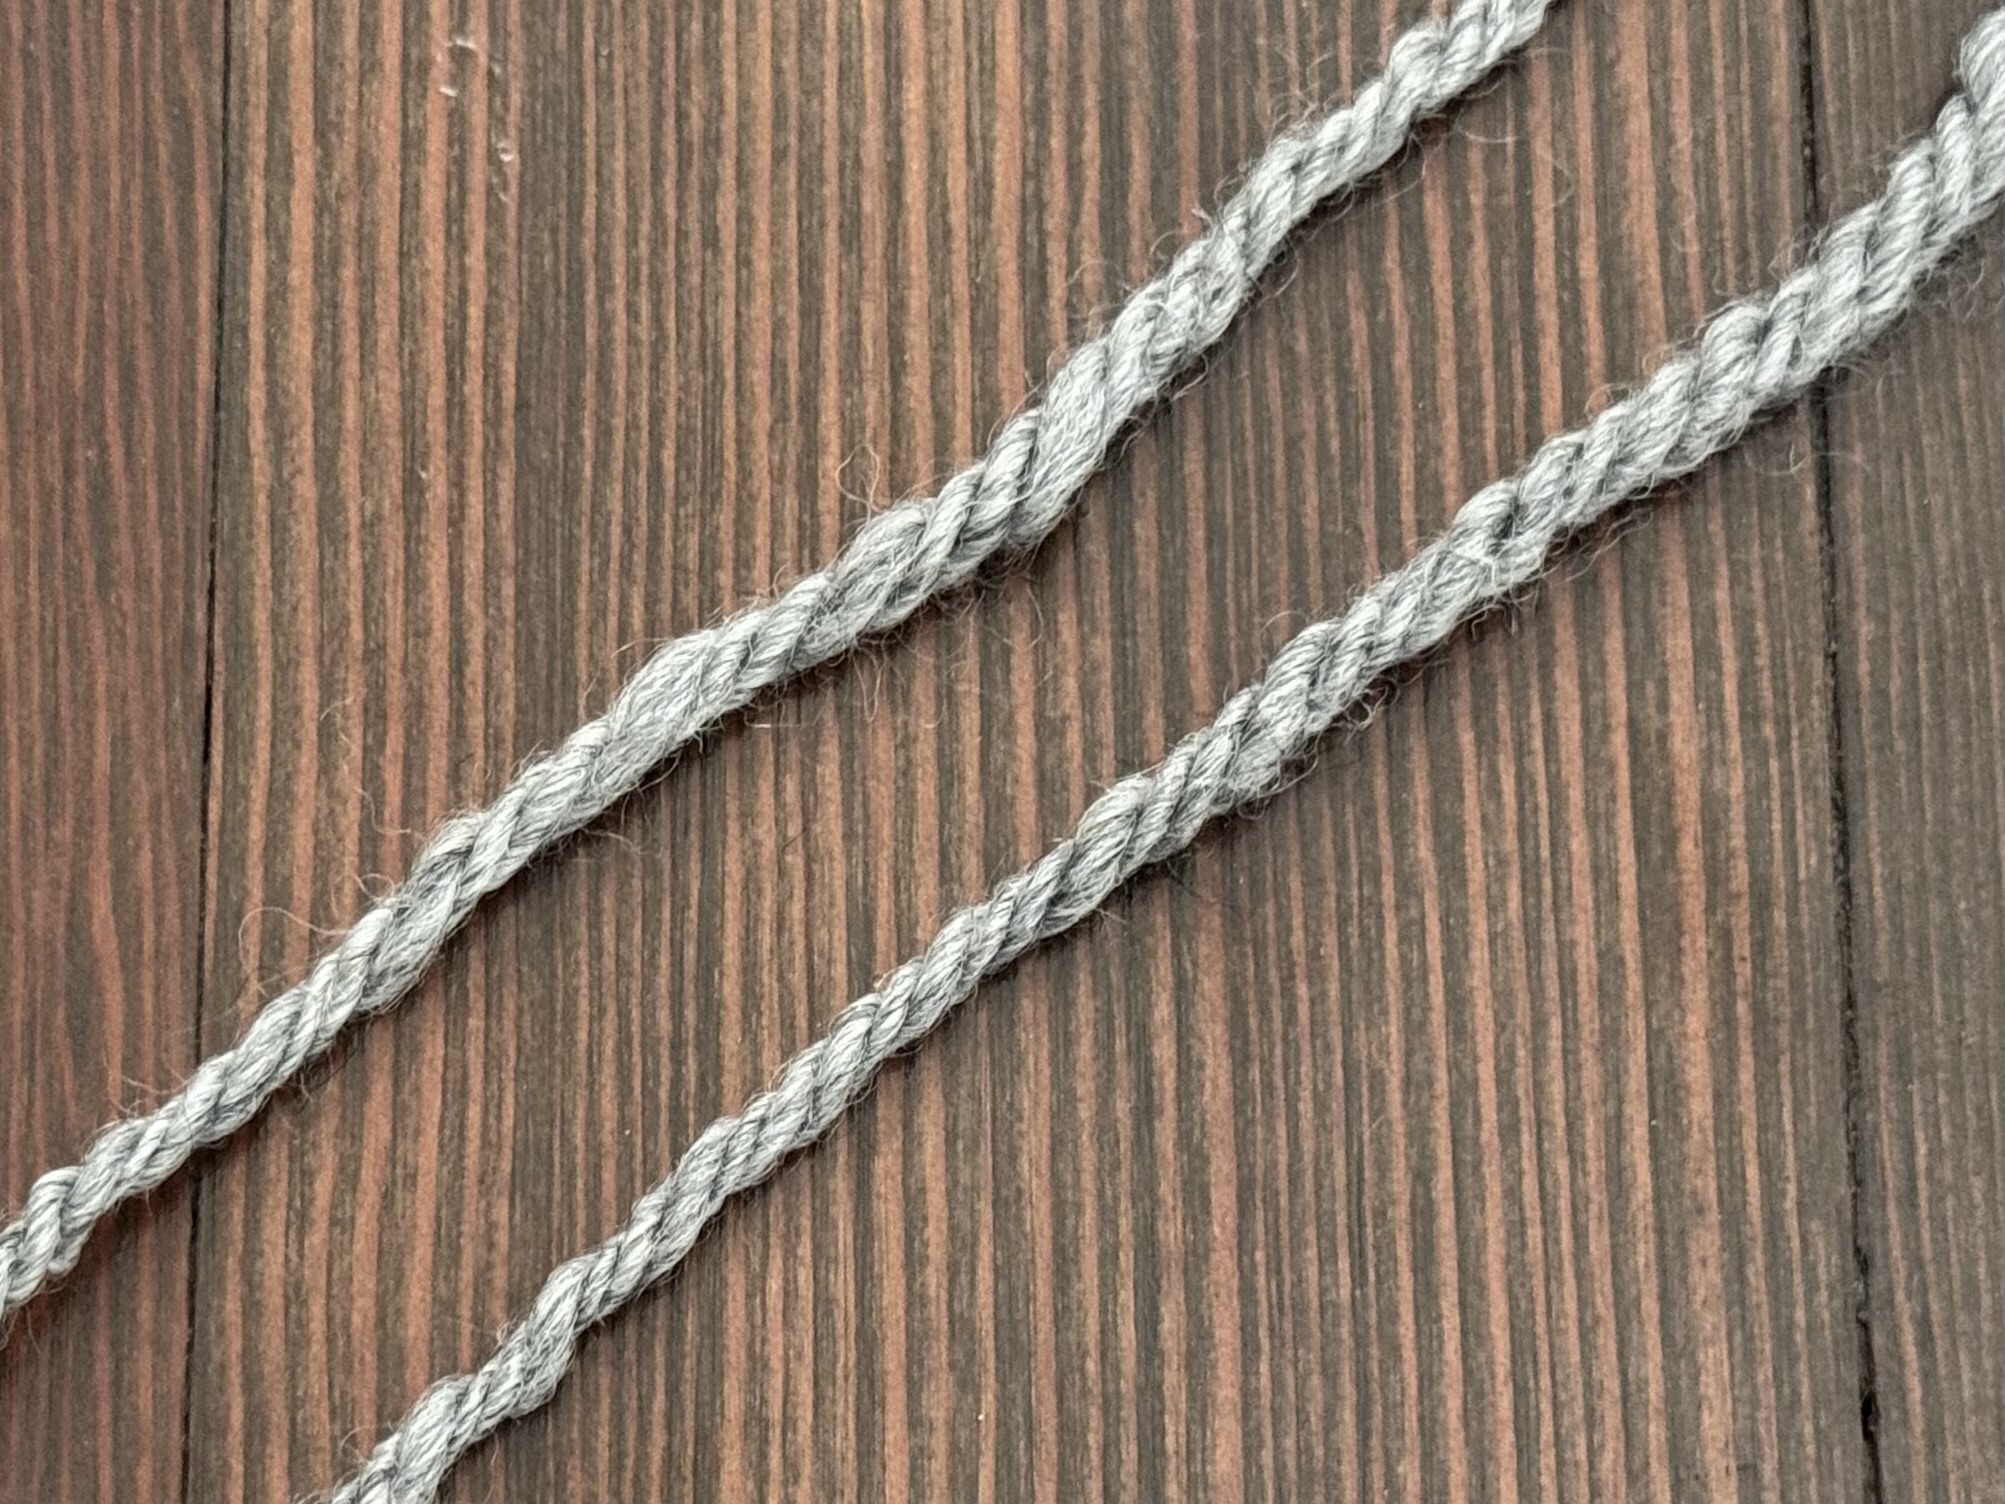
Yarn
Wool
The most common type of yarn used for nalbinding is bulky-weight single-ply 100% wool. Lighter colors make it easier to see your stitches, when you’re first getting started.
Since the traditional way of joining yarn lengths together is felting, you’ll need a wool yarn that isn’t labeled as superwash. Superwash treatment prevents wool from felting since the fibers can’t “grab” each other anymore.
Plied wool yarn can also be used, though the finished fabric will have a different texture than single-ply.

Single-ply
Multi-ply
Wool blends
Blended wool yarns should be at least 50% wool if you want to be able to felt the ends together when joining yarn lengths.
Other fibers
You can also use other fibers such as cotton, acrylic, or even raffia.
These fibers need new lengths to be tied or otherwise joined together, since they won’t felt. Since knots may change the texture or look of your finished nalbinding, plan carefully where to place them so they’re as hidden as possible.
What weight (thickness)?
This mostly depends on what you want to make. Beginners usually start with bulky yarn since it’s easy to work with, easy to see your stitches, and projects are finished fairly quickly. Most historical samples are made from thinner yarns and threads, though.
| Thin yarn | Thick yarn | |
|---|---|---|
| Flexibility | More | Less |
| Durability | Less | More |
| Warmth | Less | More |
| Texture | Smoother; lace-like with looser stitches or gauges | Bumpier |
Loop holder
It’s a good idea to have something to hold on to your working loops whenever they’re not on your thumb. Otherwise, it may be hard to tell which loop is which, or the loops may tighten and become hard to find.
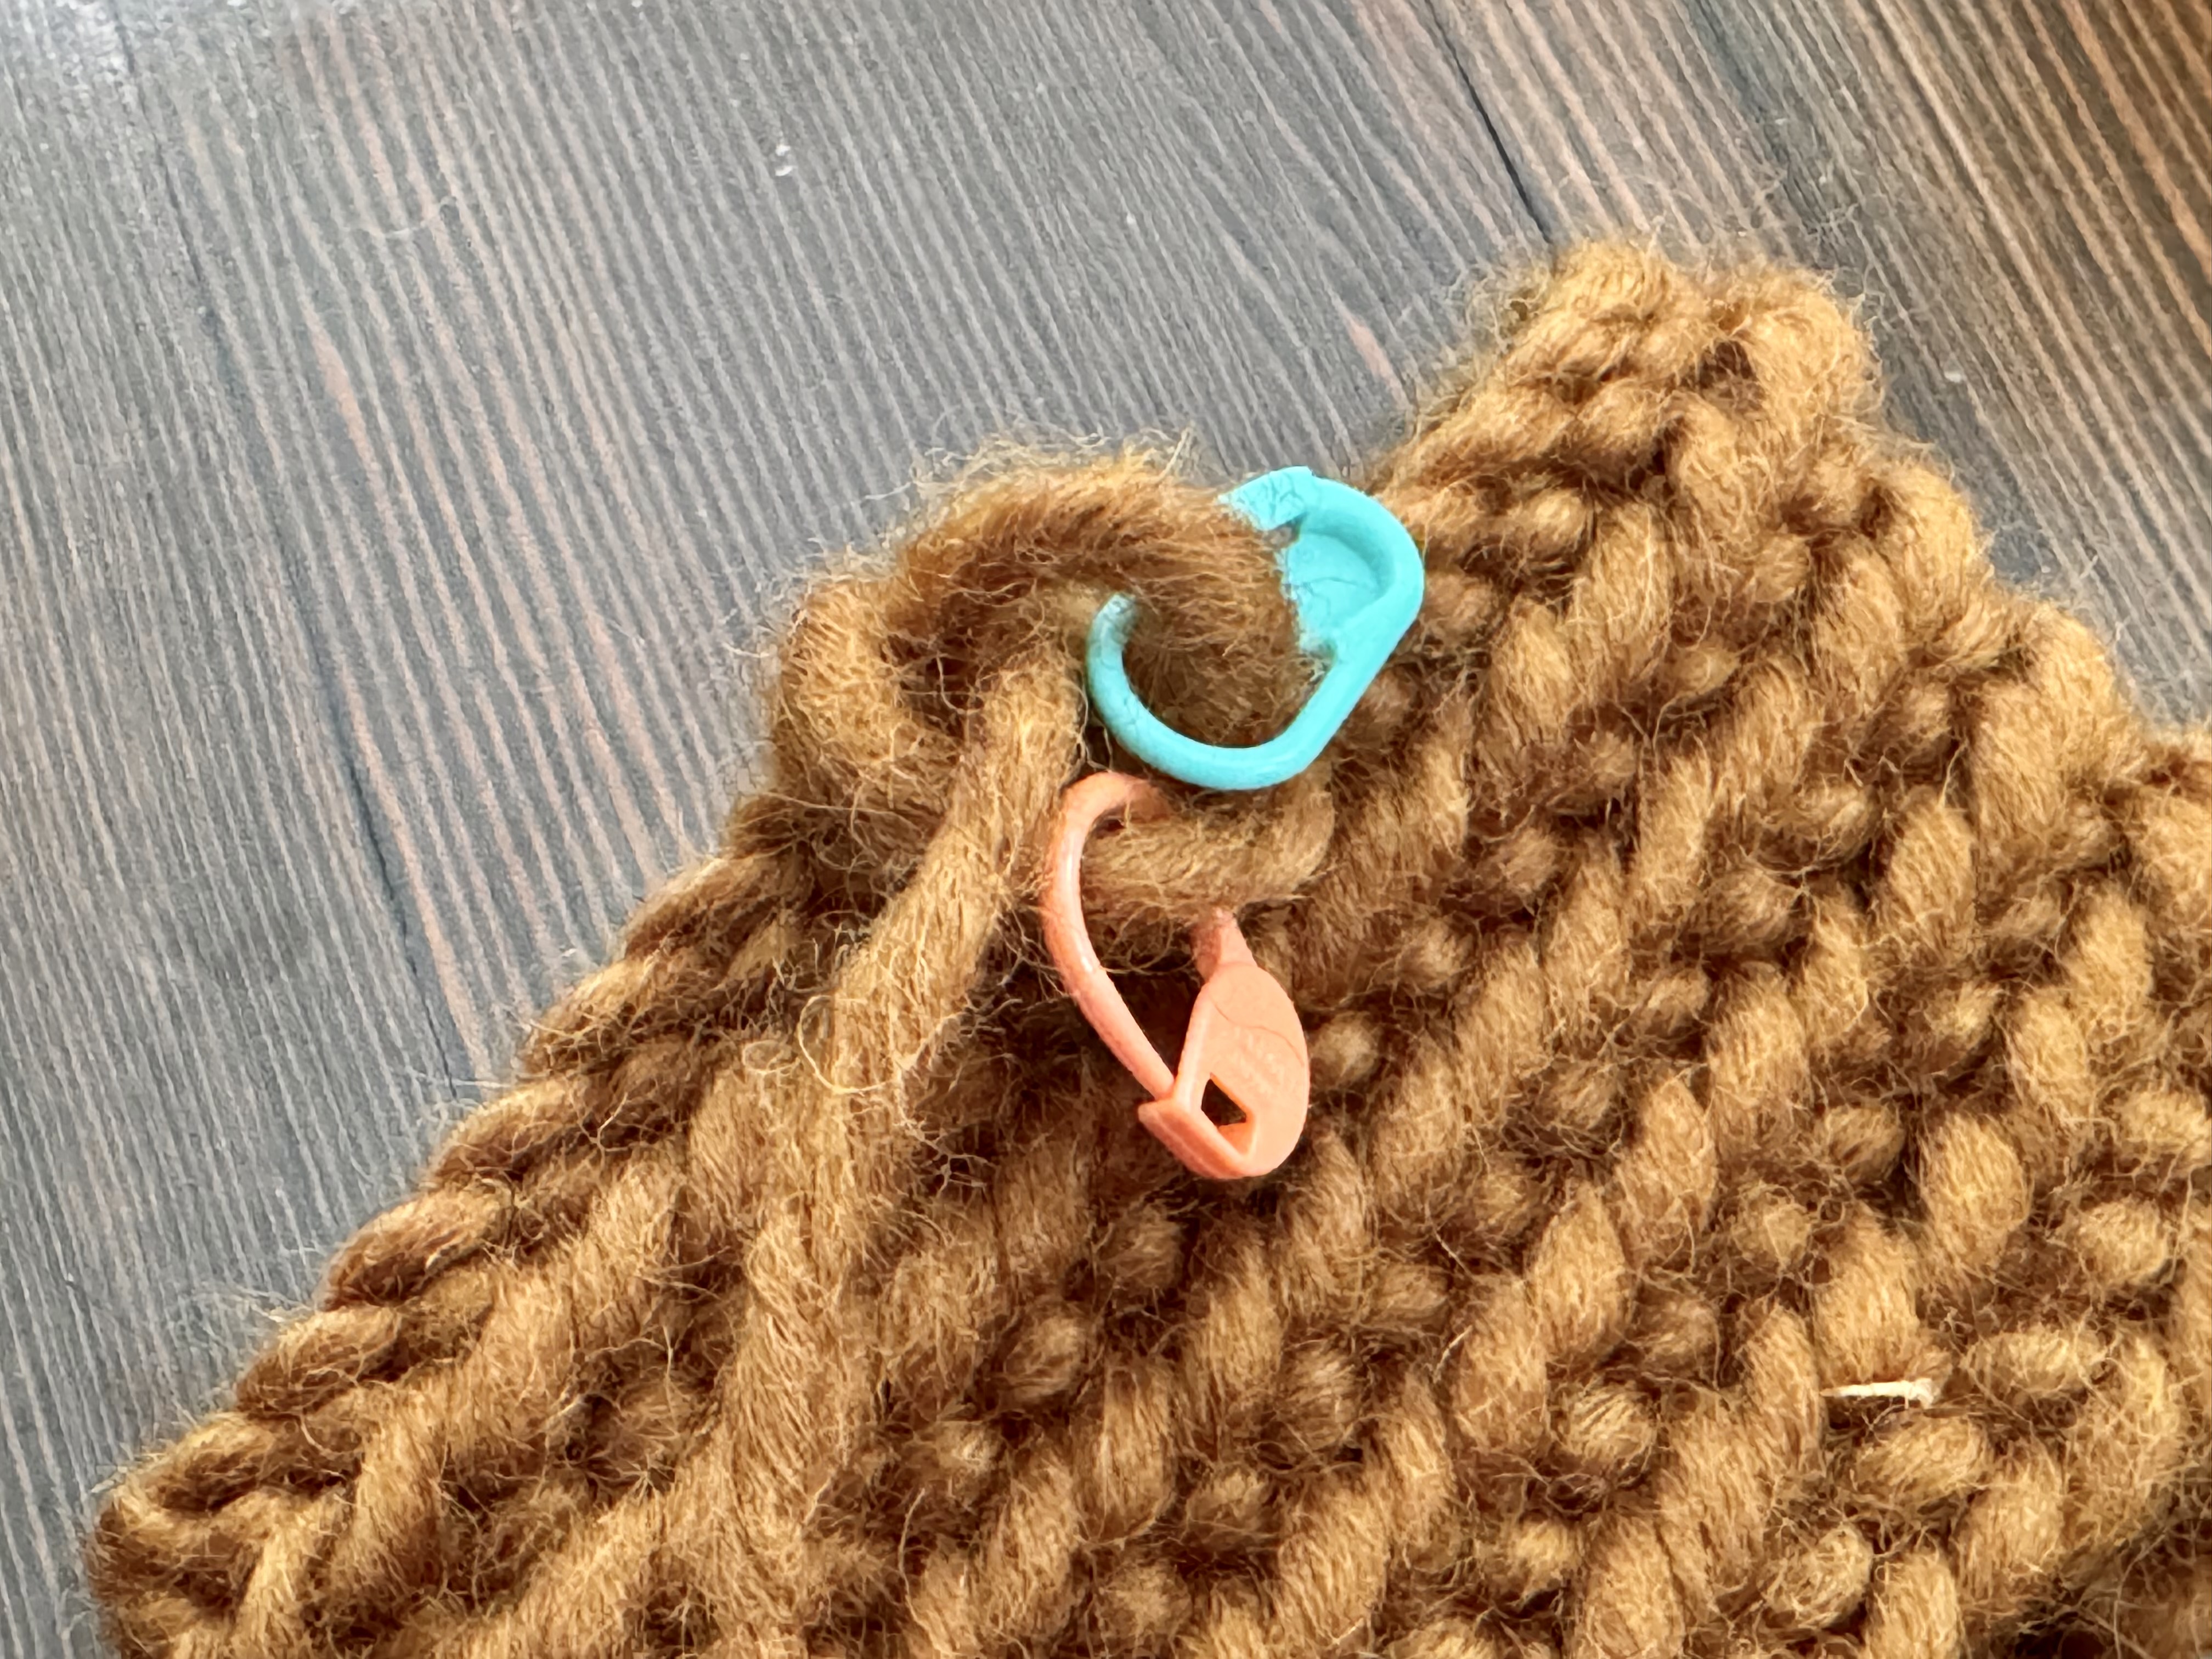
Stitch marker
Removable knitting or crochet stitch markers can work well. Be careful not to snag or pierce your yarn.
Stick
This is most likely what people used historically. You can carve and shape the stick however you wish.

Custom device
A custom-designed tool like the Loopship provides a secure hold on both loops as well as marking the direction of work.